This post may contain affiliate links. Read the full disclosure here.
There’s something absolutely magical about combining two of my favorite things: vintage treasures and Christmas decorating! As a mom of three energetic boys, I’m always looking for decorating ideas that are both beautiful and conversation-starting, and a vintage jewelry Christmas tree checks all those boxes.
A sparkling jewelry tree fits beautifully into old-fashioned Christmas decor filled with sentimental details and treasured vintage finds!
These stunning creations transform old brooches, earrings, necklaces, and sparkly baubles into breathtaking holiday displays that catch the light and everyone’s attention!
Whether you’ve inherited boxes of costume jewelry from grandma, love hunting through thrift stores, or have your own collection gathering dust, creating a vintage jewelry Christmas tree is the perfect way to give those pieces new life. The best part is that each tree becomes a completely unique work of art, filled with memories and stories that make the holidays even more special. Let me share some amazing ideas to help you create your own dazzling retro masterpiece!
Choosing the Perfect Tree Base for Your Vintage Jewelry Display
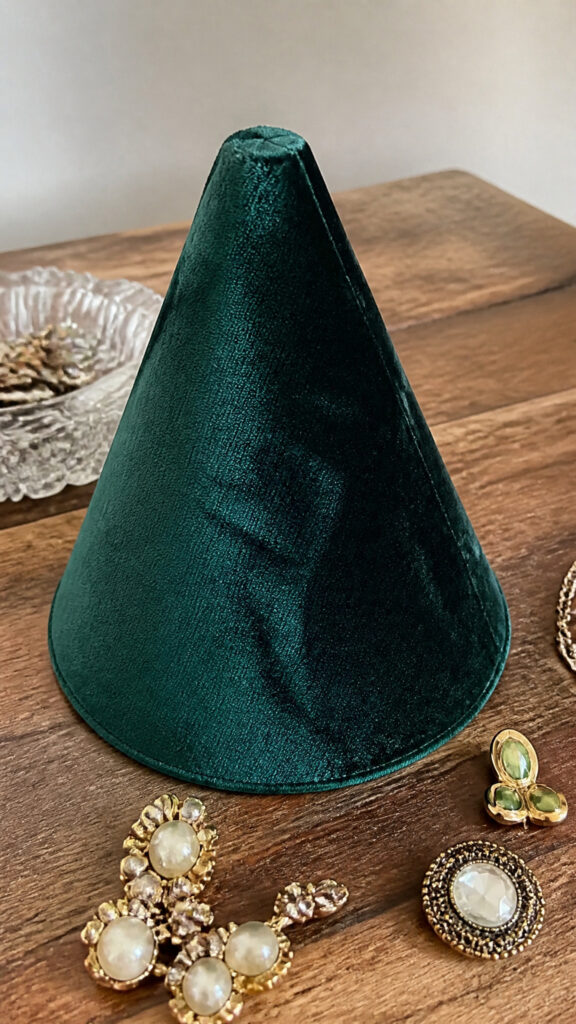

The foundation of your vintage jewelry Christmas tree is super important, and I’ve learned this through trial and error! You’ll want to select a base that can support the weight of all those gorgeous pieces while also showcasing them beautifully. Styrofoam cones are my absolute favorite because they’re lightweight, easy to pin into, and come in various sizes to fit any space in your home!
You can find these foam cones at any craft store, and they range from tabletop sizes (perfect for a mantel or side table) to larger statement pieces. I typically wrap mine in green or white fabric first, or even spray paint them to match my decor scheme. This creates a nice backdrop that makes the jewelry really pop! Some crafters prefer using wire tomato cages shaped into cone forms, which works wonderfully if you want a more open, airy look.
Another option that’s gained popularity is using actual small Christmas trees as your base. You can purchase inexpensive artificial trees and simply decorate them entirely with vintage jewelry instead of traditional ornaments. This approach gives you the benefit of built-in branches to hang pieces from, making the process even easier. Whatever base you choose, make sure it’s sturdy enough to hold your treasures securely!
Sourcing Vintage Jewelry for Your Christmas Tree Project
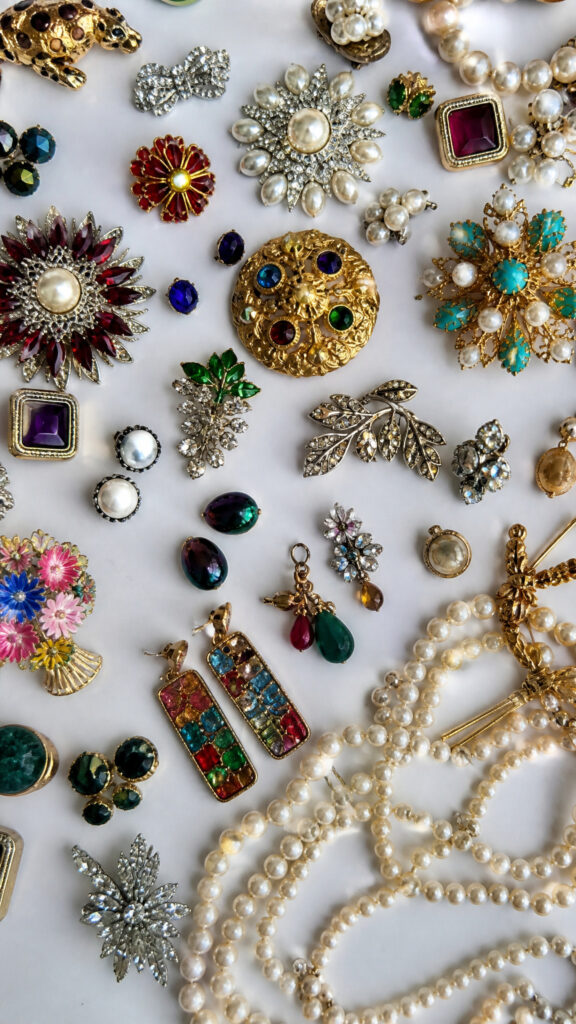
The treasure hunt for vintage jewelry is honestly half the fun of this entire project! I love spending Saturday mornings hitting up estate sales, thrift stores, and antique shops while the boys are at soccer practice. You’d be amazed at what you can find for just a few dollars! Look for pieces with interesting shapes, colors that complement your holiday palette, and lots of sparkle – rhinestones, crystals, and glass gems are absolute gold for this project!
Don’t overlook broken jewelry either! That single earring without its mate? Perfect for your tree! Necklaces with broken clasps, brooches missing a pin back, or tangled chains all work beautifully because you’re not wearing them – you’re creating art with them. I’ve found some of my favorite pieces in the “junk jewelry” bins at flea markets where everything is super affordable.
Family heirlooms add such a special touch to your vintage jewelry Christmas tree! I reached out to my mom, mother-in-law, and even some aunts asking if they had any costume jewelry they weren’t using anymore. You’d be surprised how many people have boxes of old jewelry just sitting in drawers. Plus, incorporating family pieces means your tree tells a story and becomes a meaningful conversation piece when guests visit during the holidays!
Online marketplaces like eBay, Etsy, and Facebook Marketplace are treasure troves too! Search for terms like “vintage costume jewelry lot” or “broken vintage jewelry” to find affordable bundles. Just make sure to check the dimensions and conditions in the listings so you know what you’re getting!
Creating a Color Scheme That Sparkles
One of the decisions that really makes or breaks your vintage jewelry Christmas tree is the color palette! I’ve made trees in different color schemes over the years, and each one has its own personality. A monochromatic approach using all silver or all gold jewelry creates an incredibly elegant and sophisticated look that works beautifully in formal spaces. The way light reflects off similar metallic tones is absolutely stunning!
For a more traditional Christmas feel, combine red and green vintage pieces with gold accents. Think ruby-colored rhinestone brooches, emerald glass earrings, and gold chains woven throughout. This classic combination never goes out of style and feels so festive! I created one like this for our family room and my boys actually said it looked “fancy” – which is high praise from that crew!
If you love the retro vibe, consider a pastel palette with pieces in mint green, baby pink, powder blue, and pearl white. This color scheme screams vintage glamour and works especially well if you’re going for a 1950s aesthetic. Add some aurora borealis rhinestones (those rainbow-effect crystals) for extra magic!
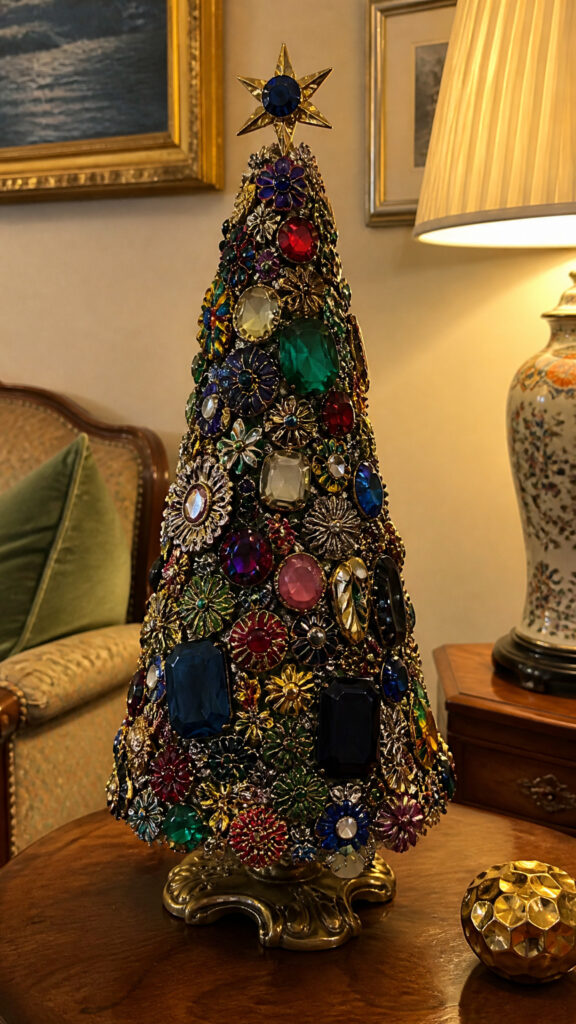
Don’t be afraid to go bold with jewel tones either! Deep purples, sapphire blues, emerald greens, and ruby reds all mixed together create a rich, opulent look. The key is to distribute colors evenly around your tree so it looks balanced from every angle. I like to step back frequently while decorating to make sure no single color is clumping in one area!
Techniques for Attaching Jewelry to Your Tree
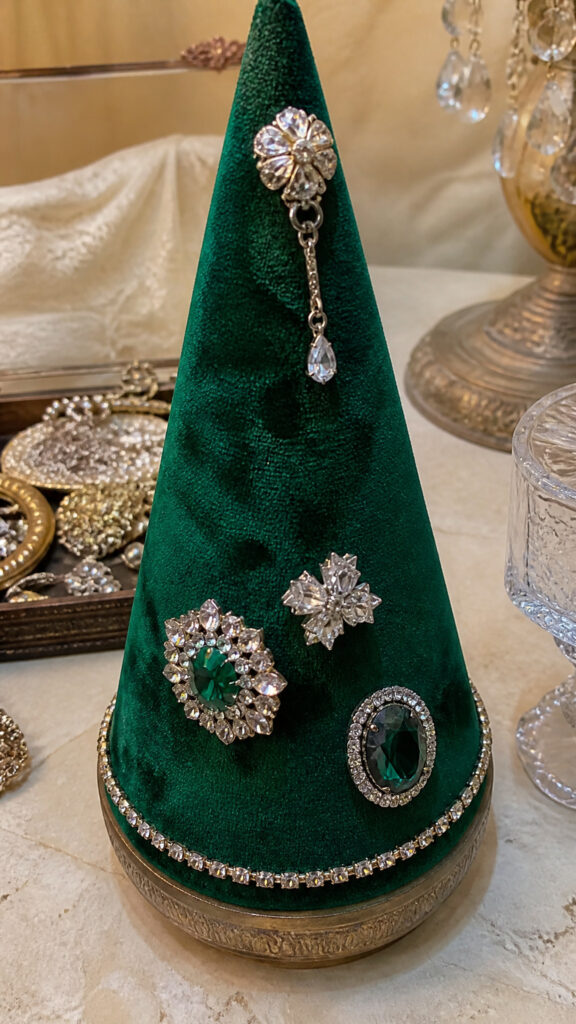
Now for the fun part – actually putting your vintage jewelry Christmas tree together! The attachment method you use depends on your base material and the type of jewelry you’re working with. For styrofoam cones, corsage pins or quilting pins with pearl heads are absolutely perfect! Simply pin brooches directly through their existing pin backs, and use the corsage pins to secure earrings, pendants, and other pieces. The pearl-headed pins even add to the vintage aesthetic!
Start at the bottom of your tree and work your way up in rows, slightly overlapping each layer. This creates that full, lush look where you can barely see the base underneath. I like to place my largest, most statement pieces first to establish anchor points, then fill in around them with smaller items. It’s kind of like putting together a sparkly puzzle!
Hot glue is your best friend for pieces that don’t have easy attachment points! I keep my glue gun handy and use it to secure flat-backed earrings, pendant pieces, or to add extra stability to heavier brooches. Just be careful with the temperature if you’re working with plastic pieces – you don’t want anything melting! A low-temperature glue gun works great for this project.
For wire-based trees or if you’re decorating an actual small Christmas tree, you can use thin floral wire or jewelry wire to attach pieces. This works especially well for necklaces and chains that you want to drape and swag around the tree. Twist the wire around branches or the wire form, and it holds everything securely while remaining invisible!
Adding Vintage Necklaces and Chains for Extra Glamour
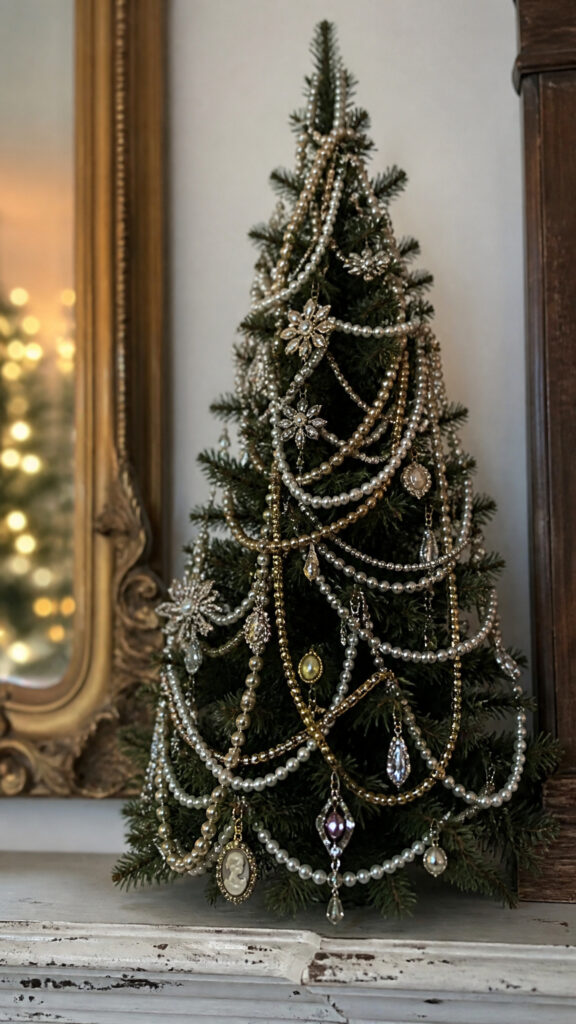
Vintage necklaces and chains are the secret ingredient that takes your vintage jewelry Christmas tree from pretty to absolutely spectacular! I love using pearl strands to create garland-like swags that wrap around the tree in spirals. The way pearls catch the light is so elegant and adds movement to the overall design. You can use single strands or layer multiple strands together for more drama!
Rhinestone necklaces work beautifully as tree toppers or can be arranged in cascading patterns down the front of your tree. I once found this amazing 1960s rhinestone choker at a thrift store for three dollars, and it became the crown jewel (literally!) of my tree that year. Don’t be afraid to take necklaces apart if needed – sometimes individual sections work better than the whole piece.
Chain necklaces in gold, silver, or even colored metals add wonderful texture and fill in gaps between larger jewelry pieces. I like to drape them loosely so they create organic, flowing lines. Chunky vintage chains from the 1970s and 80s are especially fun because they make such a bold statement! Mix different chain styles and lengths for visual interest.
If you have broken necklaces with beautiful clasps or pendant sections, use those as focal points! The clasp end of a fancy vintage necklace can become a decorative element all on its own. I’ve even used watch bands and bracelet pieces in similar ways – anything that sparkles and has that vintage charm works perfectly on your tree!
Incorporating Brooches and Pins as Statement Pieces
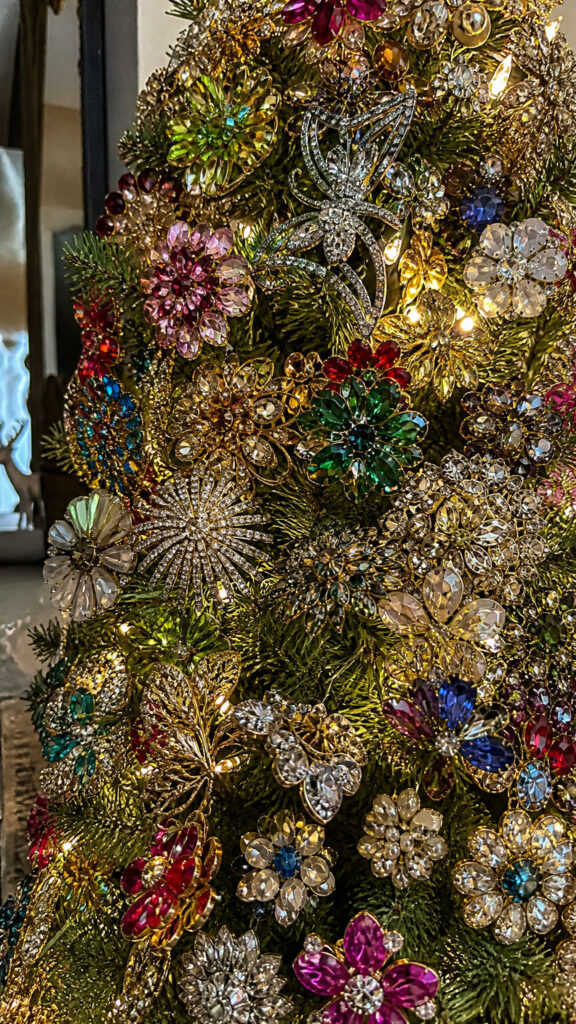
Brooches are truly the stars of any vintage jewelry Christmas tree! These pieces were made to be noticed, with their intricate designs and eye-catching sparkle. I arrange my largest and most beautiful brooches at eye level where they’ll get the most attention. Vintage Christmas-themed brooches like wreaths, bells, or Santa figures are obviously perfect, but don’t limit yourself to holiday motifs!
Floral brooches are absolutely gorgeous on these trees and come in every color imaginable. I have a particular weakness for those big, sparkly flower brooches from the 1950s and 60s – they add such glamorous retro flair! Butterfly brooches, starburst designs, and geometric Art Deco pieces all work wonderfully too. The variety in shapes helps create visual interest across your entire tree.
Layer brooches of different sizes to create depth and dimension! Place larger pieces first, then tuck smaller brooches and pins around them to fill spaces. Sometimes I’ll overlap brooches slightly to create a more abundant, luxurious look. The goal is to make your tree look absolutely loaded with treasures, like a jewelry box exploded in the most beautiful way possible!
Don’t forget about those little scatter pins and tiny brooches! While they might seem too small to make an impact, they’re perfect for filling in gaps and adding extra sparkle. I use them almost like glitter – scattered throughout to catch light from every angle. My boys love pointing out all the tiny details when they look at the finished tree up close!
Finishing Touches and Display Ideas
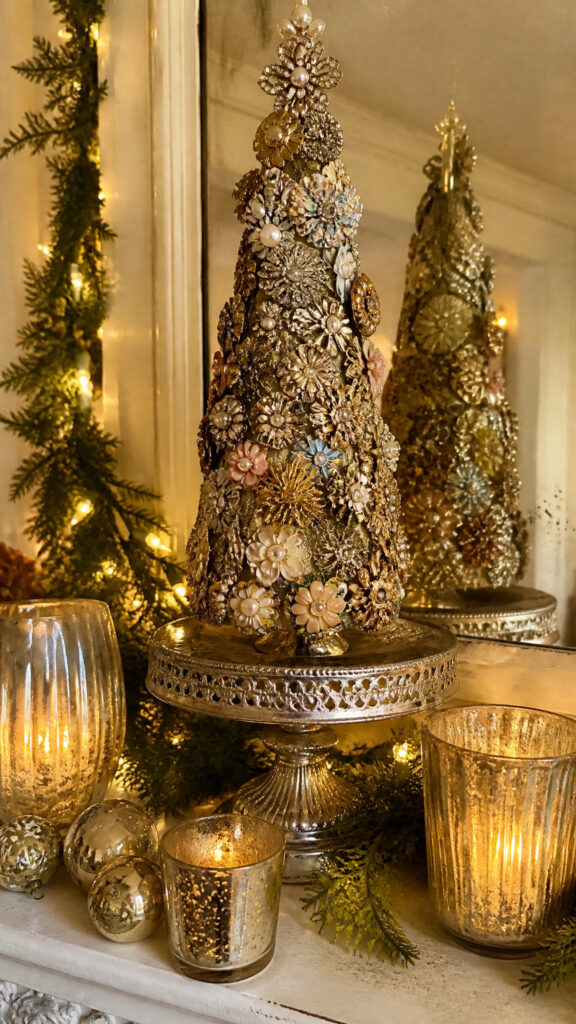
Once your vintage jewelry Christmas tree is fully decorated, it’s time to think about those finishing touches that make it truly special! Lighting is everything when it comes to showcasing all that sparkle. I like to place my trees near windows where natural light can hit them during the day, or position them near lamps in the evening. You can also add a small string of fairy lights behind or around the tree for extra twinkle – just make sure the lights don’t overpower the jewelry itself!
The base or stand for your tree deserves attention too! I’ve used everything from vintage cake stands to decorative boxes covered in velvet fabric. A mirrored surface underneath reflects the jewelry and doubles the sparkle factor, which is always a win in my book! For a more rustic look, try displaying your tree on a wooden slice or in a vintage planter.
Consider creating a vignette around your vintage jewelry Christmas tree to enhance the overall display. I surround mine with other vintage holiday items like old ornaments, mercury glass votives, or vintage Christmas cards propped up nearby. This creates a cohesive retro holiday scene that’s so much more interesting than a tree sitting alone!
If you’re really proud of your creation (and you should be!), don’t hide it away! Display your vintage jewelry Christmas tree in a spot where guests will see it – an entryway table, the center of your dining table, or a prominent mantel location. These trees are true conversation starters, and people love hearing the stories behind the jewelry pieces you’ve used. Plus, it’s a great way to share family history with your kids and keep those memories alive!
Bringing Vintage Sparkle to Your Holiday Season
Creating a vintage jewelry Christmas tree has become one of my absolute favorite holiday traditions! There’s something so satisfying about transforming forgotten treasures into a stunning centerpiece that brings joy throughout the season. Every time I walk past mine, I spot a different piece that catches my eye, and I remember the story behind where I found it or who it belonged to. It’s like having a Christmas tree full of memories and sparkle!
Whether you go all out with a large statement tree or create a sweet little tabletop version, your vintage jewelry Christmas tree will be completely unique to you and your style. Don’t stress about making it perfect – the beauty is in the eclectic mix of pieces and the personal touches you bring to it. So start gathering those vintage treasures, grab your supplies, and get ready to create some serious retro holiday magic! Your home (and your Instagram feed!) will never look more glamorous!