This post may contain affiliate links. Read the full disclosure here.
There’s something absolutely magical about vintage Christmas decorations that takes me right back to my childhood! As a mom of three energetic boys, I’m always looking for ways to slow down during the holidays and create meaningful memories together.
Making DIY vintage christmas ornaments has become our favorite tradition – it gets the kids away from screens, keeps little hands busy, and fills our home with that cozy, nostalgic feeling I remember from my own childhood!
Once your handmade ornaments are finished, use these nostalgic Christmas decorating ideas to carry that charming retro feel throughout the rest of your home!
The best part about these projects is that they don’t require fancy supplies or artistic skills! Most of these DIY vintage christmas ornaments use materials you probably already have at home, and they’re forgiving enough that even my youngest can participate without me stressing about perfection. Plus, there’s something so special about pulling out ornaments year after year that your kids made with their own hands – trust me, these will become the treasures you reach for first when decorating your tree!
Vintage Bottle Brush Trees
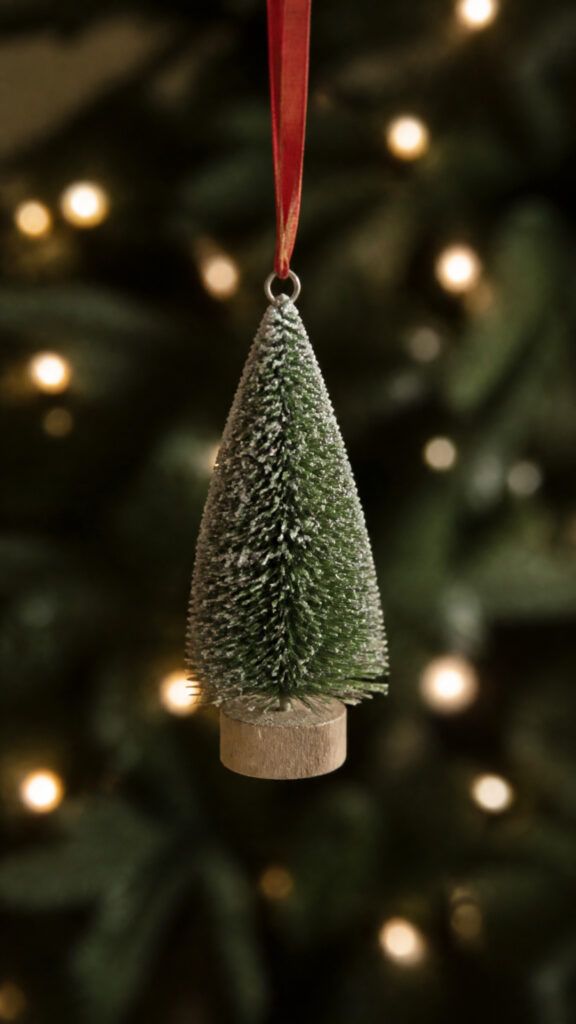

Bottle brush trees are THE quintessential vintage Christmas decoration, and making your own is surprisingly easy! I discovered this project last year when my middle son became obsessed with those little sisal trees at craft stores. Instead of buying a bunch, we made our own and honestly, they turned out even more charming than the store-bought versions!
To create these adorable DIY vintage christmas ornaments, you’ll need small bottle brushes (you can find these at craft stores or online), wooden spools or small wooden discs for bases, white craft glue, and some glitter or artificial snow. My boys love the messy part – coating the trees with glue and sprinkling glitter everywhere! Fair warning, you’ll be finding glitter in random places for weeks, but it’s so worth it.
Start by securing your bottle brush into the hole of a wooden spool using hot glue (this is the one step I handle myself because, well, hot glue and little fingers don’t mix!). Once it’s secure, let the kids paint the trees with thinned white glue and sprinkle with white or iridescent glitter to create that snowy, frosted look. For an extra vintage touch, we sometimes add tiny beads as “ornaments” on the trees or wrap them with thin gold thread!
The beauty of these little trees is that you can make them in different sizes and colors! We’ve done traditional green with white snow, bleached white trees for an ultra-vintage look, and even experimented with dyeing some pink for that retro aesthetic. Thread a ribbon through the top, and you’ve got yourself a perfect tree ornament that looks like it came straight from grandma’s attic!
Pinecone Snowflakes
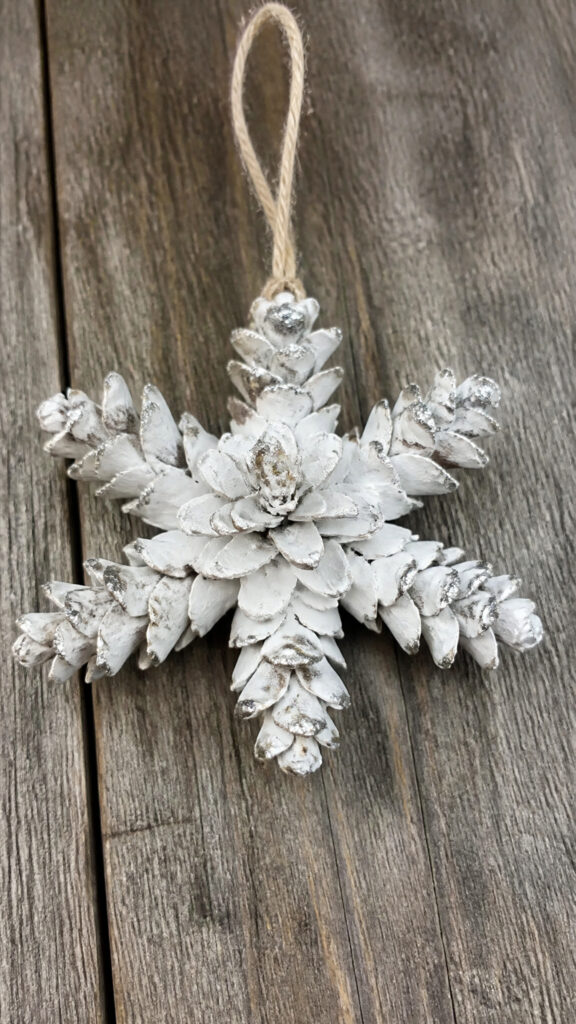
Pinecones are nature’s gift to crafty moms everywhere! We collect them on our neighborhood walks, and the boys get so excited about turning them into decorations. These pinecone snowflakes are absolutely stunning and give off major vintage vibes – they remind me of ornaments my grandmother used to hang on her tree!
You’ll need pinecones (medium-sized ones work best), white acrylic paint or spray paint, glitter, string or twine, and hot glue. The first step is to carefully pull apart your pinecones to get individual “petals” – this is actually a great fine motor activity for kids, though my youngest needs help with the tougher ones. You’ll want about 8-12 petals per snowflake depending on how full you want them to look.
Arrange your pinecone petals in a snowflake pattern on a flat surface before gluing – this lets you play around with the design until it looks just right! Once you’re happy with the arrangement, hot glue them together at the center. This is definitely a mom job because the glue needs to be applied quickly and precisely. After the glue dries completely, paint the entire snowflake white and add glitter while the paint is still wet for extra sparkle!
These DIY vintage christmas ornaments look incredible clustered together on a tree or used as gift toppers! Sometimes we leave them natural brown for a more rustic look, or we’ll do a light dusting of white paint for a snow-kissed effect. My boys love that we’re using something we found outside to decorate our tree – it makes them feel like real nature explorers!
Fabric Scrap Garland Balls
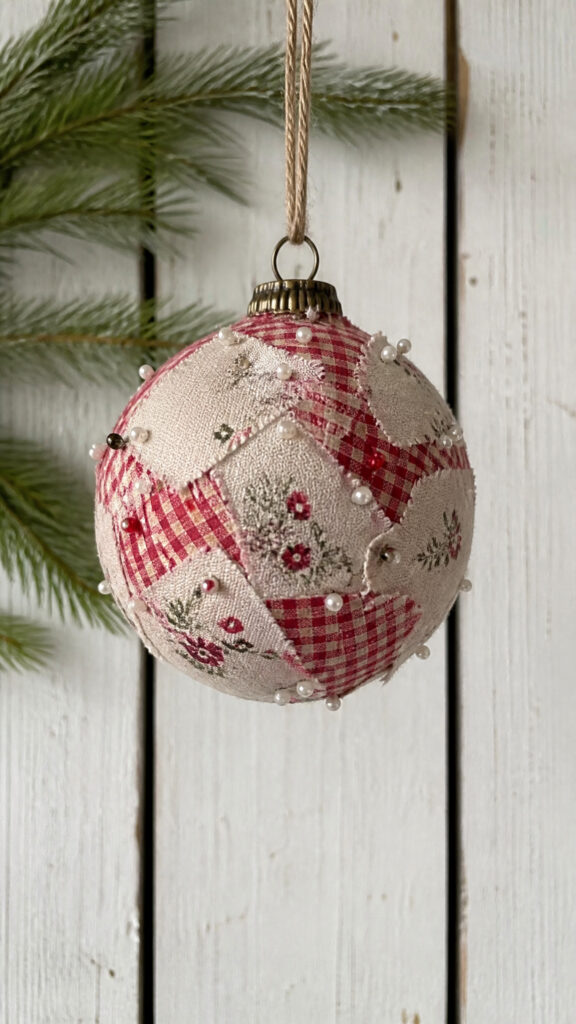
If you’re anything like me, you have a stash of fabric scraps that you’ve been saving for “someday” – well, someday is here! These fabric-wrapped balls are so charming and perfectly imperfect, which is exactly what makes them feel vintage. Plus, they’re practically indestructible, which is a huge win when you have young kids who treat the Christmas tree like an obstacle course!
Gather up styrofoam balls (various sizes look great!), fabric scraps in vintage-inspired patterns like gingham, florals, or plaids, straight pins, and ribbon for hanging. I raid my fabric bin for anything that looks old-fashioned – those red and white checks, faded florals, and cream-colored prints are perfect for this project. You can also use scraps from old clothes or linens, which adds even more sentimental value!
Cut your fabric into strips about 1-2 inches wide and 6-8 inches long. The beauty of these DIY vintage christmas ornaments is that nothing needs to be precise! Show your kids how to wrap the fabric around the ball and secure each end with a straight pin. Keep layering strips in different directions, overlapping them until the entire ball is covered. The random, patchwork effect is exactly what gives these their vintage charm!
My boys actually love this project because they can’t really mess it up – the more chaotic the wrapping, the better it looks! We usually make these while watching Christmas movies together, and it’s become one of those peaceful crafting moments that I treasure. Add a loop of ribbon or twine at the top with a pin, and you’ve got ornaments that look like they’ve been passed down through generations!
Walnut Shell Surprises
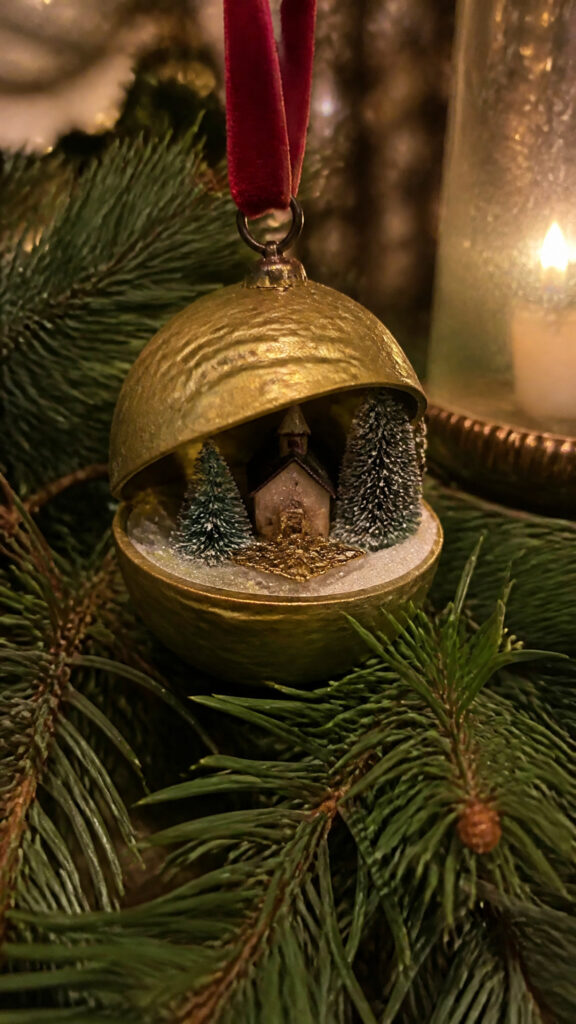
Okay, this one might sound a little quirky, but stay with me! Walnut shell ornaments are an actual vintage tradition, and they’re absolutely adorable. My kids think it’s hilarious that we’re turning nuts into ornaments, and they love the tiny surprise hidden inside each one. These are perfect for adding those special little details to your tree that make people lean in for a closer look!
You’ll need walnuts, a nutcracker, small vintage-style trinkets or images (think tiny bottle brush trees, small figurines, vintage Christmas images, or even photos of your kids), glue, gold or silver paint, and thin ribbon. Carefully crack the walnuts in half, trying to keep each shell intact – eat the nut inside (snack time!) and clean out the shells. This part requires a gentle touch, so I usually do the cracking while the boys work on other steps.
Paint the outside of the shells gold or silver for that classic vintage look, or leave them natural for a more rustic feel! Once dry, glue your tiny treasure inside one half of the shell. We’ve used tiny printed Christmas images, small plastic animals, mini bottle brush trees, and even glitter for a simple but sparkly version. The kids get so creative with what they want to put inside – my oldest made one with a tiny photo of our dog!
Glue the two halves back together with the treasure inside (or leave one side open to peek in – both ways look great!), and attach a ribbon loop at the top for hanging. These DIY vintage christmas ornaments are conversation starters for sure! Guests always pick them up and marvel at the tiny scenes inside. They’re also wonderful for gift-giving – imagine giving grandparents ornaments with tiny photos of the grandkids inside!
Vintage-Style Paper Chains
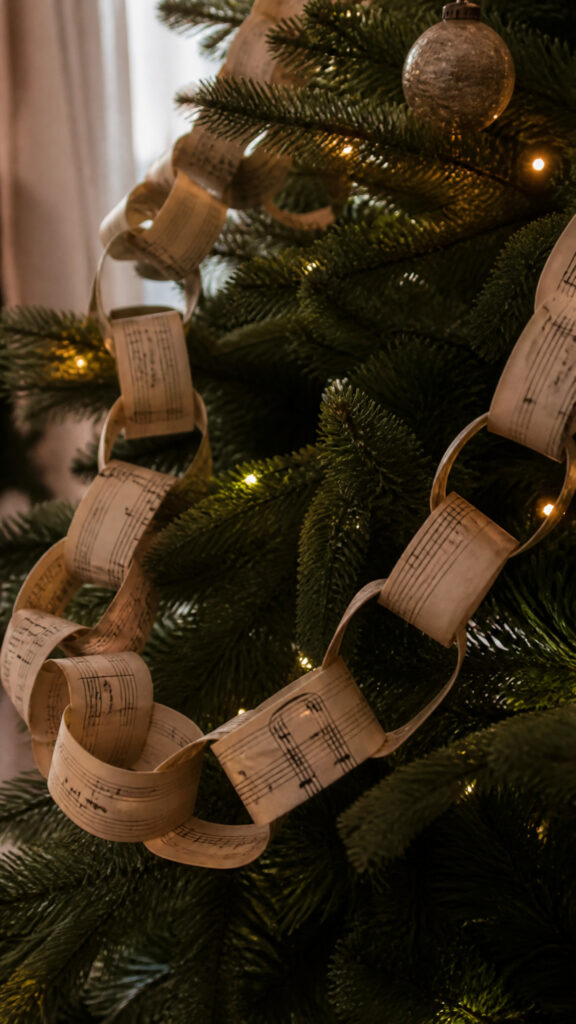
Paper chains might seem too simple to be special, but hear me out! When you use vintage-inspired papers and techniques, these become absolutely gorgeous and give your tree that old-fashioned, homemade charm. My boys can make these independently (hallelujah for independent crafts!), and there’s something so satisfying about seeing a huge chain grow longer and longer!
Grab some scrapbook paper in vintage patterns – think old book pages, sheet music, vintage Christmas images, or papers with antique designs. You’ll also need scissors, glue or a stapler, and maybe some stamps or stickers for extra decoration. I love using actual pages from old books we find at thrift stores – it gives the chains authentic vintage character and the boys think it’s cool to use “real old stuff!”
Cut your paper into strips about 1 inch wide and 6-8 inches long. Let your kids decorate the strips before linking them if they want – rubber stamps with vintage designs, a light tea-staining for aged color, or simple drawings all work beautifully! To form the chain, make the first strip into a loop and glue or staple the ends together. Thread the next strip through the first loop before securing its ends, and continue until your chain is as long as you want!
These chains are perfect for draping around your tree in that classic, nostalgic way! We make ours super long and wind them around the tree in loose spirals. You can also make shorter chains to use as garland on mantels or doorways. The best part? These DIY vintage christmas ornaments cost almost nothing to make, and kids of all ages can participate. Even my three-year-old can help with decorating the strips and threading them through loops!
Spoon Angel Ornaments
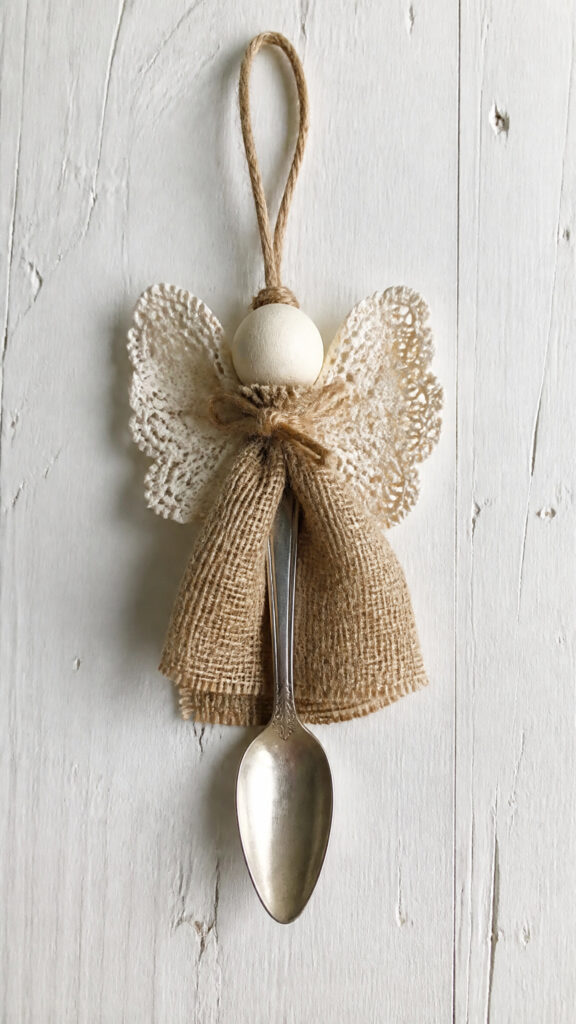
I absolutely fell in love with these when I saw them at a vintage market! Spoon angels are such a creative way to upcycle old silverware, and they have that perfect shabby chic, vintage farmhouse look. Don’t worry – you don’t need fancy antique spoons for this! Thrift store silverware works perfectly, and the boys think it’s amazing that we’re turning spoons into angels!
You’ll need old metal spoons (one per angel), wooden beads for heads, small doilies or lace scraps for wings, fabric or ribbon for the dress, hot glue, markers or paint for faces, and twine or ribbon for hanging. I always check thrift stores for mismatched silverware – you can usually find them for pennies! The different patterns and styles actually add to the vintage charm.
The spoon becomes the angel’s body, with the bowl of the spoon as the dress and the handle as the legs! Glue a wooden bead at the top of the handle for the head, then draw a simple face with markers or paint. For the dress, wrap fabric or ribbon around the bowl of the spoon and secure with glue. The boys love choosing different fabrics for each angel – we’ve used everything from burlap to vintage lace!
Attach a small doily or piece of lace behind the spoon for wings – these make such a huge difference in the finished look! You can fold the doily in half and glue it behind the “shoulders,” or cut lace into wing shapes. Add a loop of twine at the top for hanging, and you’ve got yourself an absolutely charming ornament! These DIY vintage christmas ornaments look amazing in groups on the tree, and each one has its own personality. We’ve even made some for grandparents and teachers – everyone loves them!
Cinnamon Stick Stars
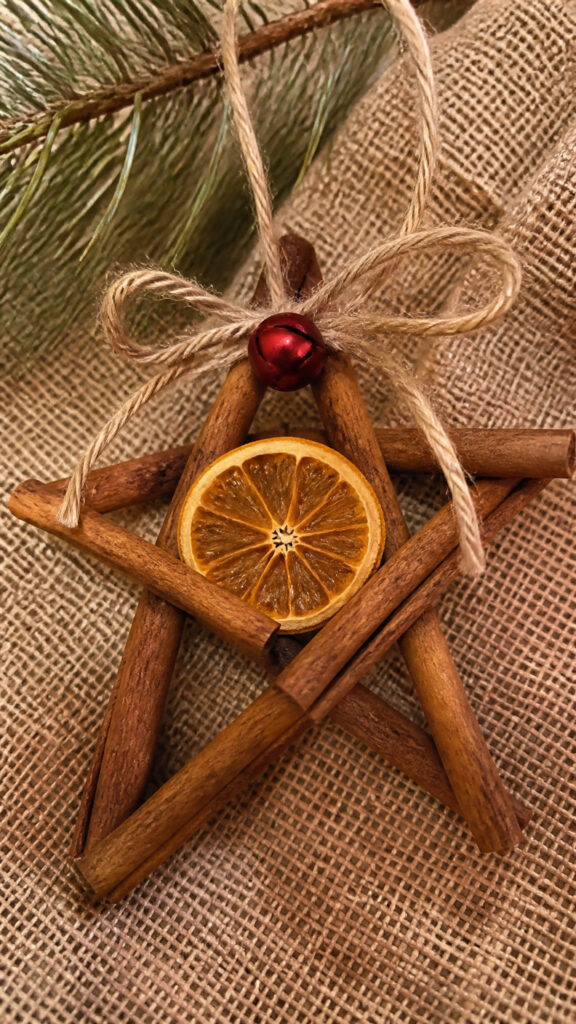
These ornaments smell as amazing as they look! Cinnamon stick stars are wonderfully rustic and vintage-looking, plus they make your whole tree smell like Christmas. Fair warning though – my boys kept trying to eat them because they smell so good! These are super simple to make but look really impressive on the tree.
You’ll need cinnamon sticks (buy them in bulk online for the best price!), hot glue gun, twine or ribbon, and optional embellishments like small jingle bells, dried orange slices, or berries. I usually buy the longer cinnamon sticks and cut them into uniform lengths with kitchen shears – you’ll need five pieces per star, all the same length for a symmetrical look, or varying lengths for a more rustic star.
Arrange your five cinnamon sticks in a star pattern on your work surface, overlapping the ends to form the points! This is where the hot glue comes in – secure each intersection point with a generous dab of glue. Work quickly and hold each joint for a few seconds until the glue sets. I make all the stars myself because hot glue and kids is asking for tears, but the boys help with the decorating part!
Once your stars are assembled and completely dry, let the kids add embellishments! We tie small jingle bells at the points with thin ribbon, glue dried orange slices in the center, or weave twine around the stars in decorative patterns. These DIY vintage christmas ornaments are perfect for a natural, rustic tree theme, and they pair beautifully with other natural elements like pinecones and dried fruits. Plus, that cinnamon scent lasts for years – our stars from two years ago still smell amazing!
Vintage Photo Transfer Ornaments
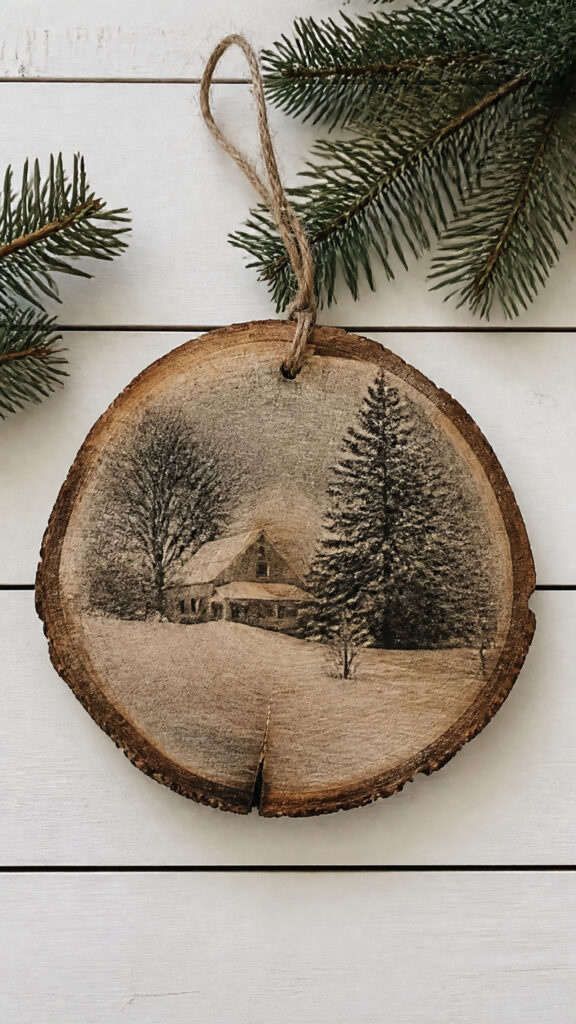
This is hands-down my favorite project because it’s so personal and sentimental! Photo transfer ornaments let you showcase old family photos or vintage Christmas images on your tree, and they look like genuine antiques. Every year when we hang these, we tell the stories behind the photos, and it’s become such a special tradition for our family!
You’ll need wooden slice ornaments (you can buy pre-cut ones or cut your own if you have access to branches), Mod Podge or gel medium, printed photos or images (printed on regular paper with a laser printer – this is important!), a sponge or soft cloth, and sealer. The process is actually easier than it sounds, though it does require a bit of patience!
First, print your chosen images in reverse (mirror image) using a laser printer – this is crucial for the transfer to work! Inkjet prints won’t work for this technique. Cut out your images to fit your wooden slices. Brush a thick layer of Mod Podge onto the wood and onto the front of your image, then press the image face-down onto the wood. Smooth out any bubbles and let it dry completely overnight – I know, the waiting is hard!
Here’s the magical part that the kids absolutely love! Once everything is completely dry, wet the back of the paper with a damp sponge and gently rub away the paper. The image will have transferred to the wood underneath! It takes a few minutes of gentle rubbing, but watching the image appear is so cool. Once all the paper is removed and the wood dries, seal it with another coat of Mod Podge. These DIY vintage christmas ornaments are priceless keepsakes – we’ve made them with photos of the boys as babies, old photos of grandparents, and vintage Christmas postcards!
Felt Gingerbread Ornaments
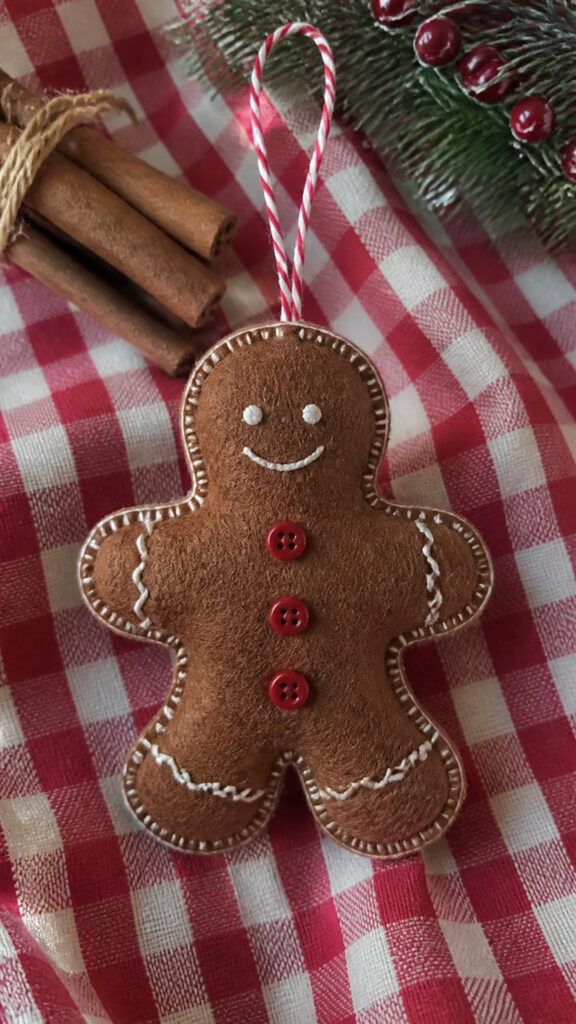
Felt gingerbread people are classic vintage ornaments that never go out of style! These are perfect for little hands because felt is so forgiving and easy to work with. Plus, unlike real gingerbread, these won’t get eaten by sneaky kids (or moms!) before they make it onto the tree! We make a whole gingerbread family every year, and the boys name each one.
Gather brown felt, white embroidery floss or puffy paint, buttons, ribbon, scissors, and stuffing or cotton balls. You can find gingerbread man templates online or draw your own – simple shapes work best! Cut two identical gingerbread shapes from brown felt for each ornament. The kids can totally help with cutting if you’re brave, or you can pre-cut them and let them focus on decorating!
The decorating is where these ornaments really come to life! Use white puffy paint or embroidery floss to create the classic icing details – zigzag lines on arms and legs, buttons down the middle, and a sweet smile. My boys love adding buttons as actual buttons on the gingerbread people, and we use tiny pom-poms for noses sometimes! Let all decorations dry completely if you’re using paint.
Once decorated, place the two felt pieces together and stitch around the edges with embroidery floss, leaving a small opening at the top! Stuff lightly with cotton or stuffing before stitching the opening closed. Add a ribbon loop for hanging, and you’re done! These DIY vintage christmas ornaments are incredibly durable and can handle being played with by curious toddlers. We’ve had some of ours for three years now, and they still look great! They’re also wonderful for giving to friends – who doesn’t love a handmade gingerbread friend?
Creating Memories One Ornament at a Time
Making DIY vintage christmas ornaments has truly transformed our holiday season! Instead of rushing through December in a blur of activities and stress, we now have these quiet crafting moments where we slow down, create together, and fill our home with handmade treasures. Sure, my house gets covered in glitter and glue, and yes, some ornaments are a little wonky, but that’s exactly what makes them perfect! These imperfect, handmade decorations tell the story of our family and this season of life with young kids.
I hope these projects inspire you to start your own ornament-making traditions! The beautiful thing about vintage-style ornaments is that they’re meant to look homemade and imperfect – there’s no pressure for everything to be Pinterest-perfect. So grab your supplies, gather your kids, put on some Christmas music, and start creating! Years from now, these will be the ornaments your children remember most – not the expensive store-bought ones, but the ones you made together with love, laughter, and probably a few happy tears. Happy crafting, mama!