This post may contain affiliate links. Read the full disclosure here.
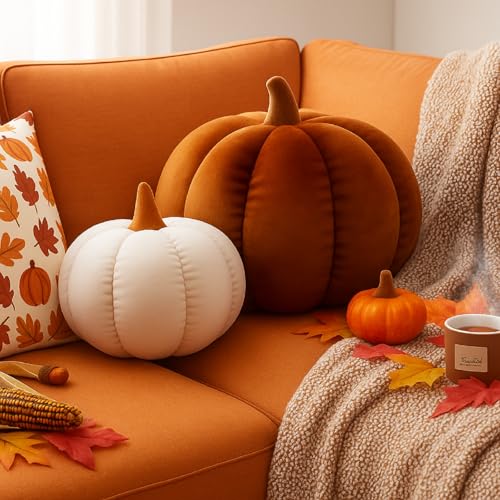
Hey there, fellow moms! As a mom of three wild and wonderful boys, I know the house never slows down, especially during fall. That’s why I love making a diy pumpkin pillow! It’s cute, squishy, and brings so much warmth to our space. Plus, it’s an easy project to enjoy with the kids on a crisp afternoon.
All you need is some soft fabric and this fluffy pumpkin pillow insert to make a cozy accent for your couch.
Homemade pumpkin pillows don’t just look adorable on the couch or entryway bench, they give our home that playful, welcoming feeling I want for the season. Even better, my boys love helping out and I get to sneak in a little family fun (and a dash of autumn charm) without spending a lot or running to the store. If you’re looking for a simple way to cozy up your fall décor and add in a personal touch, this is it!

- Materials and Tools
- Fabric Choices for a Pumpkin Pillow
- Necessary Tools and Supplies
- Optional Touches
- Prepping Your Workspace
- Cutting and Sewing the Pumpkin Shape
- Stuffing and Shaping the Pillow
- Adding Finishing Details
- Attach a Closure: If using a zipper, guide placement and sewing. If opting for buttons, explain how to make decorative buttonholes.
- Decorative Accents: Suggest painting a simple face with fabric paint, adding embroidered vines, or gluing felt leaves. Keep instructions safe for kids.
- Create a Removable Pillowcase: Show how to sew a matching case with a hidden zip or envelope closure for easy cleaning.
- Displaying and Caring for Your DIY Pumpkin Pillow
- Conclusion
Materials and Tools

Before I get into the step-by-step fun of making your own diy pumpkin pillow, it’s best to have everything ready to go. You don’t need fancy supplies or a big budget, just a few trusty basics. I like to keep things as simple as possible, since my boys are eager to jump right in as soon as the table is cleared. Let’s take a quick look at exactly what you’ll need, plus a few little extras to give your pillow extra charm.
Fabric Choices for a Pumpkin Pillow
When it comes to picking fabric, I always think about comfort, color, and durability. My boys wrestle with these pillows the way they do with each other, so sturdiness is key. Here are my favorite options:
- Fleece: Soft and warm, with a slight stretch. Perfect for hugging!
- Cotton: Breathable and available in tons of fall patterns (think burnt orange, gingham, or even plaid).
- Velvet: Adds a little luxury, and those rich colors pop in the living room.
- Upcycled shirts or sweaters: Great for saving money and giving those old clothes new life.
I suggest a 14×22 inch piece of fabric for a standard pillow, but you can go bigger or smaller. If you want your pumpkin pillow super plump, hop up a size!
Necessary Tools and Supplies
Gather your helpers and round up these must-haves before you start. I usually set everything out in little piles, which makes it easy for kids to pick their favorites.
You’ll want to have:
- Fabric (main body): As noted above, choose what fits your style and stash!
- Scissors: Sharp enough to cut fabric (safety scissors if little hands are working).
- Sewing needle and thread: For hand sewing, which I prefer when working with my boys since we can all sit around the table.
- Fabric glue: If you’re not into sewing, no worries—fabric glue works for almost everything here.
- Pins or clips: To hold everything together before the final stitch or glue.
- Stuffing or pillow fill: Poly-fil, loose fiber, or even bits of batting. Old pillow stuffing works too.
- Marker or chalk: To trace the pumpkin shape (washable is best).
- Yarn or ribbon: For a cute stem or to add leaf details.

A little table for easy scanning:
| Supply | Why I Use It | Kid-Friendly? |
|---|---|---|
| Fabric | Makes the body of the pillow | Yes |
| Stuffing | Fills the pillow, keeps it soft | Yes |
| Scissors | Cutting shapes | With supervision |
| Needle & Thread | Stitching pieces together | Yes, with help |
| Fabric glue | No-sew option | Yes |
| Yarn/Ribbon | Adds stem or leaf decoration | Yes |
| Pins or Clips | Holds fabric together | Yes, with help |
| Marker/Chalk | Drawing out shapes | Yes |
Optional Touches

Sometimes the kids want to go wild with decorations. If your little helpers like to personalize things, these extras are always a hit:
- Felt sheets: For cut-out leaves or even funny pumpkin faces
- Fabric paint: Add details, stripes, or names right on the pillow
Letting the boys sprinkle in their own touch makes each diy pumpkin pillow unique for our home.
Prepping Your Workspace
It’s a good idea to set up on a big table or even the floor with a wipeable mat. I grab an old sheet or newspaper so cleanup is a breeze, and that way everyone can move around without spilled stuffing getting stuck underfoot.
With everything set, you and your crew are ready for the hands-on part! Keep your supplies close, and the smiles will come easily.
Cutting and Sewing the Pumpkin Shape
Okay, mom friends, once everything is set out on the table and everyone has picked out their favorite shade of orange, it’s time for the real fun: turning that flat fabric into a squishy, huggable diy pumpkin pillow! This part always gets my boys excited as we finally see the “pumpkin” take shape. Here’s how I break it down to keep things easy, kid-friendly, and stress-free.
Choose Your Fabric

Picking the right fabric can make all the difference, especially if your diy pumpkin pillow is going to see a lot of action on the couch or in cuddle forts. I recommend sticking with orange cotton or fleece for the outside. These fabrics are not only soft, but they hold up well with everyday play and washing. Since my boys have a talent for dragging pillows everywhere (sometimes even outside), I always check that the fabric is:
- Soft enough to snuggle. It should feel good against the face—who wants a scratchy pumpkin, right?
- Machine washable. Spills and smudges happen daily! Fleece and cotton both wash up without shrinking or pilling.
- Kid-safe. Avoid anything with loose glitter, scratchy textures, or thin material that might rip if squeezed too hard.
For the lining, I grab a simple neutral cotton (white or beige is perfect). This extra layer keeps the stuffing from poking out and gives the pillow a nice, full shape. Soft essentials only in this house!
Create and Cut the Pattern

Here comes the “art class” moment! Drawing your own pumpkin outline is as easy as pie and lets you customize the look. I keep it simple for my boys, using two big half-ovals to make a cute, chubby pumpkin.
Here’s what I do:
- Grab a large sheet of paper (like kraft or butcher paper) and fold it in half.
- Draw a big half-oval along the fold, using a ruler to make sure both sides stay even. I like mine about 12-14 inches tall. If you want a wider pillow, go bigger!
- Cut it out, unfold, and you’ll have a classic pumpkin base. Lay it on the fabric.
- With chalk, trace the pattern onto your fabric (twice, for the front and back). Chalk works best because it brushes off easily and doesn’t stain.
- Add a half-inch all around as your seam allowance. This little “buffer zone” will give you room to sew and still get a plump pillow.
If you’re making more than one diy pumpkin pillow, let the kids help trace and cut! Just double-check that everyone’s fingers are safe before the scissors come out.
Sew the Basic Shape

With both pumpkin pieces traced and cut, it’s finally time to sew. I line up the two fabric pieces, putting the “good” (right) sides together so the seams will be hidden inside the pillow when we’re done.
Here’s my method for getting an even, sturdy finish every time:
- Pin or clip the layers together. Trust me, things can slip and get wonky when helping hands are involved.
- Use a straight stitch (you can hand-sew with a needle and thread, or use a machine if you prefer). Go slowly around the pumpkin shape.
- Leave a 4-inch gap at the bottom. This gap is where you’ll stuff your pumpkin later. I always mark the spot with a pin so I don’t forget and accidentally sew it closed.
- Reinforce the corners and curves by going over them twice. These spots get the most stress when the pillow gets squeezed and tossed.
- Turn it inside out when you’re done sewing, and check for any missed spots or holes. If I find any gaps, I just give them another quick stitch.
Nothing beats that first peek at the sewn shape—my boys love flipping it right side out and suddenly seeing the pumpkin “pop” into view! All that’s left is to get ready for the stuffing, which is always a big hit with little helpers.
Stuffing and Shaping the Pillow

Now comes the fun, squishy part—getting your diy pumpkin pillow plumped up and looking oh-so-cute! This always gets giggles from my boys as we turn that flat pumpkin shape into something soft and huggable. Whether your kids love a firmer pillow to toss or one that’s extra squishy for movie night, stuffing and shaping makes all the difference. Let’s break it down so your pumpkin looks just right for the season.
Select the Right Stuffing
The stuffing you pick can change the whole feel of your diy pumpkin pillow. I always reach for polyester fiberfill because it’s super soft, hypoallergenic, and bounces right back after a good pillow fight. Plus, it’s easy to wash—a major win when little hands and sticky pumpkin pie fingers are around.
If you want your pillow to feel extra squishy (almost like a stuffed animal), try shredded fleece or even scraps from old T-shirts. These options make the pillow feel looser and more relaxed, perfect for kids who like a softer touch.
For a quick comparison, check out this table:
| Stuffing Type | Feel | Washable | Good for Kids? |
|---|---|---|---|
| Polyester fiberfill | Fluffy, bouncy | Yes | Yes |
| Shredded fleece | Extra squishy | Yes | Yes |
| Old pillow stuffing | Slightly firm | Usually | Yes |
| Fabric scraps | More lumpy | Sometimes | Yes |
Tip: If anyone in your house has allergies, always double-check that your stuffing is rated hypoallergenic. Polyester wins here every time!
Fill Evenly
When it’s time to stuff, I like to do it in small handfuls. It’s a bit like stuffing a turkey on Thanksgiving—little bits at a time make it easy to shape and smooth! Start filling the pillow from the bottom, gently pushing the stuffing into the sides first (this helps fill the pumpkin “lobes”). As you go, use your hands to pinch and round out the curves so the pillow looks like a real pumpkin, not just a plain lump.
- Add stuffing in small batches. This gives you control and helps prevent the dreaded lumpy look.
- Shape the top and bottom. Press in a little extra to make those ends more round, mimicking a plump pumpkin’s curves.
- Gently tap the pillow. I bounce mine lightly on the table to help the fill settle down evenly inside.
If the kids are helping, have them give the pillow a light pat-down after every scoop of stuffing. It’s simple, fun, and keeps things even all the way around. I check with my hands for any soft or empty spots and fill them in as needed. Remember, it’s easy to add more, but tough to take extra out without making a mess!
Close the Opening

Once your pillow looks plump and pumpkin-perfect, it’s time to seal it up and reveal the final beauty. There are two easy ways to finish: hand-sewing or adding a zipper (if you’re planning on washing often). Here’s what works best for a busy, kid-filled house:
- Hand-sewing the gap is quick and works with any fabric. Just tuck the raw edges inside, thread a needle, and use small, neat stitches right along the seam. I use a simple ladder stitch, which hides the thread between the layers and makes everything look clean. Pull the stitches snug, but not tight, to keep the seam soft and invisible.
- Adding a zipper is handy if you want to toss the cover in the wash or swap stuffing out later. I usually choose a matching color and sew it right along the gap at the bottom. This takes a few extra minutes but pays off for years, especially if your pillow gets a lot of use.
Quick tip for neat stitching: Double-thread your needle for extra strength and snip any loose ends as you go. If your kids want to help, let them pull the needle through with you—it’s a sweet way to get everyone involved!
Once the opening is closed, give your diy pumpkin pillow a final fluff. Smooth out the shape with your hands for that classic, plump pumpkin look. And just like that, your pillow is ready for all kinds of fall fun!
Adding Finishing Details
Once the diy pumpkin pillow is stuffed and shaped, it’s time to pull everything together with those small touches that really make it shine. This part always gets the most oohs and ahhs in my house. These finishing details mean your pillow is not only functional but extra cute for fall. I love that my boys get to help here too! From sealing the pillow with a closure to adding a playful face or leafy accents, these easy steps turn a simple pillow into a family keepsake.
Attach a Closure: If using a zipper, guide placement and sewing. If opting for buttons, explain how to make decorative buttonholes.
There are a few fun ways to close up your diy pumpkin pillow, depending on how you want to use it (and how often you might need to wash the cover). My boys always want to help decide. Zippers make for a clean finish, while bright buttons give a sprinkle of whimsy. Here’s how I do each, keeping it simple.
If you want a zipper:
- Choose a zipper that matches your fabric. A 7-9 inch zipper usually fits well for most pumpkin pillows.
- With the pillow still inside out, pin the zipper along the opening at the bottom. Make sure the teeth sit right along the edge.
- Using a zipper foot (if sewing by machine) or a sturdy hand stitch, sew the zipper in place. Go slowly and check that the teeth align neatly.
- Flip the pillow right side out, and test the zip! Every time I finish, the boys love “zipping up the pumpkin.”
If you like the charm of buttons:
- Carefully fold the edges of the opening inward by about half an inch to hide the raw fabric.
No matter which closure you choose, these steps keep the stuffing inside and let you wash the cover as needed (which happens in my house a lot).
Decorative Accents: Suggest painting a simple face with fabric paint, adding embroidered vines, or gluing felt leaves. Keep instructions safe for kids.
This is my favorite part! Adding playful accents brings your diy pumpkin pillow to life. Your kids can let their imaginations run wild. It’s safe, simple, and only takes a few supplies you probably already have. Here are three ideas that always get a big response:
- Paint a Jack-O’-Lantern face: Grab a few bottles of kid-safe fabric paint. I like to lay the pillow flat and sketch the face with chalk before letting the boys paint. Use black or brown for the eyes and mouth, then fill in with orange or yellow. Let everyone take a turn! Keep the paint thin enough that it dries quickly, but thick enough so it pops.
- Embroider curly vines: Thread a needle with green embroidery floss. Draw a swirl with chalk or a washable marker, then use a simple backstitch or chain stitch to create a curly vine along the pillow’s top or sides. This makes your pumpkin look as if it just rolled in from the patch! If your kids are old enough, let them try a few easy stitches. You can always fix things up later.
- Felt leaves and embellishments: Cut out leaf shapes from green felt. I use a little fabric glue to attach them near the pillow’s “stem” or scatter a few at the sides. The felt won’t fray, so this is a safe job for little hands and a great way to use up scraps! Stack two colors for a layered leaf or use brown to add a tiny stem.
If your kids are like mine and want to go wild, let them design their own face or draw their name on the pumpkin. Just make sure to use non-toxic supplies and supervise with glue and needles.
Create a Removable Pillowcase: Show how to sew a matching case with a hidden zip or envelope closure for easy cleaning.
For easy cleaning (and a longer-lasting diy pumpkin pillow), I like to make a removable cover. This comes in handy when the pillow inevitably ends up on the floor, in a fort, or outdoors during a fall picnic. You can pick a matching or contrasting fabric to keep things festive. Here are my two go-to options:
Hidden zipper pillowcase:
- Cut two identical pumpkin shapes from your chosen fabric, just like you did for the main pillow.
- With right sides together, sew around the pumpkin shape. Be sure the zipper is half-open, so you can flip it right side out when done.
- Turn, press, and pop in your pillow form. Done!
Envelope closure case:
- Cut one full pumpkin shape for the front, and two back pieces. Each back piece should be about two-thirds the height of the pumpkin, with a bit of overlap in the center.
- Hem one long edge of each back piece.
- Lay the front shape right side up. Place one back piece on top, right side down, lining up the outer edges. Place the second back piece, overlapping the first.
- Pin or clip everything, then sew around the entire pumpkin.
With either style, a removable cover saves time and makes life simpler. I love being able to swap out pillow covers as the boys spill their hot cocoa or want a new look for the next season. Plus, teaching my kids how to make and use removable pillowcases gives them ownership, and they’re always excited to pick fun prints for the next round!
Adding these little details to your diy pumpkin pillow gives each one a big personality (and lets your kids join in every step).
Displaying and Caring for Your DIY Pumpkin Pillow
You’ve finished your diy pumpkin pillow and you want it front and center in your fall decorating! I love the excitement my boys get each time we arrange and rearrange our handmade pillows around the house. The right spot and a little care help your pillow last all season (and for years to come). Here’s how I show off our pumpkin pillows and keep them looking fresh, squishy, and ready for every movie night or cuddle pile.
Placement Ideas
There are so many fun ways to show off your diy pumpkin pillow, and my boys come up with new ones all the time! A few crowd-pleasers in our home:
- Living-room sofa: This is our top spot. Nestle your pumpkin pillow among other cozy throws for a cheerful autumn feel. It gives an instant splash of color and warms up the space.
- Kids’ bedroom corner: Pop it in their reading nook or on a child’s bed for a playful accent. My youngest likes his pillow propped under his arm during story time.
- Hallway perch: Tuck it on a hallway bench, shoe cubby, or entry seat. Guests will smile as soon as they walk in and spot a bright pumpkin cushion.
- Mudroom or porch chair: If you’ve got a covered space by the door (protected from rain), a pumpkin pillow says “come on in!” in the friendliest way.
No matter where you set your pillow, safety comes first. Since there are no hard parts or sharp edges, it’s a safe choice wherever little ones play or nap. If you added buttons or other decorations, double-check they’re secure—loose bits can be a choking hazard if they come free.
Don’t forget the power of a little mix-and-match! Pair your pumpkin pillow with other fall designs (think: leaf or acorn pillows) for a fun, layered look. It’s an easy way to make your home feel festive without too much effort.
Seasonal Storage
Once the turkey’s gone and it’s time to swap out autumn for winter, I like to store my diy pumpkin pillow so it’s fresh for next fall. Taking just a couple of steps now saves lots of headache later and prevents that musty, squished look.
Here’s my easy method:
- Loosely fold the pillow: If your pumpkin pillow is overstuffed, don’t force it. Gently press to release air, then fold in half. Try not to crease too tightly, which can make the fill clump over time.
- Use a breathable bag: I pop ours into a cotton pillowcase or a mesh laundry bag. This lets air flow and keeps dust out. Avoid locking it in plastic—moisture can sneak in and cause mildew or musty smells.
- Pick a dry spot: Tuck the bag into a linen closet or up high on a shelf where it won’t get squashed. Keep it away from damp basements or garages. If you’re storing with other pillows, stack gently (pumpkin on top if possible).
A little lavender sachet or a dryer sheet added to the storage bag keeps everything smelling nice when you pull your pillow out again next year. Your homemade pumpkin will look just as inviting as the day you made it!
Cleaning and Maintenance
Between sticky hands and hot cocoa accidents, our diy pumpkin pillow gets its share of messes! Thankfully, a bit of regular cleaning keeps it looking brand-new all season.
- Spot-cleaning: For most spills, a damp cloth and mild soap do the trick. Dab gently, don’t scrub. I blot the spot, then let it air dry. Sometimes my boys use their own towel to “help” and it always turns into a team job.
- Machine-washing: If you installed a zipper or envelope closure, just slip off the cover and toss it in the wash. Use cold water on a gentle cycle and mild detergent. Skip the bleach, which can fade your colors. Always zip or fasten closed before washing to avoid snagging.
- Drying: Air dry the cover to prevent shrinkage. If you must use the dryer, keep it on low and toss in a few clean tennis balls to fluff while it tumbles.
- Fluffing: When the pillow starts to look flat, a quick shake or a few squeezes along the sides and top will plump it back up. My boys love to “help” with this step—sometimes they even have a contest to see who can make it look roundest!
- Reshaping: If stuffing gets lumpy after a wash, work it back into place with your hands. Gently knead and smooth until you see that full pumpkin shape again.
A clean, fluffy pumpkin pillow looks and feels better. Trust me, when the weather cools and those movie nights start up, your family will run for the coziest seat—the one with your homemade pumpkin pillow sitting front and center!

Conclusion
Making a diy pumpkin pillow turned out to be one of my favorite fall memories with my boys. It’s such a simple, hands-on way to bring everyone together and fill our home with warmth and personality. These pillows make our space extra cozy, and each one feels special because we made it as a team.
If you give this a try, I would love to see your creations! Please share your photos or ideas in the comments, or ask any questions if you get stuck. Thank you for joining me and adding a bit more joy to the season—you’ve got this, and your home is going to look adorable!