This post may contain affiliate links. Read the full disclosure here.
I’m a mom of three busy boys, and I love quick projects that make our table shine without stress. If you’re looking for simple ways to dress up winter dinners or birthday pizza night, you’re in the right place. I’ll share snowflake centerpieces that are fast, budget friendly, and totally kid approved, so you can set a bright, snowy scene in minutes and still have time for hot cocoa and a movie!
Here’s what I’ll cover next: a simple plan you can follow, easy DIY projects, styling tips for height and lighting, kid friendly setup and cleanup, and fun ways to customize for holidays or weeknights. Think winter table decor that feels playful, a cozy holiday tablescape, and a DIY winter centerpiece or two that add instant sparkle. Ready to make something beautiful together?
- My Quick Plan: Theme, Budget, and Timeline for Sparkly Success
- Pick a Winter Theme and Color Palette
- Budget and Supplies Checklist by Table Size
- Timeline: 30 Minutes, 1 Hour, or a Weekend Project
- Tools and Safety Basics Before We Start
- Easy DIY Snowflake Centerpieces You Can Make Today
- Paper Snowflake Luminaries with LED Tea Lights
- Glitter Jar “Snow-Globe” Vases with Epsom Salt Snow
- Acrylic Snowflakes on Mirror Tiles for Instant Ice Shine
- Edible Sugar Snowflakes on a Cupcake Stand Centerpiece
- Style Like a Pro: Height, Layers, and Lighting for Serious Sparkle
- Create Height Safely with Stands and Books
- Layer Textiles and Faux Snow for Depth
- Add Glow with Fairy Lights, Candles, and Mirrors
- Finish with Small Accents that Pop
- Kid-Friendly Craft Time, Quick Cleanup, and Easy Storage
- Set Up No-Mess Craft Stations That Actually Work
- Keep Little Hands Safe While They Help
- Cleanup Tricks and Stain-Saving Tips
- Pack, Label, and Store So Decor Lasts Next Winter
- Make It Yours: Holiday, Party, and Everyday Variations
- Cozy Weeknight Dinner or Family Movie Night
- Holiday Brunch or Christmas Dinner
- Hanukkah or Winter White Party
- New Year’s Eve Sparkle on a Budget
- Conclusion
My Quick Plan: Theme, Budget, and Timeline for Sparkly Success
Here is how I keep our projects quick, calm, and pretty. I pick a simple theme, set a small budget, and map the time. That way, our snowflake centerpieces look planned, not thrown together, even with little hands helping.
Pick a Winter Theme and Color Palette

A clear theme saves time and sanity. I keep the colors tight and repeat them across the table. It keeps the scene calm, not cluttered, and makes every piece feel connected.
- Cozy Cocoa with Cream and Wood: Warm brown, cream, soft gray. Pull in natural wood.
- Red and White Peppermint: Bright red, crisp white, clear glass. A tiny hint of silver works too.
- Winter White and Gold: White, champagne gold, clear. Elegant and clean.
I stick to two colors and one neutral. Then I add a single texture for depth. One texture is plenty. Try one of these:
- Velvet ribbon on jars for a soft, cozy note.
- Burlap under a cluster to ground the sparkle.
- Knit or faux fur runner for warmth in the center.
- Matte paper snowflakes next to shiny glass for contrast.
Tip I love: Repeat your texture in two spots. A velvet bow on a vase, then velvet napkin ties. The table feels intentional fast.
Budget and Supplies Checklist by Table Size

Small budget, big impact. I build from a core list and scale it by table size. Many of these pieces are reusable, so money stretches across seasons.
Budget tiers per table
| Budget | What you can cover | Where it shines |
|---|---|---|
| $10 | 1 to 2 jars, Epsom salt, paper snowflakes, ribbon | Small coffee table or 2 place settings |
| $25 | 3 to 5 jars, LED tea lights, faux snow, mirror tile | Family table with 4 to 6 place settings |
| $50 | Clear vases, cupcake stand, extra LED lights, felt snowflakes, runner | Full dining setup for 6 to 8 place settings |
Modular supplies list Use what you have first, then add a few pieces.
- Paper or felt snowflakes
- Mason jars or clear vases
- LED tea lights
- Epsom salt or faux snow
- Ribbon or twine
- Mirror tiles or a small round mirror
- Cupcake stand or cake stand
How I scale by place settings
| Place settings | Centerpiece count | Accent pieces | Notes |
|---|---|---|---|
| 4 | 1 focal cluster (3 jars) | 4 paper snowflakes, 4 LED tea lights | One mirror tile under the cluster |
| 6 | 1 focal cluster + 2 side jars | 6 to 8 snowflakes, 6 LED tea lights | Add ribbon ties on two napkins |
| 8 | 1 focal cluster + 4 side jars | 10 to 12 snowflakes, 8 LED tea lights | Use a cupcake stand for height |
What scales up
- Add jars or vases in odd numbers.
- Spread snowflakes along the runner in a simple path.
- Mirror tiles stretch light without more decor.
Reusable heroes
- Mason jars, clear vases, mirror tiles, and LED tea lights last all season.
- Felt snowflakes hold up better than paper and store flat.
- Ribbon rolls work for napkins, jars, and gift wrap later.
Timeline: 30 Minutes, 1 Hour, or a Weekend Project

I set a timer and keep it fun. Short bursts win with kids and busy nights.
30 minutes: Paper luminaries
- Wrap jars with paper snowflakes and tape.
- Fill jars with Epsom salt, then drop in LED tea lights.
- Scatter 6 to 8 loose snowflakes on the table.
- Add one ribbon bow to the tallest jar.
Result: Soft glow, simple sparkle, done before bedtime.
1 hour: Glitter jar vases and a simple runner
- Brush glue on jar rims, sprinkle glitter, and let it set.
- Lay a runner, or use a strip of kraft paper down the center.
- Build a cluster of 3 to 5 jars on a mirror tile.
- Add faux snow around the base, then tuck in LED tea lights.
Result: Brighter shine, clean lines, and a fuller look.
Weekend: Edible snowflake dessert centerpiece and layered styling
- Style a layered base: runner, mirror tile, then jars at two heights.
- Mix paper and felt snowflakes for texture.
- Add a few clear vases with Epsom salt, then nestle battery lights inside.
Result: Showpiece in the center, dessert within reach, and lots of depth.
Mom life tips that save my sanity
- Prep cuts at night while the house is quiet.
- Glue in short bursts so kids do not wander off.
- Let kids sprinkle Epsom salt, place LED tea lights, and hand you ribbon.
- Use trays to move projects from the kitchen to the table fast.
Tools and Safety Basics Before We Start


I keep a small kit ready so we can start quick and clean up faster.
- Kid scissors for paper and ribbon.
- Low temp glue gun for adults, and glue dots for kids.
- Painter’s tape for quick holds without residue.
- Trays for mess control, one per child works great.
- Lint roller to pick up glitter and felt fuzz.
- Handheld vacuum for Epsom salt and faux snow.
Safety first, always.
- Use LED candles, not flame, near paper or ribbon.
- Protect wood tables with a runner, placemats, or kraft paper.
- Keep cords and hot glue out of little hands.
- Let glittered pieces dry on a tray so they do not stick.
With a clear theme, a tiny budget plan, and a simple timeline, the table comes together fast. It looks pretty, stays calm, and feels special, even on a weeknight.
Easy DIY Snowflake Centerpieces You Can Make Today

I love quick projects I can finish before dinner, and these ideas check every box. They look polished, they are kid friendly, and they use simple supplies I already have. If you need pretty snowflake centerpieces fast, try one of these and enjoy the glow tonight!
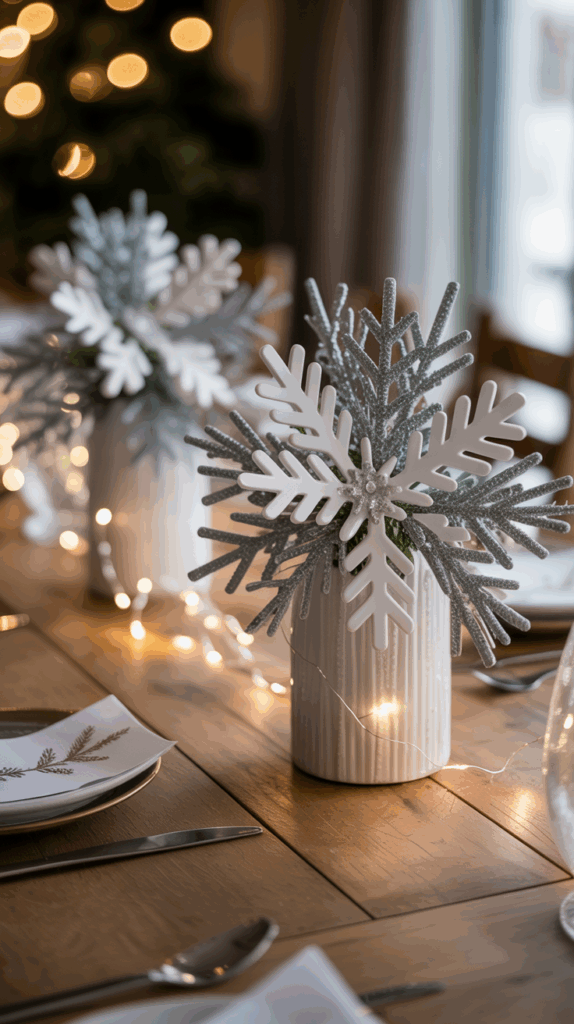
Paper Snowflake Luminaries with LED Tea Lights

This one is calm, pretty, and perfect for little helpers. The glow feels magical, which is hard to believe for paper and tape!
- Materials: printer paper or vellum, jars or drinking glasses, double sided tape, LED tea lights.
- Prep tip: If your kids are young, pre-fold a few sheets so they can do the snips.
Steps
- Fold standard paper into a square, then into a triangle, and cut small notches and shapes. Unfold to reveal snowflakes. Vellum works too.
- Wrap each jar with a single snowflake, then secure with small pieces of double sided tape.
- Drop in an LED tea light. If the jar is wide, add a bit of Epsom salt to keep the light centered.
- Set 3 jars together for a quick cluster.
Variation I love
- Layer a strip of vellum inside the jar for a soft, frosted glow. It helps diffuse the light.
Kid job
- Folding, simple cutting, and sticking the snowflakes to the glass. This is always a hit.
Style notes
- Mix one large snowflake with two smaller ones for balance.
- Add a short ribbon bow on the tallest jar for a tiny pop of color.
Time: about 20 minutes
Cost: low
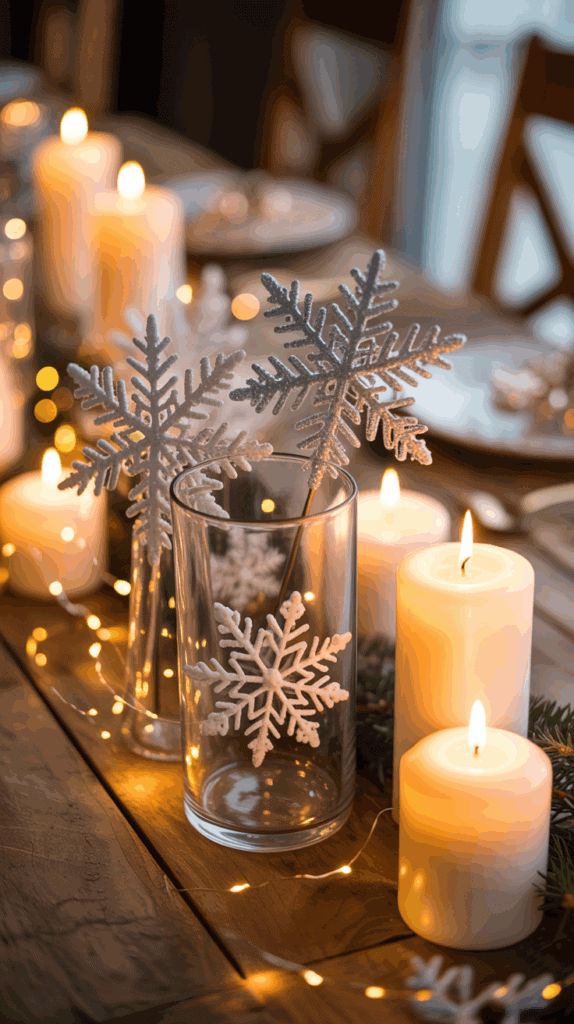
Glitter Jar “Snow-Globe” Vases with Epsom Salt Snow
These look fancy, but they are so simple. The salt sparkles like fresh snow, and the boys love pouring it in.
- Materials: clear jars, Epsom salt, fine glitter or mica, ribbon.
- Optional: tall paper or acrylic snowflake picks, cranberries, a small pine sprig.
Steps
- Fill each jar one third full with Epsom salt. Sprinkle a pinch of fine glitter or mica on top.
- Tie a short ribbon around the rim in a simple knot or bow.
- Tuck a tall paper or acrylic snowflake pick into the jar so it stands straight.
- Group 3 to 5 jars together in the center. Add a couple of LED tea lights nearby for sparkle.
Kid job
- Pouring Epsom salt and sprinkling glitter. Mine call it snow magic.
Simple tip for contrast
- Drop in a few cranberries or a small pine sprig. The red and green pop against the white.
Cleanup
- Pour salt back into a container to reuse next week. Tap jars over the sink to remove glitter.
Time: about 25 minutes
Cost: low to medium
Acrylic Snowflakes on Mirror Tiles for Instant Ice Shine

This is my fast track to a centerpiece that looks pulled together. It reflects light, looks crisp, and sets a clean winter vibe.
- Materials: mirror tiles or mirrored placemats, acrylic snowflakes, clear stands, LED micro lights.
- Safety note: Keep cords tucked and use battery packs with a switch.
Steps
- Place one mirror tile in the center of your table. For a long table, use two tiles side by side.
- Set 3 to 5 acrylic snowflakes on clear stands, with one taller in the back.
- Snake LED micro lights around the bases, then hide the battery pack behind a jar or napkin stack.
- Add a few loose paper snowflakes on the mirror edge for softness.
Kid job
- Placing the snowflakes on their stands and turning the lights on. They love the reveal.
Styling tips
- Keep pieces in odd numbers for a clean look.
- If the table is dark wood, a white runner under the mirror helps the shine travel.
Why it works
- The mirror doubles the light and adds depth in seconds. No extra fuss.
Time: about 30 minutes
Cost: medium, and everything is reusable
Edible Sugar Snowflakes on a Cupcake Stand Centerpiece
Dessert as decor is always a win. This centerpiece is tasty, cute, and perfect for family dinners with a sweet finish.
- Extras: small sprinkles, a dusting of powdered sugar, mini cupcake liners.
Steps
- Stack the cupcake stand. Wipe it clean so sprinkles do not skid.
- Top each treat with a sugar snowflake. Add a tiny pinch of sprinkles in the center.
- Finish with a light dusting of powdered sugar on the stand for a snowy effect.
Kid job
- Decorating and taste testing, which is always a highlight. I set three aside for tiny hands first.
Make it look full
- Tuck a few wrapped candies between cupcakes. It fills gaps and adds shine.
Storage hint
- Keep extra sugar snowflakes in a small container so they do not soften.
Time: about 40 minutes
Cost: medium, and it doubles as dessert
Quick pick guide
- Want soft glow fast? Paper luminaries.
- Want sparkle and height? Acrylic on mirrors.
- Want cozy, snowy texture? Glitter jar vases.
- Want dessert and decor in one? Cupcake stand with sugar snowflakes.
Grab one idea, set a timer, and let the kids help. You will have a pretty table and happy helpers in under an hour!
Style Like a Pro: Height, Layers, and Lighting for Serious Sparkle

Once you have your snowflake centerpieces ready, the real fun starts with styling them on the table. I always aim for a look that feels pro but stays simple, especially with my three boys running around. Height adds drama, layers bring depth, and lighting creates that wow factor. These tips turn basic jars and snowflakes into a cozy winter scene that lights up family dinners. Let’s get your table sparkling!
Create Height Safely with Stands and Books
Height makes snowflake centerpieces pop without blocking the view. I stack items carefully so everyone at the table can chat and pass the rolls. My boys love helping build these towers, and it keeps things exciting.
Start with a cake stand or cupcake tier for the main cluster. Place your tallest jar or vase on the top level, then add medium ones below. If you lack stands, flip a sturdy bowl upside down and set a plate on top for an instant riser. For budget fun, stack books and cover them with wrapping paper in your theme colors. Silver paper works great for a snowy vibe.
Keep sight lines clear by limiting height to about 12 inches max. Position pieces so faces stay visible across the table. I aim for a triangle setup: one tall piece in the back, one medium on the side, and one low in front. This draws the eye without crowding.
- Quick safety check: Use non slip pads under stands to avoid wobbles during meals.
- Kid helper tip: Let them wrap the books or place the low pieces. It builds pride in the setup!
This method lifts your centerpieces safely and adds balance. Trust me, it makes the table feel festive fast.
Layer Textiles and Faux Snow for Depth
Layers give snowflake centerpieces texture and interest, like building a cozy blanket fort. I start simple to contain messes, since salt and snow can scatter with active boys at the table.
Lay a fabric runner down the center first. White or blue linen keeps it neutral and easy to wash. Next, add a round placemat or mirror tile under your main cluster for reflection. Then, pour faux snow or Epsom salt into a shallow tray. The tray catches spills and frames the jars nicely.
For movement, drape ribbon tails from the edges or weave a narrow garland through the base. I tie ribbons in soft knots around jar necks too. Always leave the outer six inches of the table clear for plates and elbows. No one wants to juggle decor during pizza night!
Here is how I layer for different vibes:
- Cozy base: Runner plus burlap mat, then salt in a tray.
- Clean shine: Mirror tile direct on wood, with faux snow dots around edges.
- Playful touch: Add a felt snowflake path over the runner for kid appeal.
Layers make the scene feel full yet tidy. Your snowflake centerpieces will stand out with this easy depth!
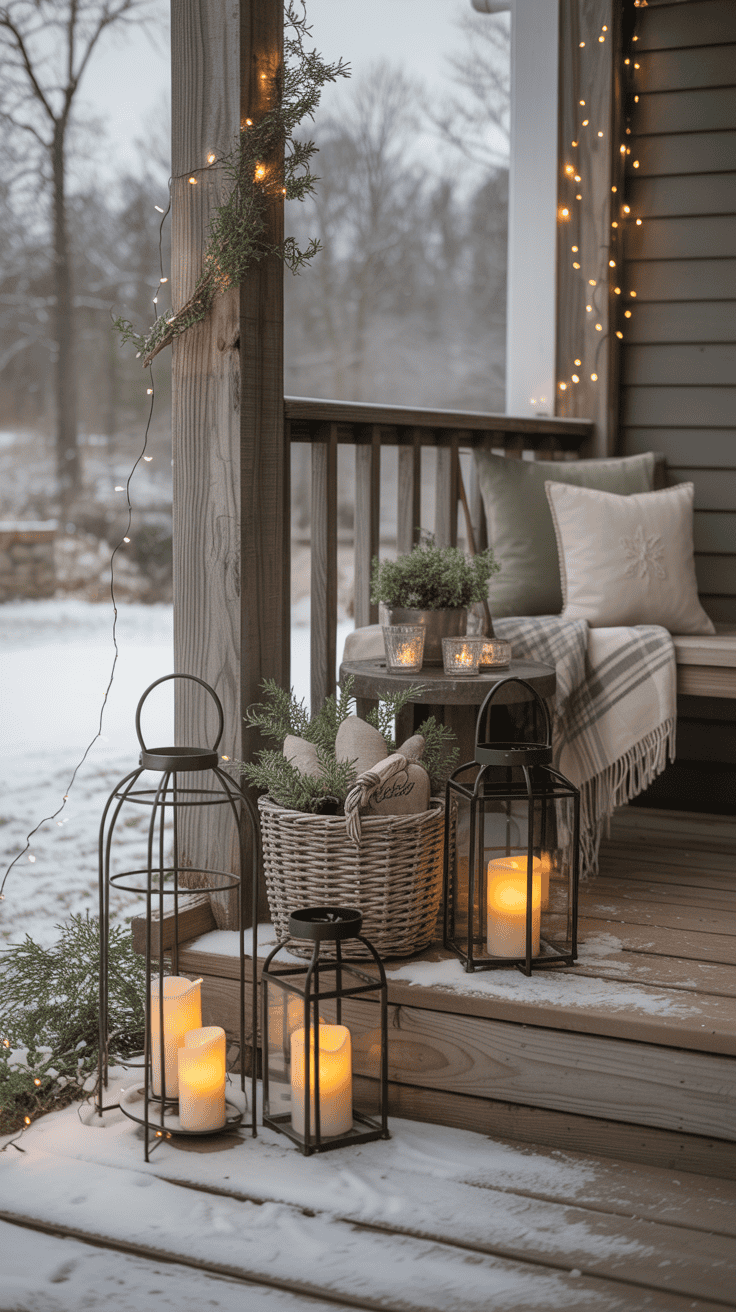
Add Glow with Fairy Lights, Candles, and Mirrors
Lighting turns snowflake centerpieces into a magical focal point. I stick to safe, warm options that mimic firelight without the risk around little ones. The glow makes winter nights feel extra special.
String warm white fairy lights under or around your jars. Tuck them into the base tray for a hidden sparkle. Use LED tea lights inside glasses or next to mirrors; they flicker just right. Mirrors and glass accents bounce the light, doubling the shine across the table.
For a lantern effect, drape paper snowflakes over fairy lights or place them above LED candles. The shadows dance softly. I love placing lights low so they highlight the salt and flakes without glare.
Quick phone photo tip for sharing your setup: Turn off overhead lights, lower the exposure a bit, and snap from across the table. Let the fairy lights steal the show! It captures that cozy magic perfectly.
- Battery powered only: No cords near kids or food.
- Mix it up: One cluster with lights under, another with tea lights beside.
This glow elevates everything. Watch your boys’ eyes light up too!
Finish with Small Accents that Pop
Small accents polish snowflake centerpieces without overwhelming the design. I add just a few to keep the focus on those pretty flakes. Less is more, especially for quick family setups.
Tuck fresh pine sprigs or faux ones around the base for a woodsy scent. Silver or blue ornaments dangle from jar rims add holiday cheer. Clear beads scattered like ice crystals catch the light beautifully.
Go bold with one ribbon bow on the tallest piece, or prop a mini framed quote like “Let it Snow” nearby. I pick accents in my color palette so they blend, not clash. With three boys, I choose durable items that won’t break if bumped.
Try these final touches:
- Natural pop: Two pine sprigs and a handful of beads.
- Festive nod: One ornament per jar, tied with twine.
- Personal twist: A small family photo in a snowflake frame.
These details make your table uniquely yours. Step back and admire; you did it!
Kid-Friendly Craft Time, Quick Cleanup, and Easy Storage
Making snowflake centerpieces with my three boys is one of our favorite winter rituals. It turns a simple afternoon into pure joy, but I always plan for the mess that comes with eager little hands. These tips keep things fun, safe, and stress-free, so we end up with beautiful decor and no chaos!
Set Up No-Mess Craft Stations That Actually Work
I set up craft stations that contain the fun right from the start. This way, my boys stay excited without glitter ending up in every corner of the house. We gather everything in one spot, and it makes the whole process smooth.
I use sheet pans or colorful placemats as personal stations for each boy. These catch spills before they hit the table. I pre-portion glitter or mica flakes into small bowls, so no one dumps the whole jar. Wipes stay within reach, along with a tiny trash bowl for scraps. For extra protection, I spread a plastic tablecloth over the work area. At the end, we just fold it up and toss any mess away!
To keep energy high, I turn on upbeat music. It gets them dancing between cuts. I also set a 20-minute timer. This helps them focus and wraps things up before anyone gets fidgety. Trust me, these stations turn craft time into a win every time. The boys love their own space, and I love the calm!
Keep Little Hands Safe While They Help
Safety comes first when my boys join in on snowflake centerpieces. I assign jobs based on their ages, so everyone feels included without any risks. It builds their confidence too!
For the youngest, simple tasks like placing stickers or pressing glue dots work best. He sprinkles Epsom salt with a spoon, which feels like magic to him. My middle one handles cutting with kid-safe scissors. They have blunt tips and bright handles that make snipping paper fun. The oldest sprinkles mica flakes or helps stack pieces.
I take over anything tricky, like using the low-temp glue gun. It stays out of reach until I need it. To cut down on loose glitter mess, we swap it for glitter cardstock. They cut shapes from it instead. Or we use mica flakes, which stick better and sparkle just as bright. These swaps keep things safe and simple. Watching their proud faces makes it all worth it!
Here are a few ways we divide tasks:
- Sprinkling and placing: Epsom salt, stickers, or glue dots for all ages.
- Cutting basics: Paper snowflakes with kid scissors for ages 4 and up.
- Adult only: Glue guns and any sharp tools.
Everyone helps, and no one gets hurt. What a relief!
Cleanup Tricks and Stain-Saving Tips
Cleanup after crafting with boys can feel overwhelming, but I have tricks that make it quick. We tackle it together, turning it into a game. Before you know it, the kitchen sparkles again!
A lint roller picks up glitter fast. I roll it over the table and their clothes in seconds. For Epsom salt spills, the handheld vacuum sucks it right up. No sweeping needed! If sticky tape leaves marks on glass jars, I dab rubbing alcohol on a cloth. It wipes away residue without scratching.
We wash jars immediately after use. This stops salt from caking inside. For lights, I remove batteries before storing. It prevents surprises next time. I keep a damp cloth nearby during the project too. It catches glue drips on the spot.
These steps save time and keep stains at bay. The boys even race to vacuum first! Try them, and cleanup becomes part of the fun.
Pack, Label, and Store So Decor Lasts Next Winter
Storing our snowflake centerpieces right means they look fresh for years. I involve the boys in packing, so they remember the project fondly. It is easy and keeps everything organized.
We flatten paper snowflakes gently. Then slip them into large envelopes or clear page protectors. This prevents creases. For breakable items like jars, we wrap them in soft tissue paper. I place everything in a clear plastic bin. On the front, we label it “Winter Table Decor” with a marker. The boys draw a quick snowflake next to it!
Inside the bin, I add a short note. It lists what worked well and what to restock, like more Epsom salt. We store the bin in a cool, dry spot, like a closet shelf. Away from humidity, nothing warps or fades.
This system makes setup next year a breeze. Pull out the bin, and the magic returns! The boys get excited just seeing their label.
Make It Yours: Holiday, Party, and Everyday Variations
One of my favorite parts about these snowflake centerpieces is how easy they adapt to any occasion. We tweak them for quick family nights or festive gatherings, and it always feels special without extra work. My boys love adding their touches, which makes our table uniquely ours. Let’s look at some simple ways to switch things up for holidays, parties, or everyday meals!
Cozy Weeknight Dinner or Family Movie Night
Weeknights with my three boys call for simple setups that keep the focus on food and fun. I aim low so plates slide past without knocking anything over. This keeps dinner calm and cozy!
Start with three jar luminaries using paper snowflakes and soft LED tea lights inside. The gentle glow warms up the table just right. Lay a knit runner down the center for that snuggly feel; it adds texture without fuss.
Fill hot cocoa mugs and place them around the edges. The steam rises like a little winter fog! For a personal touch, have the boys draw snowflakes on paper place cards. They color them with crayons, then we fold and set one at each spot.
- Why it works: Low height means easy reach for little hands grabbing rolls or napkins.
- Boy-approved twist: Let them drop a few mini marshmallows into the cocoa mugs during setup. It turns prep into a game!
This variation wraps up in under 15 minutes. We end up with a table that says “relax and enjoy” on busy evenings.
Holiday Brunch or Christmas Dinner
Holiday meals with the family deserve a bit more cheer, so I layer in reds and whites with a touch of gold. It brings that classic Christmas vibe without overwhelming the space. Safety stays top of mind, especially around excited kids!
Build around mirror tiles as the base; they reflect the lights and make everything sparkle. Tuck mini ornaments between the jars or along the edges for subtle shine. Add a big ribbon bow at one end of the runner to tie it all together.
For scent, scatter a few cinnamon sticks near the centerpiece. The warm aroma fills the room as we eat! Use LED candles only; they flicker safely near the table linens and food.
- Quick add: Drape sheer white fabric over the runner for a soft, snowy layer.
- Kid fun: The boys hang tiny ornaments on the ribbon bow. They feel like they’re decorating a tree!
This setup elevates brunch or dinner beautifully. It feels festive yet easy to clear for pie afterward.
Hanukkah or Winter White Party
For Hanukkah celebrations or a clean winter party, I go with blues, whites, and silvers. Clean lines keep it bright and airy, perfect for gatherings where we laugh and share stories. My boys adore the shiny accents!
Pair acrylic snowflakes with dreidel shapes or star cutouts from cardstock. Place them on stands around the mirror base for height without clutter. Add a silver runner to guide the eye down the table.
Keep the look open by spacing pieces evenly. No heavy fabrics here; let the light bounce freely! For extra pop, weave in a few blue ribbons loosely around the jars.
- Bright idea: Use clear vases filled with white beads to mimic falling snow.
- Family touch: The boys cut out simple stars to mix with the snowflakes. It’s quick and builds excitement!
This variation shines at parties. It stays elegant and lets the joy of the season take center stage.
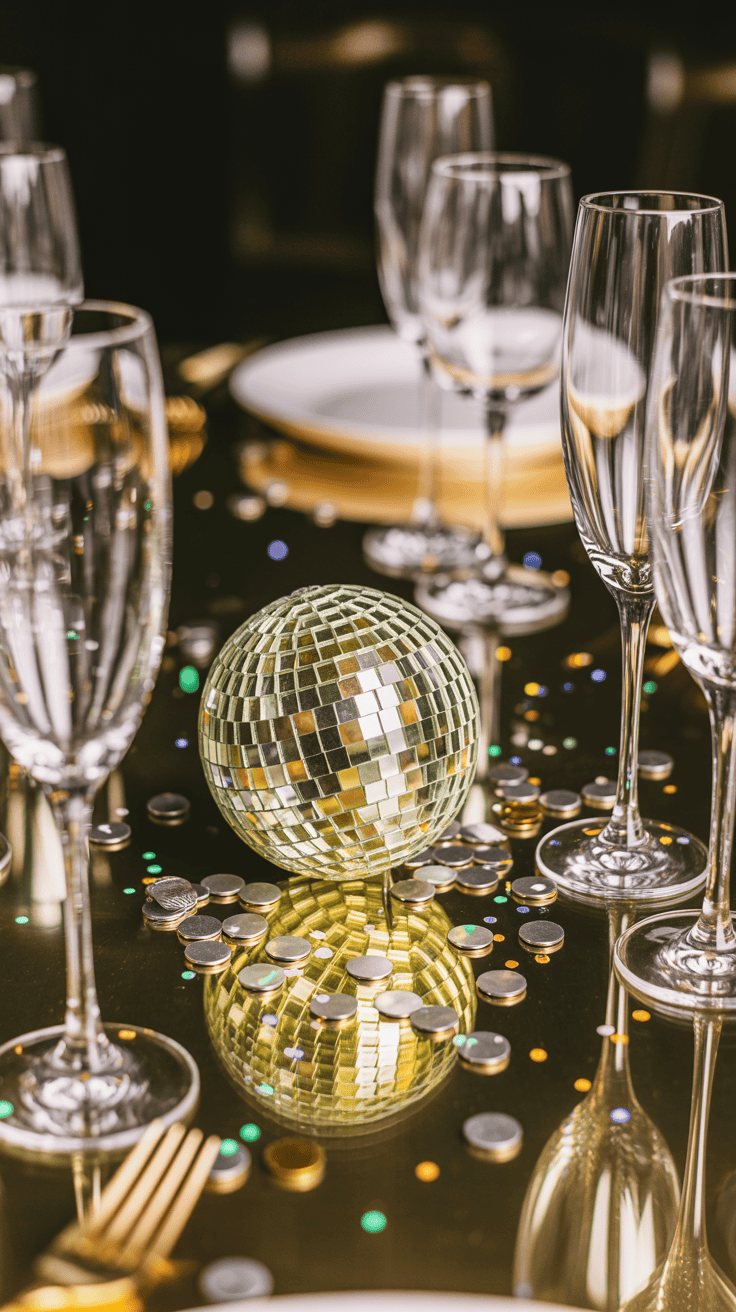
New Year’s Eve Sparkle on a Budget
New Year’s Eve calls for fun without the fuss, so I switch to black and silver with confetti touches. We keep it budget-friendly, using what we have plus a few thrifty adds. The boys stay up late, and this setup keeps the energy high!
Use mirror bases to amp up the shine, then dot confetti around the edges like midnight bursts. Add countdown number picks to the tallest jar; they stand proud and count down the hours!
Thread fairy lights through champagne flutes filled with faux snow. The lights twinkle like stars as we toast. Black ribbon ties on the jars ground the sparkle nicely.
- Budget saver: Reuse last year’s confetti or cut shapes from foil paper.
- Boy excitement: They place the number picks and “test” the lights a dozen times!
This twist brings party magic on a dime. We ring in the new year with a table full of cheer and zero stress.

Conclusion
As a mom of three energetic boys, I know how these snowflake centerpieces bring that perfect winter table decor sparkle without the hassle. We started with a simple plan for themes, budgets, and timelines that keep everything quick and calm. Then we jumped into easy projects like paper luminaries and glitter jars that the kids adore making. Finally, those styling tricks for height with stands, layers of faux snow, and warm LED glow turn it all into a cozy holiday tablescape.
Pick one idea today and set it up tonight. You will love the magic it adds to your dinners! Snap a photo of your setup and share it in the comments. I cannot wait to see your sparkle. Store those pieces away now, and they will shine bright next winter too.