This post may contain affiliate links. Read the full disclosure here.
Every year I tell myself I’ll book a studio session, then real life with three wild little boys kicks in. So instead, I figure out a way to create a cute valentine’s day backdrop for photos right at home, in between snack refills and Lego explosions. If your kids will not sit still, your winter light is gloomy, and your living room looks like a toy tornado hit, you’re in the right place. You don’t need a huge budget or pro gear, just a few simple tricks and a bit of planning.
In this post, I’ll share the easy, budget-friendly ideas that actually work in a real house, with real kids, and a phone camera. Think quick setups you can pull together during nap time, and props that double as décor so you’re not storing giant hearts all year. I’ll walk you through simple color combos, wall fixes for messy spaces, and little touches that make photos feel special without feeling staged. By the end, you’ll have a cozy, camera-ready backdrop that lets you capture those sweet, chaotic Valentine memories at home!

- Start With a Plan: What Do You Want Your Valentine Photos to Feel Like?
- Pick a mood: sweet, silly, or romantic family fun
- Choose one main color and one accent so your photos pop
- Match your backdrop style to your real space
- Simple Valentine’s Day Backdrop Ideas You Can Set Up in Under an Hour
- The easy heart wall: paper hearts, tape, and a blank wall
- Cozy bed or couch backdrop with blankets and pillows
- Balloon and garland backdrop that kids actually get excited about
- DIY backdrop with a plastic tablecloth or curtain panel
- Kitchen table cookie decorating scene as a real life backdrop
- Little Details That Make a Valentine’s Day Backdrop Pop on Camera
- Use soft, bright light so colors look true and skin looks smooth
- Pick outfits that pop against the backdrop, not blend in
- Add a few fun Valentine props, but do not overload the scene
- Keep kids happy: quick sessions, snacks, and silly prompts
- Make Your Valentine Photos Look Better Right on Your Phone
- Use simple phone settings so your backdrop looks sharp
- Frame the shot: leave some space and avoid clutter at the edges
- Quick editing tricks that keep your photos natural and bright
- Conclusion
Start With a Plan: What Do You Want Your Valentine Photos to Feel Like?

Before I hang a single heart or blow up a single balloon, I decide how I want the photos to feel. That one decision keeps me from buying random things and helps me build a valentine’s day backdrop for photos that actually looks pulled together. When I skip this step, I end up with a cart full of cute stuff that does not match and a backdrop that feels messy on camera.
So I ask myself a simple question:
Do I want this to feel sweet, silly, or romantic family fun?
Once I pick a mood, every choice gets easier, from colors and props to where I set it up and what the boys wear.
Pick a mood: sweet, silly, or romantic family fun

The mood you choose is like the “theme” in your head. It guides every decision, without needing a full Pinterest board or a mood board.
Here is how I think about it.
Sweet
If I want soft and snuggly photos, I go for a sweet mood. Think cozy and simple.
I like to use:
- Soft pinks and whites
- Paper hearts taped to the wall
- Cozy blankets and pillows on the floor
I picture the boys cuddled on a fluffy blanket, maybe holding a stuffed animal or reading a Valentine book. Nothing too loud, nothing too bright. Just soft colors, big hugs, and calm faces, at least for ten seconds if I am lucky.
Silly
When my boys are bouncing off the walls, a silly mood works better. I do not fight the chaos, I turn it into part of the photos.
For a silly vibe, I love:
- Bright reds and hot pinks
- Fun props like heart glasses, mustaches, or signs that say “XOXO”
- Lots of balloons on the floor or taped to the wall
These photos feel loud and fun. I let the boys jump, toss balloons, and make goofy faces. The backdrop can be a little “extra” here because the mood is playful and bold.
Romantic family fun
This one is my favorite when I want the photos to feel sweet enough for a couple photo, but still totally kid friendly.
For romantic family fun, I use:
- Warm string lights along the wall or around a doorway
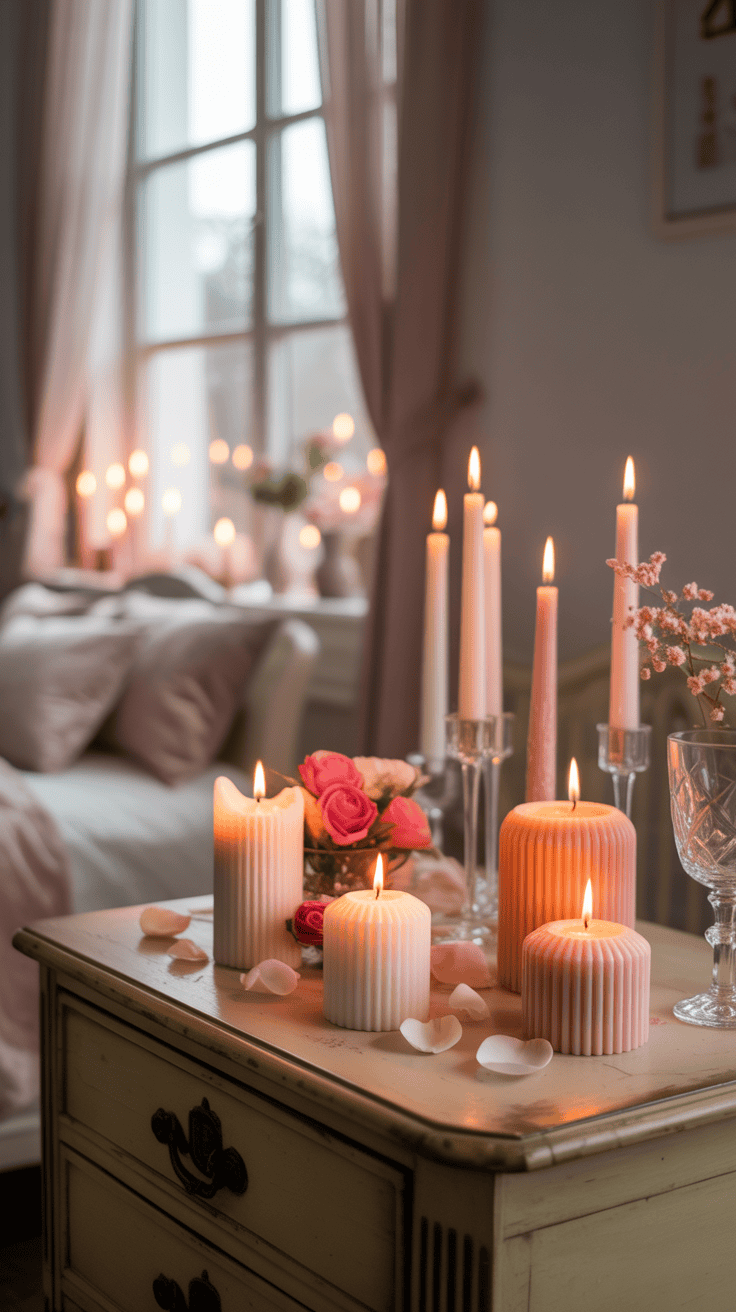
- Roses or faux flowers in a small vase or taped in a row on the wall
- Simple color palette, usually red, white, and maybe one soft pink
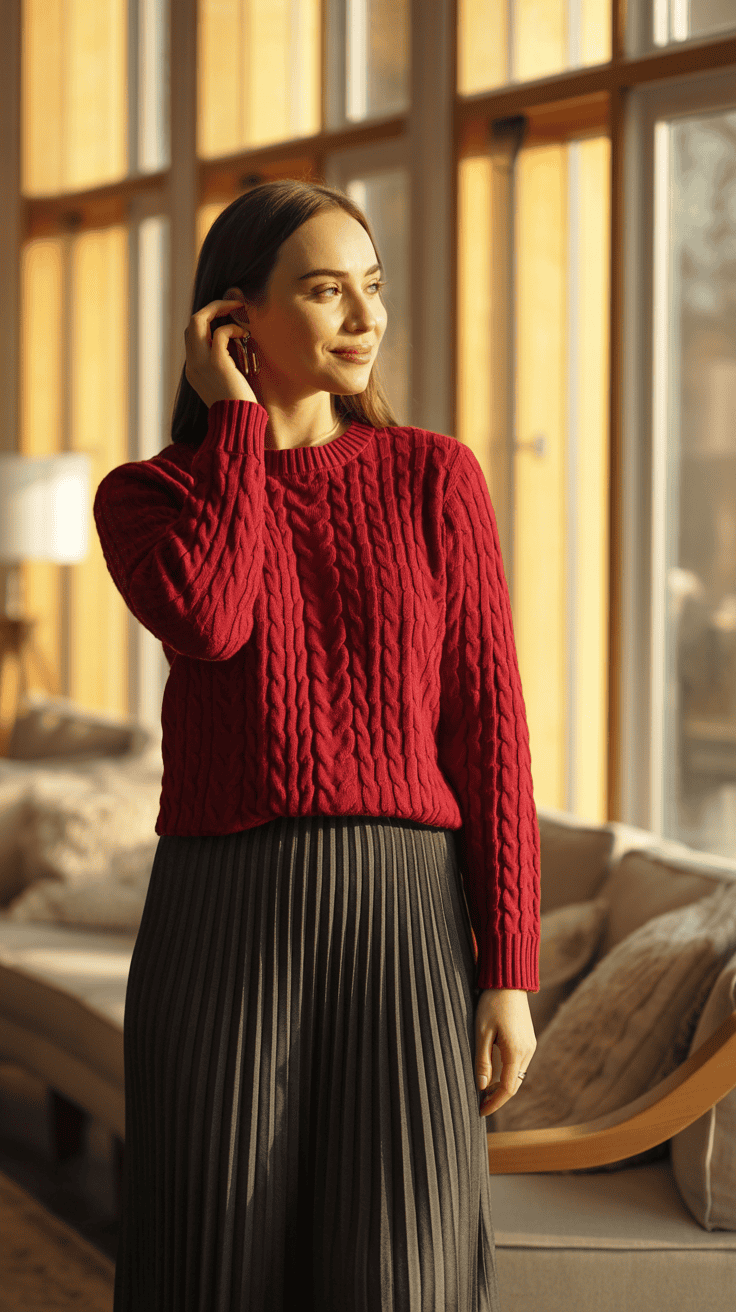
The boys can still be silly, but the background feels a bit more grown-up. I like this mood if I want a picture of my husband and me, then pull the kids in for a few group shots.
When you pick your mood, think about your kids first:
- Do they sit and snuggle, or do they run and climb?
- Will they handle glitter and roses, or do they need balloons they can attack?
- Do they hate scratchy sweaters but love pajamas?
If your kids are wild, a silly setup with balloons they can stomp will keep them happy on camera. If they like to read or build, a sweet, cozy corner with pillows might be better. Happy kids always look cuter than perfectly styled grumpy ones.
Choose one main color and one accent so your photos pop

Once I pick the mood, I move on to color. I keep it very simple: one main color, one accent color. That is it.
Too many colors can make the backdrop look busy, especially on a phone screen. Two strong colors make everything look more put-together, almost like a mini studio.
Some easy color combos that always look good:
- Red and white for classic Valentine, bright and bold
- Pink and gold for soft and pretty, great for a sweet or romantic feel
- Red and black for a slightly more grown-up look, still fun with kids
- Blush and cream for a very soft, cozy setup
I also peek at my boys’ closets before I decide. This saves money and drama.
You can:
- Match the backdrop to their favorite shirts, like red shirts with a red and white setup.
- Or, go for contrast, like a white backdrop with red hearts and the kids in denim and simple tops.
If I know one child will only wear his dinosaur sweatshirt, I plan around that. For example, I might do a white and red backdrop, then let the dino sweatshirt be the “real life” pop of color. It still looks cute and honest to who they are right now.
The goal is not perfect matching. The goal is a backdrop that supports the kids in the photo instead of fighting with them.
Match your backdrop style to your real space

Now that you have a mood and colors in mind, it is time to look around your house. I always tell myself, “Use the space you have, not the space you wish you had.”
You do not need a huge empty wall. You just need one small, workable spot, like:
- A short wall in a small apartment
- The end of a hallway
- A playroom corner
- The blank side of the couch
- A closet door with some tape-on décor
I like working with a real wall or doorway, especially with tiny, wild kids. It is easier to tape up a few hearts or hang a string of lights than to set up a full photo stand that they will try to climb.
Here is how I match the backdrop to my space:
- Small space: I keep the backdrop tight and vertical, like a strip of hearts down a closet door with a small stool in front.
- Living room wall: I set the kids on a blanket on the floor by the couch, decorate the wall above, and let the couch be part of the backdrop.
One more thing I always think about is safety and clean-up. I try to keep walkways clear so we are not tripping over balloons or light cords. If we use a hallway, I keep props tight to the wall. When we are done, I want to be able to take it all down in a few minutes before someone needs a snack.
When your mood, colors, and space all match, the whole setup feels intentional. Even if it is just one tiny corner next to the couch, it can look special on camera and still work for real family life.
Simple Valentine’s Day Backdrop Ideas You Can Set Up in Under an Hour

Once I know the mood and colors, I move straight into fast setups I can pull together during nap time. I like simple tricks that use stuff I already have, still look cute on camera, and give me a valentine’s day backdrop for photos without a huge project. These are the quick backdrops my boys actually sit for, at least for a few minutes!
The easy heart wall: paper hearts, tape, and a blank wall

If I have almost no time, I start with a heart wall. It looks adorable in photos and costs almost nothing.
Here is how I do it, step by step:
Pick a blank wall.
I look for a plain wall with good light, usually near a window. Light-colored walls work best, like white, cream, or light gray.Cut out paper hearts.
I grab whatever I have:- Construction paper
- Scrapbook paper
- Old gift bags or gift wrap
I cut hearts in two or three sizes. I do a few large ones, more medium ones, and lots of small ones to fill gaps. They do not need to be perfect, I promise they will still look cute.
Plan a simple pattern.
I pick one style and stick to it:- Rows: neat and graphic, great if you like clean lines.
- Scattered: hearts “falling” across the wall, very fun and playful.
- One big heart shape: all the paper hearts form one giant heart.
If I want it fast, I go with scattered hearts. Less measuring, more fun.
Tape the hearts to the wall.
I use painter’s tape or rolled-up washi tape on the back of each heart. I start by placing a few higher than eye level, then work my way down.I always keep in mind:
- Kids sit, crawl, or slump.
- Grown-ups often sit on the floor for photos too.
So I make sure the hearts go from about shoulder height up to a good bit above their heads. That way, even if my boys slide down the wall while I am taking pictures, there are still hearts behind them.
Check it through the camera.
I snap a test photo with my phone. If there is a bare spot, I add one or two more hearts right where the camera sees it.
For colors, I keep it bold and simple so it pops on camera:
- Red hearts on a white wall for a classic Valentine look.
- Pink and red on a light gray wall if I want it softer but still bright.
- White and light pink hearts on a darker wall if my wall is a deeper color.
If the boys’ outfits are busy, I stick to one heart color. If their clothes are simple, I mix two or three shades of red and pink to make it feel more fun.
Cozy bed or couch backdrop with blankets and pillows

When my kids are extra wiggly, I stop fighting it and move them somewhere cozy. A bed or couch backdrop is perfect because it keeps them in one place and feels natural.
Here is how I turn a regular bed or couch into a Valentine photo nook:
Start with a plain base.
I pull off busy blankets and use:- White, cream, or gray bedding
- Or a plain sheet tucked over the couch
A neutral base lets the Valentine colors stand out.
Layer in 2 or 3 Valentine pillows.
I use what I have first:- A couple of red pillow covers
- A pink throw pillow
- A heart-shaped pillow if I have one
I like to keep the number of colors low so the background does not look cluttered.
Add a cozy throw.
A fuzzy blanket or knit throw adds texture. I drape it across the bottom of the bed or over the arm of the couch. It covers any weird spots and makes the kids want to snuggle.
This setup is amazing for babies and toddlers. I can:
- Lay a baby on their back and shoot from above.
- Sit toddlers against the pillows and shoot from the side.
- Let siblings pile up in a snuggle heap and capture real giggles.
To keep the photos clean:
- I hide clutter at the edges of the frame. I move laundry baskets, toys, and random cups just out of view.
- I turn off the TV or close apps on a screen so there are no crazy colors glowing in the background.
- I check that no random cords or tissue boxes are peeking into the shot.
This feels less like a fake setup and more like a cozy, real-life moment that still photographs beautifully.
Balloon and garland backdrop that kids actually get excited about
If I want my boys to run to the backdrop instead of away from it, I bring out balloons. I skip the fancy balloon arches and keep it simple.
Here is my easy balloon setup:
- Pick a wall section.
I choose one side of the room so balloons do not roll everywhere and drive me nuts. - Blow up red, white, and pink balloons.
I mix sizes for a fun look. Then I:- Tape a row of balloons to the wall at about chest to head height, or
- Tie a few heart-shaped balloons to a small chair or bench.
- Add a heart garland above.
I hang a cheap paper or felt heart garland above the balloons. It “frames” the scene and gives the eye a clear top line. It also makes the setup look more done with almost no effort.
Safety is big here, especially with little ones:
- I keep latex balloons away from babies’ mouths. If one pops, I pick up every piece right away.
- I am strict about one balloon zone. All the balloons stay on that side of the room so I am not slipping on them while I take pictures.
- I use painter’s tape on the wall so I do not peel paint when I pull everything down.
Then I let the kids jump, toss, and squish the balloons. The movement gives the photos so much energy, and the background still looks planned.
DIY backdrop with a plastic tablecloth or curtain panel

If my walls are a mess or covered in art and I do not want to clear everything, I cheat with a DIY backdrop from a tablecloth or curtain.
Here is how I set it up:
Pick your backdrop piece.
I use:- A red, white, or pink plastic tablecloth
- A simple shower curtain
- A fabric curtain panel I already own
Hang it up.
I clip or tape the top edge to:- A door frame
- A curtain rod
- A backdrop stand if I happen to have one
I let it fall all the way to the floor so kids can sit or stand and still have color behind them.
Smooth out the worst wrinkles.
Plastic and shiny tablecloths can reflect light, which can look fun, but wrinkles really show in photos. I smooth it with my hands and pull it tight where I clip it.Add one small detail so it does not feel flat.
I keep it simple:- A small heart garland draped across the top
- String lights along one side
- A cluster of paper hearts in one corner
I like putting the detail slightly off to one side so it frames whoever is in the photo instead of taking all the attention.
This is my go-to when I need a “studio style” look fast. I can tuck the kids on a stool or little chair a few feet in front and get clean, bright portraits without showing the rest of my messy house.
Kitchen table cookie decorating scene as a real life backdrop
Sometimes my favorite photos are not in front of a wall at all. They are right at the kitchen table with frosting on everyone’s fingers.
A cookie decorating scene works as a real-life backdrop and keeps kids busy while I take pictures. Win-win.
Here is how I set it up:
- Cover the table.
I throw on a plastic tablecloth in red, pink, or white. It protects the table and adds color fast. - Set up a simple “decorating bar.”
I use:- A tray or cutting board with bowls of sprinkles
- A few small dishes of candy hearts
- Add one cute focal piece in the middle.
A small vase of flowers, a mason jar of heart-shaped lollipops, or even a milk jug with striped straws. Nothing huge, just a little Valentine touch.
Then I let the kids go for it. They frost, sprinkle, and lick their fingers while I move around the table and grab:
- Close-ups of tiny hands.
- Side angles that show their faces and the table.
- Wider shots that include a bit of the kitchen without stressing over perfection.
I remind myself that crumbs and spills are part of the story. A few smears of icing on the table tell me exactly what that year felt like. I would rather have real, messy smiles than a spotless background and fake faces.
This kind of backdrop feels like our life, just a little more colorful and a lot more sugary. And the kids are too busy having fun to complain about photos, which is always a win in my book!
Little Details That Make a Valentine’s Day Backdrop Pop on Camera

Once the backdrop is up, the little tweaks are what make it actually look good in photos. A simple valentine’s day backdrop for photos can look flat and dull, or bright and magical, just based on light, outfits, props, and kid moods. These are the tiny details I pay attention to so my boys look cute, not washed out or lost in the background.
Use soft, bright light so colors look true and skin looks smooth

Lighting sounds fancy, but at home it really comes down to one thing: use the window. Window light is your best friend!
Here is how I set it up in simple steps:
- I pick the brightest window in the house, usually late morning or early afternoon.
- I turn off yellow overhead lights if they make the room look orange.
- I face the kids toward the window, not the other way around.
If the light feels harsh, I fix it with tiny changes:
- I open curtains all the way so more light comes in.
- If the sun is strong, I pull sheer curtains closed to soften it. This works like a giant soft filter.
- If the backdrop looks dark, I move it closer to the window by a foot or two.
I always test with a quick phone shot. If I see dark eye circles or weird shadows under noses, I shift the kids a bit so the light hits their faces more evenly. I want soft light across their cheeks, not bright light behind their heads.
Backlight (when the window is behind the kids) can look pretty, but it is hard with phones. Kids usually turn into dark little shapes with glowing windows. So I keep it simple and make sure:
- The window is in front of them or slightly to the side.
- The backdrop is near the window, not stuck in a dark hallway.
For night photos, I still keep things soft and bright:
- A ring light on a tripod works great. I set it slightly above eye level and a little off to the side, not straight in their faces.
- If I do not have that, I grab two lamps with white bulbs and place them at angles. One on each side of the kids, a few feet away. That way the light wraps around their faces instead of flattening everything.
If the picture looks too yellow, I switch my phone camera to a cooler filter or adjust the white balance a bit. Even a small change can make skin look clearer and the reds and pinks look true.
Pick outfits that pop against the backdrop, not blend in

Once the light looks good, I think about what the boys are wearing. Outfits can either make the backdrop look amazing or make everyone blend into a red blob.
I keep one simple rule in mind: backdrop and outfits should not fight each other.
Here are a few easy combos that work:
If my backdrop is mostly red
I put the kids in:- White shirts
- Denim jeans
- Light pink
- Soft gray
This way the red hearts or balloons stand out in the back, and the kids stand out in front.
If my backdrop is white or very light
I let one child wear a red shirt, and the others wear:- Simple neutrals like gray or tan
- Soft pink
- Denim
That one red shirt pulls your eye to the child right away, which looks great in photos.
If my backdrop is busy with patterns, like lots of hearts or a printed tablecloth
I keep the clothes simple and solid. Too many patterns can look messy and distracting on camera.
I also avoid:
- Huge logos or characters
- Loud patterns, like giant stripes and wild prints together
I want faces to pop first, not the brand across a shirt.
Comfort matters even more than color. If clothes are itchy or too tight, my boys last about three seconds. So I always check:
- No tight pants that make it hard to sit or climb.
- No brand new shoes that rub or feel weird.
Happy, comfy kids will give you better photos than perfectly styled but miserable kids. If my child insists on his favorite dinosaur tee, I roll with it and build the rest around it. Real life looks sweet in photos too.
Add a few fun Valentine props, but do not overload the scene

Props can make kids excited to sit for pictures, which is half the battle. The trick is to pick just a couple of simple, safe props that fit tiny hands and do not steal the whole show.
Some favorites that are easy and mom-friendly:
- Felt hearts on sticks
Light, soft, and cute. Kids can pretend they are “wands” or hide behind them. - Small stuffed animals
A teddy holding a felt heart or a simple plush in Valentine colors. My boys always relax more when they can hold something familiar. - Mini chalkboard
I write a short message like “Love You” or the year. One kid can hold it in the middle. - Fake flower bouquet
A small bunch is enough. Kids can “offer” it to the camera or each other.
I try not to pile too many props in at once. Too much stuff can:
- Cover their faces.
- Make the photo feel crowded.
- Pull attention away from the kids.
So I usually pick one or two favorites for each mini session. For example, one round with the chalkboard, then a second round with a teddy and no sign.
I also try to think about what my own kids actually love. If someone sleeps with a certain stuffed animal every night, that goes into the scene. I might tie a small red ribbon around it or sit it beside them on the blanket. Little personal touches make the photos feel special, not just like a random Pinterest copy.
Keep kids happy: quick sessions, snacks, and silly prompts
The best backdrop in the world cannot fix a group of cranky kids. I learned that the hard way. So now I plan around kid happiness first, photos second.
Here is what works in my house with three wild boys:
Short sessions
I aim for 5 to 10 minutes at a time. That is it. I get everyone in place, shoot fast, then give them a break. If I need more photos, we reset later.Silly words and prompts
Instead of “Say cheese,” I ask:- “Say stinky socks!”
- “Who has the smelliest feet?”
- “Whisper ‘I love you’ in your brother’s ear.”
The real laughs after the silly prompt are the shots I love.
Let them help
I let the boys:- Stick a few hearts on the wall.
- Hold the balloon string.
- Decide which teddy sits in the middle.
When they help with the setup, they feel proud of “their” backdrop and stay interested longer.
I also promise goofy photos at the end. I say, “Give me three nice smiles, then you can do your craziest face.” That tiny bit of control makes a huge difference. Their wild photos are usually my kids’ favorites.
Some of my sweetest pictures are the ones I did not pose much at all. Quick little moments like:
- Brothers hugging without being asked.
- One child whispering a secret into another’s ear.
- A toddler staring at a heart balloon like it is magic.
I try to keep my camera out for a minute after I say we are done. That is often when the real cuddles and giggles happen, right in front of the backdrop I worked so hard to set up. Those honest little moments are the ones I print and hang every time.
Make Your Valentine Photos Look Better Right on Your Phone
Once the backdrop is up and the kids are semi-cooperative, the magic really happens on your phone. Little tweaks can turn a quick snapshot in front of your valentine’s day backdrop for photos into something you actually want to print and hang on the wall. The good news is, you do not need fancy camera skills, just a few simple habits you can use every time you pull out your phone!
Use simple phone settings so your backdrop looks sharp
Before I take a single picture, I do a tiny “phone check,” and it helps so much.
First, I clean the lens. I know it sounds silly, but my boys love touching everything, so my camera lens is always covered in fingerprints. I grab a soft cloth or the corner of my shirt and gently wipe the lens. That one step can take a foggy, hazy photo and make it look crisp.
Next, I think about how close I am. Instead of using the little zoom slider on my screen, I step closer with my feet. Digital zoom on both iPhone and Android can make photos look grainy and soft. If I want a closer shot, I walk in a bit and fill more of the frame with the kids and the backdrop.
When I am ready to shoot, I tap on a face on the screen.
On both iPhone and Android, tapping the face tells the camera, “Focus here, please.” It also helps the phone pick the right brightness. If the backdrop is stealing the focus, I tap one of the kids again so they snap back into sharp focus.
Portrait mode can be amazing, but I use it with a little caution. If the backdrop has important details, like words on a banner or pretty hearts I worked hard on, portrait mode might blur them too much. I like to:
- Take a few photos in regular photo mode.
- Then take a few in portrait mode, just to compare.
- Keep the ones where faces are sharp and the backdrop still looks like part of the story, not just a mushy blur.
Before I bring in all three boys, I always take a few test shots.
I sit a stuffed animal or one child in place, snap a couple photos, then check:
- Are the colors too yellow or too blue?
- Is anything important cut off at the top or sides?
- Are faces bright enough, or do I need to move closer to the window?
It only takes a minute, but it saves me from sorting through 100 photos later and realizing half of them are too dark or out of focus.
Frame the shot: leave some space and avoid clutter at the edges
The way you frame the picture can make your setup look like a cozy little studio or like a messy living room with hearts slapped on the wall. I have had both!
I start by looking at the whole screen, not just the kids. I check the corners and edges and ask myself, “What is sneaking in here?” If I see:
- Random toys
- Piles of laundry
- A trash can
- A bright colored plastic cup
I move them out of the frame. Sometimes I do not even clean, I just slide things a few feet to the side so the camera cannot see them.
If a big piece of furniture is awkward, I give it a tiny shove. Moving the couch or coffee table six inches can hide outlets, cords, and weird gaps. If moving things is not an option, I stand closer and crop tighter around the kids and the backdrop. Less room in the frame means less clutter to hide.
I also think about how full the frame is. I want the picture filled with:
- The kids
- The backdrop
- Maybe one or two props
Not bare wall and empty floor. If the kids look tiny in the shot, I step closer until I see mostly them and the cute background I worked so hard on.
Here is how I explain the rule of thirds in mom language.
Imagine your screen has a light grid, like tic-tac-toe. Instead of putting your child right in the center square every time, try placing them:
- A little to the left, or
- A little to the right
So their face sits near one of those “crossing points” in the pretend grid. It sounds tiny, but photos often look more interesting and less stiff when the person is just off-center a bit.
When I shoot, I like to get a mix of angles:
- A few close-up shots, from the chest up, that really show their faces.
- A few wider shots, that show the full outfit, backdrop, and floor setup.
The close-ups are perfect for cards and framed prints. The wider shots are fun for photo books and social media, because they show more of the scene and all your hard work.
If you are not sure which ones you will like more, take both. You can always delete later, but you cannot go back in time once the kids are over it and the balloons have popped!
Quick editing tricks that keep your photos natural and bright
Once I finish snapping pictures, I do a quick edit right on my phone. I do not use anything fancy, just the built-in tools in the Photos app on my iPhone or a simple free app on Android, like Google Photos or Snapseed.
I keep a little routine so it is fast:
Gently brighten
I bump up the brightness a bit so faces look clear. I do not blast it all the way to the top, just enough so I can see eyes and smiles.Add a touch of contrast
Contrast makes reds and pinks stand out and keeps everything from looking flat. I slide it up a little, then stop before shadows start to look harsh.Fix weird color warmth
Indoor light can make photos look very orange. On iPhone and Android, I look for something called “Warmth” or “Temperature.”- If the picture looks too orange or yellow, I slide the warmth down a bit.
- If it looks too cold and blue, I slide it up a tiny bit.
My goal is normal skin, not super tan or super pink.
Skip heavy filters
Filters can be tempting, but strong ones can turn kids into wax dolls and make reds glow like a stop sign. If I use a filter, I pick a soft one and lower the strength, sometimes down to 20 or 30 percent. I want it to enhance the photo, not completely change it.
If you find an edit you love, you can treat it like a tiny “preset” without getting technical. I do this:
- Edit one photo slowly until I like it.
- Then open the next photo and copy the same steps in the same order.
- Make tiny extra changes only if I need to.
On some phones, you can literally copy and paste edits, which is amazing. Even if you just repeat the same little tweaks by hand, your whole set of pictures will look consistent. That makes a big difference when you print a collage or post a group of photos together.
Before I finish, I always zoom in on each kid’s face and check:
- Are their eyes clear and not too dark?
- Is their skin still looking like real skin, not super smooth and fake?
- Are the reds and pinks still rich, not neon?
If something looks off, I back off the edit a bit. It is better to keep it simple and natural than to chase some “perfect” look and lose what your real child looks like right now.
With a clean lens, good framing, and a few tiny edits, those sweet, chaotic Valentine pictures start to feel a lot more special. And you did it all on your phone, in between snack breaks and “Mom, are we done yet?” moments!

Conclusion
When I zoom out on everything we covered, it all comes back to this: a valentine’s day backdrop for photos that really pops does not need to be fancy or expensive. It just needs a tiny bit of planning, some soft light, and a whole lot of love. Whether you tape paper hearts to a closet door, pull the kids onto the couch with cozy pillows, or let them go wild with frosting at the kitchen table, the magic is in the connection, not the props. Start small, keep it simple, and let those imperfect little details tell the story.
If this all feels like a lot, pick one easy idea and try it this year, even if the house is messy and the kids are wired from sugar. You can straighten one corner, open a window, grab a few balloons or books, and call it good. From one mom of three boys to another, these pictures are really about remembering this loud, sticky, beautiful season of life. Have fun, laugh through the chaos, and snap the picture anyway! Someday you will be so glad you did.