This post may contain affiliate links. Read the full disclosure here.
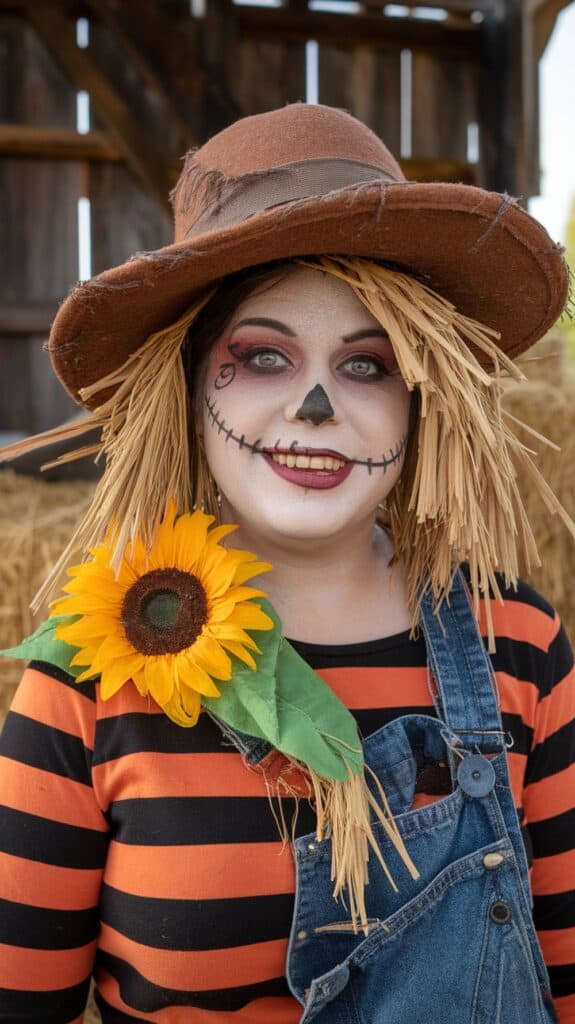
Making a wizard of oz scarecrow costume without sewing is music to my ears as a mom of three busy boys! I always get a kick out of simple, do-it-yourself projects that don’t involve dragging out the sewing machine or fighting with tangled thread. Quick, easy, and mess-free means I’m in—especially when little hands want to help and attention spans run wild. If you love a low-stress project you can finish in a single afternoon, you’re in the right place!
This scarecrow costume kit saved me hours — just add jeans and a plaid shirt!
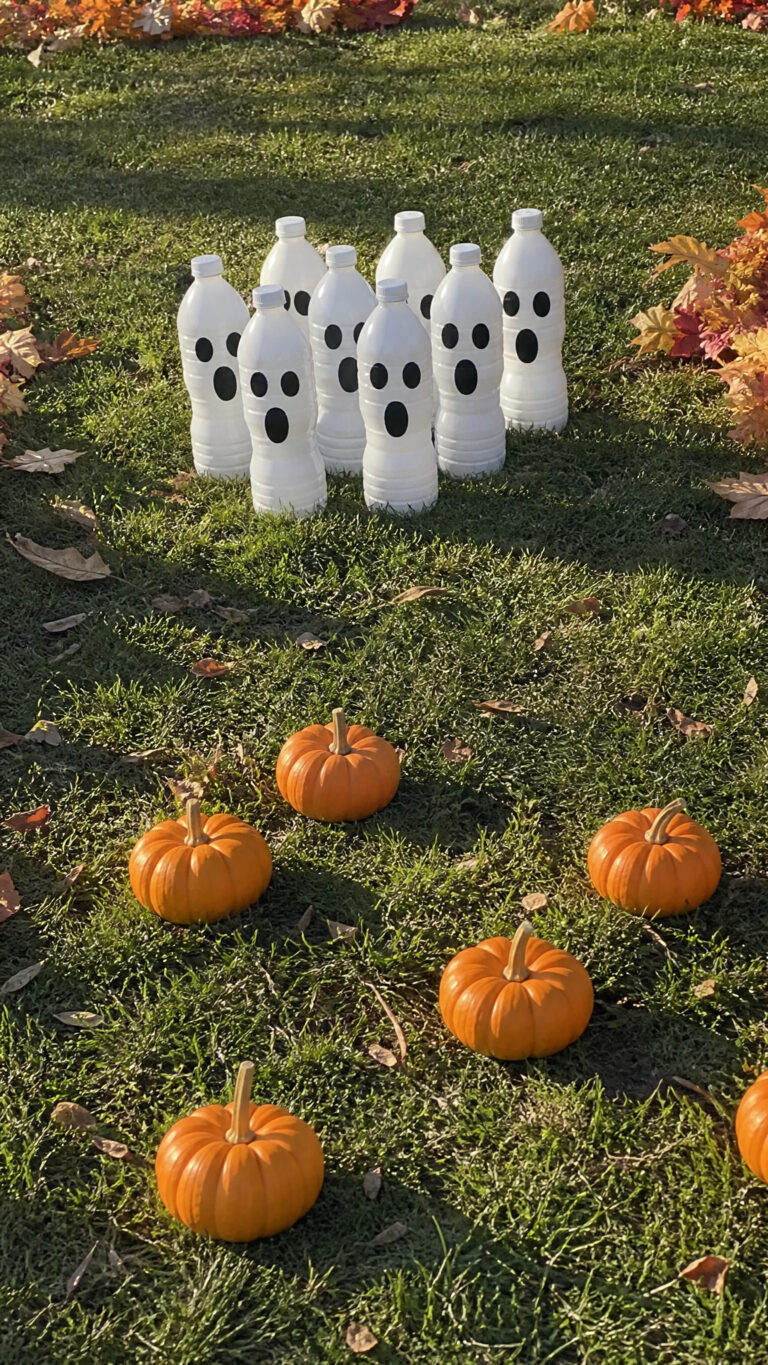
This idea came to life right after we did our fall leaf coloring one weekend!
I’m excited to show you my favorite way to put together this classic look with supplies you probably already have at home, or can grab in a quick trip to the store. No needle or fancy skills needed—just a few clever tricks, a dash of patience, and a lot of laughs with your kiddos. By the end, you’ll have a step-by-step plan for a no-sew scarecrow costume that’s comfy, cute, and totally doable. Let’s make this Halloween (or school spirit day) easy, fun, and memory-filled!

Why Choose a No-Sew Wizard of Oz Scarecrow Costume?

When you’re juggling busy schedules, endless laundry, and kids who bounce off the walls at the mention of costumes, the idea of a no-sew wizard of oz scarecrow costume feels like a tiny miracle. I’m all about options that save time and sanity. Plus, skipping the sewing machine doesn’t mean settling for anything less than cute and memorable. There are some serious perks to choosing a no-sew route for your scarecrow look, and I’m excited to share them with you!
Time-Saving Magic for Busy Moms

Some days, finding a stretch of uninterrupted time is impossible. With no-sew costumes, I can put together something fun and satisfying even if I have to pause twenty times for snacks or sibling drama. This method uses grabs from your closet, easy fabric glue, safety pins, and maybe a little hot glue action. Here’s why this matters:
- Fast assembly: Most no-sew costumes come together in an hour or less.
- Fewer supplies: I avoid fancy patterns, spools of thread, or tricky needles.
- Kids can help: My boys never tire of sticking on patches or stuffing straw!
Absolutely No Sewing Skills Needed
I know friends who can sew up a storm, but let’s be honest—many of us either never learned or just don’t have the patience! With no-sew, I don’t worry about making straight seams or wrestling with tangled bobbins. If you can cut straight lines and squeeze a glue bottle, you’re good to go.
- No technical know-how required.
- Fewer mistakes to fix.
- Anyone can join in, even if it’s your child’s very first try at making a costume.
Budget-Friendly and Easy to Personalize
I’m always hunting for ways to save money, especially with three fast-growing boys. No-sew costumes let me use what we already have or upcycle old clothes. Thrift stores and dollar bins are gold mines. Plus, it’s easy to make the costume fit your family’s style.
Simple ways to cut cost and make it special:
- Use jeans, flannel shirts, and hats already at home.
- Grab scrap fabric and ribbons instead of pricey sewing kits.
- Let your child pick their favorite patches or colors for a whimsical twist.
Mess-Free and Stress-Free Fun
Sewing projects sometimes leave my dining table looking like a disaster site. Not so with no-sew! Everything stays neat and tidy. If the glue oozes, it peels off most surfaces—or washes off little fingers. That means less clean-up and more time having fun.
- Minimal mess.
- Quick to set up and put away.
- Safer for younger kids, with no sharp pins or needles in sight.
Perfect for Last-Minute Plans
Halloween party tomorrow? Class spirit day you forgot about? No-sew lets you create a wizard of oz scarecrow costume in a pinch. I love that I can pull this together with an after-dinner burst of energy or a free afternoon.
- Great for procrastinators (trust me, you’re not alone).
- Supplies are easy to find, even at the last minute.
- Peace of mind knowing you’ve got a go-to option, no matter what the school calendar throws at you.
Making a no-sew scarecrow is all about combining what works for your family—keeping it light, accessible, and packed with personality. In the end, you get a cozy costume your child is proud to wear, with lots of memories made along the way!
Gathering Your Materials: Affordable & Accessible Supplies
Getting ready to make a Wizard of Oz scarecrow costume without sewing almost feels like packing for a quick family picnic. I want supplies that are quick to find, easy to buy, and kind to my wallet. No fancy stuff here—just simple pieces you can scoop up at a thrift shop, dollar store, or even your own closet. If your family is anything like mine, you want a project that’s fast, fun, and stress-free. Here’s what I grab to make sure nothing stands in the way of a happy costume afternoon!
Finding Budget-Friendly Basics
I love a good bargain, so my first stop is always the stuff we already have at home. Most years, we piece together old play clothes, outgrown shirts, or jeans with a little extra “character.” Keeping the scarecrow look simple makes it easy to spot the basics on hand or spot strong contenders at a thrift store.
Main items to look for:
- Plaid or flannel shirts (the baggier, the better)
- Old jeans or khaki pants (rips or tears add character)
- Straw hat or floppy garden hat (adult-sized hats work for kids, with a little trick I’ll share later)
- Scrap fabric, ribbons, or bandanas (free and cheerful accents)
- Brown vest or cardigan (optional, but a nice touch if you find one)
If there’s a piece you don’t have, check the children’s section at Goodwill, try the rummage bins at yard sales, or pop into the seasonal aisle at discount stores. Sometimes, I even borrow from my own closet, which my boys find hilarious.
Sourcing Straw and Filling Alternatives
No scarecrow is complete without a few bits of “straw” poking out. Real straw is itchy, so I keep it simple and soft for my kids.
Easy alternatives for scarecrow stuffing:
- Raffia ribbon (most craft aisles stock this, and it’s not sharp or itchy)
- Yellow tissue paper (cut into strips—I always have scraps from birthday parties)
- Yarn or felt strips (great for hands, ankles, and peeking out of hats)
- Fabric scraps (just snip into thin strips for a rustic look)
Sometimes, I mix a few types together. I tuck these into sleeves, around pockets, and in the brim of the hat. All it takes is a dab of glue or a quick knot.
Reliable No-Sew Tools
Since I skip the sewing, having a few key tools on hand speeds things up. You don’t need a full craft closet—just the essentials!
My must-have no-sew supplies:
- Fabric glue (strong and kid-safe—just check the label)
- Permanent fabric tape (works wonders for hems and patches)
- Hot glue gun (use with adult supervision for quick, tough spots)
- Safety pins (great for last-minute changes and easy patching)
- Scissors (sharp for fabric, safe for little helpers)
- Markers or face paint (brown, black, or orange for scarecrow nose and stitches)
Stock up on these ahead of time and you’ll avoid frantic trips mid-project. I keep everything in a shoebox so it’s easy to carry around, especially when one of my boys wants to “help” from a different room.
Getting Creative With Little Extras

Making a Wizard of Oz scarecrow costume is about adding special touches that feel right for your family. Sometimes my kids want a flower on their hat or a quirky patch on a knee. Dollar stores are full of tiny extras that spark big smiles.
Fun and cheap accessories to consider:
- Artificial sunflowers (clip to hat or overalls)
- Colored buttons (glue or pin on for a vintage look)
- Felt patches (let kids choose their favorite shapes)
- Jute string or twine (tie at the wrists and ankles)
- Old bandanas (around the neck or as a pocket square)
These little details turn the project into a memory. The best part? Most of these cost less than a dollar each and make your child’s scarecrow unique.
Quick Checklist for Shopping or Thrift-Store Runs
Here’s my grab-and-go list to keep handy on your phone:
- Flannel shirt
- Old jeans or pants
- Straw or floppy hat
- Scrap fabric or bandanas
- Raffia, yarn, or tissue strips
- Fabric glue or tape
- Scissors and safety pins
- Face paint or markers
- Little add-ons (flowers, patches, buttons)
With supplies like these, you can pull together the classic Wizard of Oz scarecrow costume in no time. Even better, your kitchen table won’t look like a tornado hit it, and your budget will thank you!
Step-by-Step Guide: Creating Your No-Sew Scarecrow Costume
A homemade wizard of oz scarecrow costume is pure magic for families! Once you have your basic supplies ready, it’s time to start building. I like to break it down into simple parts so I can wrangle three boys, keep the mess to a minimum, and still end up with a costume that gets lots of smiles. Get ready to glue, snip, and decorate—no sewing required! With each step, I’ll show you how to keep it fun and stress-free, especially with kids jumping in to help.
Making the Classic Floppy Hat Without a Stitch

The hat is the crown of the scarecrow look! You don’t need any sewing skills—just a little felt and a glue gun. I like to pick up felt sheets (or even a cheap felt floppy hat from the dollar store) and raid my scraps drawer for extras.
Here’s how I whip up a cute scarecrow hat everyone will love:
- Form the Hat Base:
- Grab a big piece of brown or black felt.
- Shape it into a loose cone, wide enough for your child’s head.
- Use hot glue along the edge to seal the seam. If felt is thin, layer two pieces for stability.
- Create a Floppy Brim:
- Cut a large circle of felt (wider than your child’s shoulders).
- Snip a circle in the center for the head opening.
- Glue the cone to the brim’s center, pressing firmly.
- Add Character:
- Make uneven cuts along the brim so it looks worn and “ragged.”
- Let your kids glue on artificial flowers, pieces of ribbon, or colorful patches. Sunflowers and daisies always look cheerful!
- Decorate and Personalize:
- Attach faux leaves, stray fabric bits, or even a small felt “patch” to the front.
- When my youngest helps, I let him pick all the colors—even if it’s wildly mismatched. The more “homemade,” the better.
Kids love sticking on their own decorations, and there’s no “wrong” way. I’ve seen hats covered in pom-poms, dinosaur stickers, even a teddy bear patch or two. The trick is to make it silly and memorable!
Transforming Old Clothes Into the Perfect Scarecrow Outfit
The outfit is pure childhood fun. I start with the basics—a big plaid shirt and loose jeans—stuffed with patches and wild colors. Nothing needs to fit perfectly, which is my favorite part of this whole process. You want comfort, wiggle room, and a dash of “farm fresh.”
Here’s what I do to get the look just right:
- Oversize Everything:
- Bigger is better! Baggy shirts and pants give that floppy, comfy scarecrow shape.
- Roll up the sleeves, cuff the pants, and let the hems drag a little for added charm.
- Patch It Up:
- Cut out patch shapes from old t-shirts, scrap fabric, or even fun bandanas.
- Let your kids help choose their favorite pieces, then use fabric glue to stick patches all over—elbows, knees, shoulders, and pockets.
- Layer the patches for a wild, “lived-in” look.
- Add Some Raggedy Details:
- Snip a few holes (carefully!) or fray the shirt cuffs and jean hems by pulling at loose threads.
- Don’t overthink it—messier is actually cuter for this costume.
- Mix Colors and Patterns:
- Flannel and plaid are classics, but a striped or flowered shirt works great too.
- Let siblings argue (gently!) about whose patch gets the best spot. The results always make us laugh!
My boys make a contest out of who can find the weirdest socks for scarecrow feet, which is always a highlight. Let your crew join in on making the scarecrow outfit their own.
DIY Straw Details: Bringing the Scarecrow to Life
Nothing says “scarecrow” quite like bits of straw poking out everywhere. Real straw is itchy, so I use soft, safe materials that are easy to find. Raffia, thick yellow yarn, or strips of tissue paper all look great and stay comfortable all day.
Here’s my favorite way to fake that straw look:
- Gather the “Straw”:
- Cut raffia, yarn, or tissue paper into strips about 8 inches long.
- If you have a paper shredder, let the kids go wild shredding yellow construction paper—talk about fun!
- Attach to Key Spots:
- Slide bundles into shirt cuffs and glue or tape in place.
- Stuff straw strips into pant legs at the ankles and around the waist.
- Tuck a little under the hat brim, letting some poke out over the forehead or behind the ears for a playful touch.
- Make It Secure:
- For extra security, use safety pins to hold bigger bundles inside sleeves and pant cuffs, away from sensitive skin.
- Wrap thin twine or yarn around wrists and ankles on top of the “straw” so it looks tied off, just like a real scarecrow.
- Add Some Movement:
- Encourage your child to wiggle, jump, or dance around before you’re done. If any straw pieces fall out, just pop in a few more with another dab of glue or tape.
Trust me, kids love stuffing their sleeves and seeing how goofy they look in the mirror. The best part is that none of this is permanent. You can adjust or remove pieces if anyone complains about itchiness.
Finishing Touches
All great costumes need simple, sweet finishing touches. This is where your scarecrow comes to life! You don’t need fancy makeup or expensive props—just a little face paint and whatever accessories bring a smile.
Quick and easy face paint ideas:
- Orange triangle on the nose for a “patchwork” carrot look.
- Brown or black lines stitched from the corners of the mouth to the cheeks.
- Soft rosy circles on the cheeks for a “stuffed” look.
Use a washable marker or face paint stick, and keep wipes nearby for smudges (my tip for wiggly little ones).
Homemade accessory ideas my family loves:
- Felt Crow: Cut simple bird shapes from black felt and glue onto a hat or shoulder.
- Rope Belt: Tie a length of old rope or jute around the waist, letting the ends fray.
- Funny Signs: Write “If I Only Had a Brain” or “Off to See the Wizard!” on cardboard and hang it with string.
- Extra Straw: Tuck bundles into pockets or glue to the top of old boots.
Don’t worry about things being perfect. Homemade costumes have real heart, and every crooked patch or smudgy cheek says “family fun” louder than any store-bought outfit. If your child takes over the decorating or swaps out the patches for their favorite color, just let the project run wild. You’ll make memories that outshine even the brightest yellow brick road!
Tips for Making Costume Time Fun and Stress-Free

Costume-making honestly brings out the wild side at my house, and the “wizard of oz scarecrow costume” project is no exception! After doing this year after year with three excited boys (who can’t sit still for long,) I’ve found a few easy tricks for keeping it lighthearted instead of overwhelming. Let’s be real, everyone wants happy kids and a fun memory—not a disaster zone in the kitchen. Here’s how I keep spirits high while piecing together the perfect scarecrow, minus the headaches!
Keep Expectations Simple and Flexible
I always remind myself that good enough is way better than perfect. Kids don’t care if patches are crooked or if the hat looks a little wild. Sometimes their wild decorations are what make me laugh the most! Whenever we start, I make it clear that we’re making something playful, not a fashion show outfit.
Some easy ways I take the stress off:
- Let the kids choose their favorite details even if it clashes or gets a little silly.
- Laugh at the mistakes. If glue lands in the wrong spot or patches overlap, it just adds character.
- Aim for comfort first so nobody ends up itchy or cranky.
Set Up a “Station” Before You Start
Before calling the kids over, I lay out all the supplies on a big table or even the floor. This keeps everything in one place and stops the constant search for scissors or glue. I put all the little things (like markers or pins) in cups, so they don’t roll away.
What goes on my table before we get started:
- Shirt and pants right in the middle (the costume “canvas”)
- All fabric scraps and ribbons sorted out
- Glue, tape, and scissors at the ready
- Bowls or trays for tiny extras like buttons or patches
- Wet wipes for sticky fingers or quick messes
Kids love seeing all the colorful options at once, and I’m not dashing around trying to find lost supplies. We call it our “costume buffet”—and it makes everything run smoother!
Let Kids Do the Decorating

Costume day is way more special when kids see their own work shine. I give my boys a job for every step. Some are patch masters, some are straw stuffers, and the youngest just likes painting “mud” on the knees with markers!
How we split up the fun:
- One child is in charge of choosing patches and fabrics.
- Another gets the glue (with extra supervision.)
- The youngest hands out accessories or sticks straw into cuffs.
- I help with anything sharp or sticky, but mostly just cheer them on.
Even little ones can help with big jobs, and they take so much pride wearing something they made themselves. Results are always unique—one year our scarecrow had polka-dot arms and pirate socks!
Take Lots of Breaks and Celebrate Small Wins
Kids’ patience is about as long as a squirrel’s attention span. I keep things relaxed by planning short breaks. Snack time between steps works wonders if someone gets restless or frustrated. If one patch goes on straight or a hat looks extra adorable, we all cheer and snap a quick photo. These tiny celebrations keep everyone excited to keep going.
Why I never rush:
- Tangled glue or cranky kids just kill the mood.
- Breaking the project into steps saves everyone’s sanity.
- Quick breaks let everyone admire what they’ve done so far.
Embrace the Mess (Within Reason!)
Okay, every fun costume project has a bit of chaos. I plan for a mess, not a disaster. We wear old t-shirts, throw down a sheet or plastic tablecloth, and keep a mini trash bag handy. At the end, I let the kids have a race to see who can collect scraps the fastest—a tradition that actually works!
Simple ways to handle the aftermath:
- Prep the work area so it’s easy to clean.
- Wipes and paper towels are a must.
- Let kids help tidy up so it feels like part of the fun.
Memories Matter More Than Perfection
The best part of any wizard of oz scarecrow costume is the time spent together. The little hiccups—the glue on the table, the giggles when patches land on foreheads, the silly hat that sits sideways—all turn into the stories we laugh about for years. I never want to miss these moments by worrying about the finished photo.
Key reminders I live by:
- Every costume is special if it’s made with love (and a little chaos).
- Letting go of perfection makes the day sweeter.
- A goofy, messy family project is always a highlight of the season.
So, trust yourself, keep it simple, and lean into the fun! The best costumes are made of laughter, patches, and a few glued-on memories that stick around much longer than the costume itself.
Creative Variations: Scarecrow Costume Ideas for All Ages
When I first set out to make a wizard of oz scarecrow costume—with zero sewing—my boys each wanted a look that was totally their own. That’s actually the best part! There are so many ways to switch up this classic costume for little kids, teens, or even us “grown-up” Dorothy fans. With a few simple tweaks, you can build a scarecrow look that fits any age, personality, or wild idea your family brings to the table.
No need to stick to just the basics. I love getting creative and letting each child’s style shine. One year, I even joined in for our family’s group costume as a tall, silly scarecrow with mismatched socks. The memories (and photos) are worth every second. Here are some of my favorite ways to make any scarecrow costume unique and fun, from toddlers to adults.
Toddler Scarecrow: Cute and Comfy
With little ones, comfort wins every time. My youngest wanted to wear his scarecrow suit to bed, which is high praise from a kid who usually rips off anything “itchy” after five minutes. Keeping things soft, loose, and easy to move around in is key.
Here’s what works best for toddlers:
- Soft, Stretchy Clothes: Use cotton leggings and onesies instead of regular jeans or stiff shirts. Neutral pajama sets make a perfect base you can easily decorate.
- Velcro Patches: Instead of glue, attach felt patches with sticky Velcro so you can pull them off after Halloween. This saves the outfit for another wear.
- No-Fuss Straw: Use soft yellow yarn for “straw” details at the wrists and ankles. It won’t irritate delicate skin.
- Elastic Accessories: Skip anything tight or hard to tie. Choose elastic cuffs, soft hats, and slip-on booties.
- Oversized Hat: Choose a floppy toddler hat and glue on one or two lightweight felt flowers. Not too heavy, not too fussy.
Toddlers lose hats every five minutes, so I use a chin strap or a little bit of Velcro tucked under the chin. It keeps the look together until the last candy is handed out.
School-Aged Kids: Whimsical and Wild
Once my boys hit kindergarten, their ideas exploded. One wanted rainbow hair peeking out of his hat. Another insisted his scarecrow be a “robot scarecrow” with shiny silver patches. I let them take over—what could possibly go wrong?
Here’s how I make it extra playful for big kids:
- Mix Colors and Patterns: Anything goes! Plaid shirt with polka dot patches? Perfect. Purple pants and a green hat? Why not.
- Glitter Glue and Stickers: Let kids add a little sparkle to their costume with easy craft supplies.
- Goofy Accessories: Oversized bow ties, silly glasses, or even a small plush animal “friend” pinned to their shoulder.
- Personalized Signs: Every year, we make new cardboard signs. “Vote for Brains!” was a crowd favorite.
- Face Paint Fun: Let them choose their own colors for the nose and cheeks.
School-age kids love showing off their own ideas. I step back as much as possible, only jumping in to supervise the glue or help with safety pins.
Teens & Preteens: Vintage Vibes or Edgy Style
Yes, even teens can have fun with a no-sew scarecrow! My niece took the classic scarecrow and made it cool for her junior high dance. She threw in some vintage flair and a bit of attitude, and it totally worked.
Easy ways to give it extra style:
- Distressed Denim: Let teens cut and fray their own jeans for an authentic look. The more fringe, the better.
- Layered Flannel & Jackets: Let them mix vests, plaid shirts, and chunky cardigans.
- Accessorize: Think dark or colorful beanies, wool scarves, beaded bracelets, and statement boots.
- Grunge Scarecrow: Add black lipstick or eye makeup with orange stitches for something bold.
- Light-Up Elements: Use battery-powered fairy lights tucked into the hat or cuffs for a Halloween night glow.
My tip for teens? Give them free rein and a bag of old clothes—they’ll do the rest. If your teen is not a fan of face paint, they can just pop on a hat and call it done.
Family and Group Scarecrow Costumes
One of my favorite ways to keep Halloween easy is to make it a whole family thing. A group of scarecrows trailing down the sidewalk is a crowd-pleaser! Plus, nobody gets left out.
Want to try it as a family? Here are fun ideas:
- Mix and Match Styles: Each member picks their own shirt and hat. No two scarecrows have to match.
- Add Dorothy or Tin Man: Mix in other Wizard of Oz characters for a full cast.
- Pet Scarecrow: Even the dog can join with a bandana and a patch glued to their collar.
- Take a Themed Photo: Set up some hay bales and snap a silly group photo for memories.
- Group Signs: Each person carries a different Oz-inspired sign, like “Follow the Yellow Brick Road.”
These group costumes are simple to pull off when you use no-sew tricks. The best part is everyone can help make their own look.
Scarecrow Accessories for Any Age
Sometimes the real magic is in the extras. No matter how old your scarecrow is, a few added details make the costume unforgettable.
Favorite add-ons include:
- Mini Pumpkin Buckets: Great for holding candy or treats while in costume.
- Flower Crowns: Make a garland of fake flowers and leaves for something a little fancy.
- Patchwork Tote Bags: Glue colorful scraps onto old reusable bags for Halloween goodies.
- Suspenders: Add a playful farmer vibe. Old suspenders, even mismatched, look perfect.
- Homemade Bird Friends: Craft tiny felt crows or bluebirds and pin them to shoulders or hats.
Accessories let everyone go a little wild or stay simple—whatever fits the mood.
Simple and Safe Adaptations
Costumes sometimes need a little extra love for safety or comfort, especially if you have kids of different ages running around.
Safety tips I use every year:
- For toddlers, avoid small add-ons like buttons or tiny charms that could be choking hazards.
- Use soft, flexible materials, and check for anything scratchy inside hats or sleeves.
- If trick-or-treating at night, add reflective strips or LED bracelet lights for visibility.
- Keep scarves and rope belts loose. Secure everything with knots or tape rather than tight elastic.
These simple swaps make sure everyone stays cozy and safe while looking adorable.
Seasonal Scarecrow: Swap It for Any Holiday
Honestly, a scarecrow costume isn’t just for Halloween! We’ve re-used ours for classroom storybook day, fall fairs, and even the family Thanksgiving talent show.
Here’s how to give your scarecrow a seasonal twist:
- Add Festive Colors: Swap in orange, gold, or green for Thanksgiving. Try red and white patches for a winter party.
- Holiday Props: Give your scarecrow a felt candy cane, a paper snowflake, or a mini flag for the Fourth of July.
- Spring Blooms: Attach fake daffodils or tulips for a fresh, garden-party look.
A simple change in colors and add-ons takes the same base costume through the whole year. It’s such a win for busy moms!
No matter your child’s age, favorite color, or wildest idea, you can make a wizard of oz scarecrow costume that fits their personality and your schedule. I love how this no-sew base grows with our family, making every Halloween, school play, or last-minute party both creative and special.
Conclusion
Making a wizard of oz scarecrow costume without sewing turns a simple afternoon into a memory your family will talk about for years. I love how this project brings out creativity, laughter, and teamwork, all with materials most of us have around the house. Every crooked patch, ragged hat, and glue-splattered sleeve tells a little story from costume day.
If you follow these steps, you’ll end up with something comfortable, unique, and packed with family charm. More important, you’ll have shared the kind of fun that always matters more than a perfect costume. Please share your scarecrow photos and wild ideas with other busy moms—we all love a peek behind the scenes! Thanks so much for reading and happy Halloween or dress-up day to you and your crew. Here’s to another year of memories, not just costumes!