This post may contain affiliate links. Read the full disclosure here.
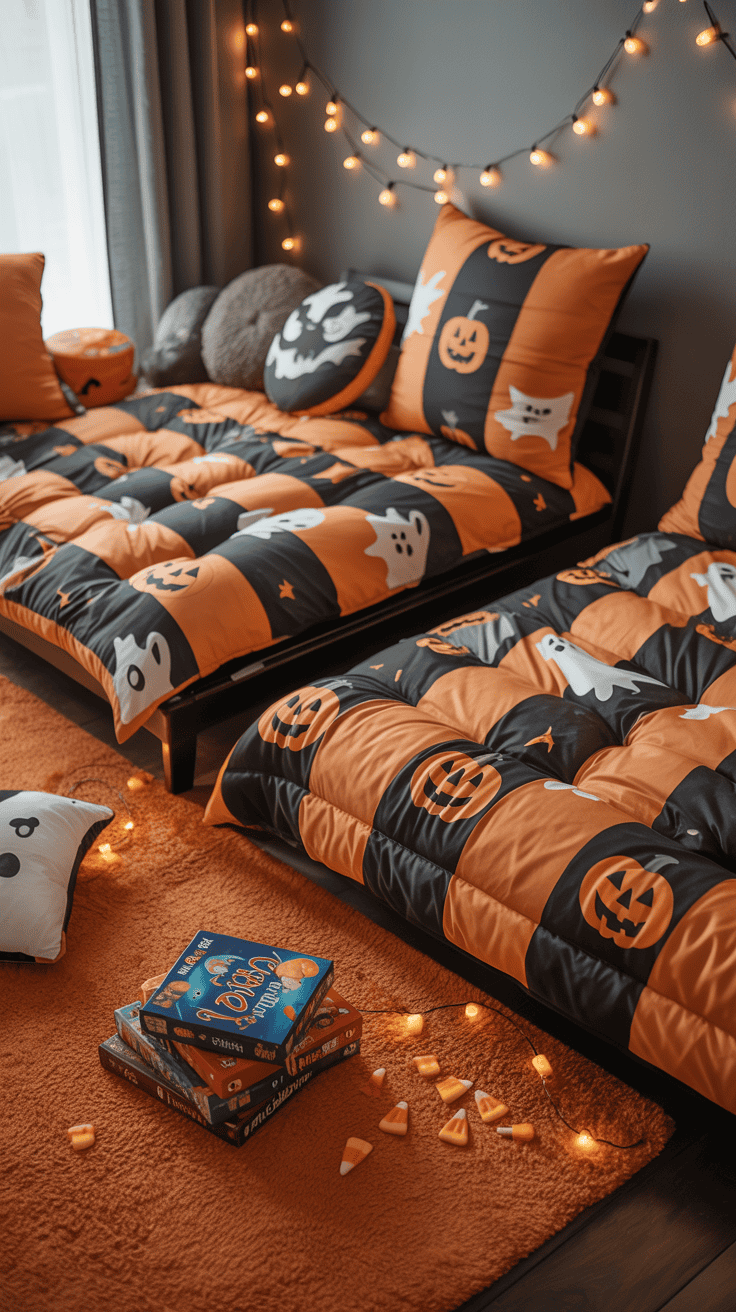
Halloween is such a big deal at our house, and nothing gets my boys more excited than filling every corner with our own witch decorations for halloween! As a mom of three adventurous boys, I’ve learned that spooky crafts at home bring out their creativity, get some giggles, and help us make the best memories!
The mess is real, but so is the fun—especially when little hands are busy and imaginations run wild. It’s simple, affordable, and you don’t need fancy supplies, just a kitchen table and some excitement.
Grab a pack of witch hat craft supplies and let the kids help — messy fun, guaranteed giggles, and the cutest results.
If you love the idea of making your own witchy decor with your kids (and getting a little messy along the way) you’re in the right place! I’ll show you my favorite ways to keep things playful and family-friendly, while turning your home into a magical Halloween hideout. Let’s jump in and get those brooms ready!
Essential Supplies for DIY Witch Decorations
Getting started with witch decorations for Halloween always starts with a wild trip through our stash of art and party supplies. Honestly, it feels a bit like a treasure hunt: you find a forgotten bag of googly eyes here, a surprise spool of purple ribbon there. I’m telling you, you don’t need a big budget or specialty shop. Most of what we use comes straight out of the “mom drawer” in the kitchen or the corner of the kids’ playroom. Here’s what you’ll want to have on hand before you gather the kids and launch into a witchy mess!
Basic Supplies You’ll Find at Home

You probably have half of these things in your cupboards already, which is why I love this type of project! Here’s what I always keep close by when we’re making our own spooky witches:
- Construction paper (green, black, purple, orange)
- Scissors (make sure they’re kid-safe)
- School glue and glue sticks
- Tape (clear and double-sided)
- Markers, crayons, and colored pencils
- Old newspapers or brown grocery bags for covering the table
Tip: Don’t forget a tray or old baking sheet to corral the supplies and catch runaway glitter or sequins!
Spooky Add-Ons for Extra Magic
Once you have the basics, you can throw in a dash of sparkle or a few quirky details to make each witch unique! These little touches turn simple supplies into Halloween treasures. Here are some favorites at our house:
- Googly eyes (the bigger, the better)
- Yarn (black, green, or neon colors for hair)
- Pipe cleaners (wiggly arms, spooky hats, broomsticks)
- Felt pieces or fabric scraps
- Popsicle sticks or wooden dowels for brooms and wands
- Sequins, buttons, or plastic gems for extra pizzazz
I never underestimate the power of a few extra glitter glue pens—my boys love seeing their witches’ hats shine under the light!
Common Household Items That Work Like Magic
You don’t always need to buy anything. A few household odds and ends can transform into witchy details in no time, and the kids think it’s hilarious adding kitchen junk to our decorations.
Here’s what we often use:
- Empty toilet paper rolls (great for witch bodies or little cauldrons)
- Cotton balls (for cloudy potion puffs or fluffy hair)
- Bottle caps (perfect for mini hats or cauldron bottoms)
- Egg cartons (they make spooky little witch faces)
- Old buttons or beads
If you’re like me, these things tend to multiply in the junk drawer. Now they get a second life as part of our Halloween fun!
Must-Haves for Witchy Details
Every witch needs a few signature pieces, right? These next supplies help bring that classic look together—pointy hats, funny little noses, and broomsticks that look like they’re ready to zoom.
- Black paper or felt (for hats and shoes)
- Orange or brown yarn or string (for broom bristles)
- Green paper or paint (for faces and hands)
- Ribbon or lace (for a fancy witchy cape)
- Black pipe cleaners (for wiry arms or legs)
I also save every bit of ribbon and string from gifts or packages—you never know when you’ll need that perfect black bow!
Seasonal Finds for Extra Fun
Around Halloween, stores fill up with all kinds of themed extras. I always let my boys pick out one or two things when we swing by the craft aisle, just to add some extra excitement to our projects.
Some kid-approved favorites:
- Small plastic spiders or bats
- Halloween-themed stickers
- Glow-in-the-dark paint or stickers
- Miniature witch hats from the party section
- Purple or green pompoms
Just a few of these small store-bought items can make homemade witch decorations for Halloween feel even more special and festive—especially to little kids with big imaginations!
Having all these supplies ready turns any afternoon into the start of a magical project. There’s something about dumping everything out on the table and watching the kids dream up witches from what looks like a pile of junk. Get ready, because the fun is about to start!
DIY Witch Hat Centerpieces That Wow
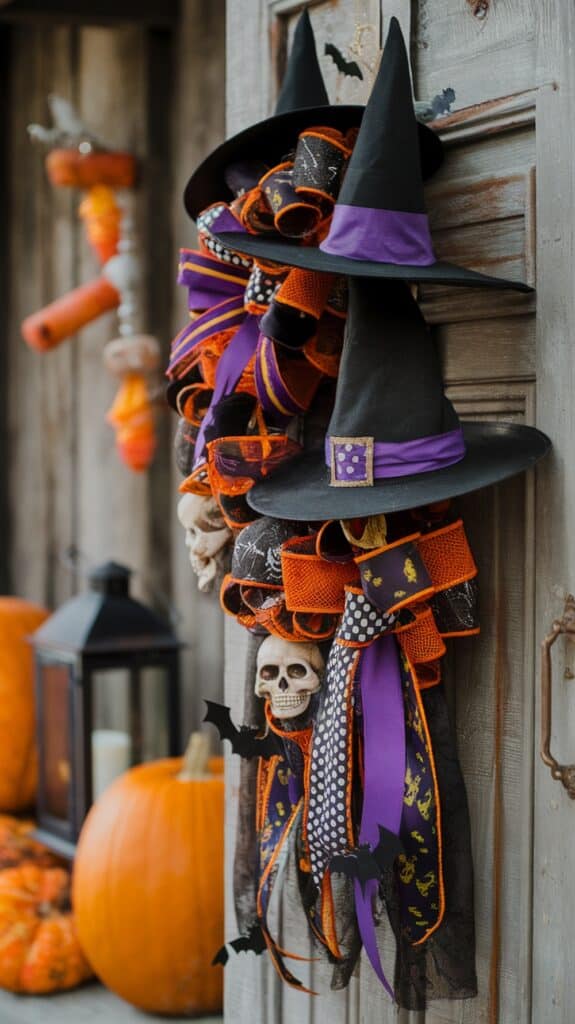
Nothing anchors a table quite like a quirky centerpiece, especially when it comes to witch decorations for halloween! Our kitchen turns into party central every year, and my boys love making these classic witch hats to stick in the middle of the table. They bring in the spooky magic, but never feel too serious or overdone. The best part? You can whip up a whole batch without running to the store or spending a ton of money. These hats look just as great on the table as they do in the windows or even tucked into planters outside.
How to Make Classic Paper Witch Hats

A classic paper witch hat is simple, quick, and the perfect way for kids to show off their personality. We usually set up a big “witch hat factory” in the dining room and let everyone pick their own colors and decorations. Here’s how we make them at our house:
- Start with black construction paper (or purple if your crew loves a pop of color). Cut out a large circle for the brim and a triangle for the hat’s cone.
- Shape the cone by rolling the triangle into a pointy hat and taping or gluing the seam. Tuck the base of the cone into a small slit in the center of the brim, and secure with tape or glue underneath. Even little hands can help with this part!
- Let the decorating begin! This is where the wild ideas come out. Pull out markers, crayons, or even a white pencil for doodling on stars, spider webs, moons, or any spooky shapes the kids dream up.
- Prop up your finished hats by turning a cup or jar upside down and settling the hat right on top, or push a wooden dowel inside to make a “stand” for planting the hats into a decorative bowl or planter.
Here’s a quick list of ways we make each centerpiece a little different:
- Mixing up the brim size for tall or short hats.
- Layering different colors for a two-tone look.
- Cutting out zigzag or scalloped edges for the brims.
- Gluing on paper “buckles” or “bands” for a vintage witch look.
I love watching each hat turn out a little different—I always end up with a table full of witchy characters straight from the kids’ imaginations!
Upgrade With Ribbons, Glitter, and More!
Now for the part that gets everyone giggling: embellishments! This is where plain hats become wow-worthy centerpieces. My boys’ favorite part (other than sprinkling way too much glitter) is picking out the extra details that show off their personalities.
Kids can get creative by adding:
- Colorful ribbons wrapped around the hat’s base, or tied in bows for extra flair.
- Glitter glue painted in zigzags or swirls. Yes, it makes a mess, but a sparkly mess always feels worth it!
- Googly eyes scattered across the brim for a silly, monster-witch vibe.
- Foam stickers in shapes like pumpkins, bats, or cats.
- Mini plastic spiders crawling up the hat’s side.
If you want to get even more creative, raiding the recycling bin brings in surprises like:
- Bottle caps for hat toppers.
- Yarn scraps for curly “witch hair” poking out from under the brim.
- Leftover buttons for colorful accents.
Kids love when you set up a “hat decorating station.” I fill muffin tins with different ribbons, sequins, and leftover party favors—then let them go wild. Giving each child their own hat to design keeps everyone busy and proud of their unique creation.
Bonus tip for getting kids involved: Play spooky music, and make a “witch hat contest!” The silliest hat gets displayed in the center of the table all month. The winner changes daily, which they love.
The best thing about these hats? No two will ever look alike. Years from now, I’ll still remember which sparkly mess belonged to which boy and how proud they all were to show off their witchy masterpieces right in the middle of our Halloween table!
Enchanting Broomsticks and Flying Witch Silhouettes
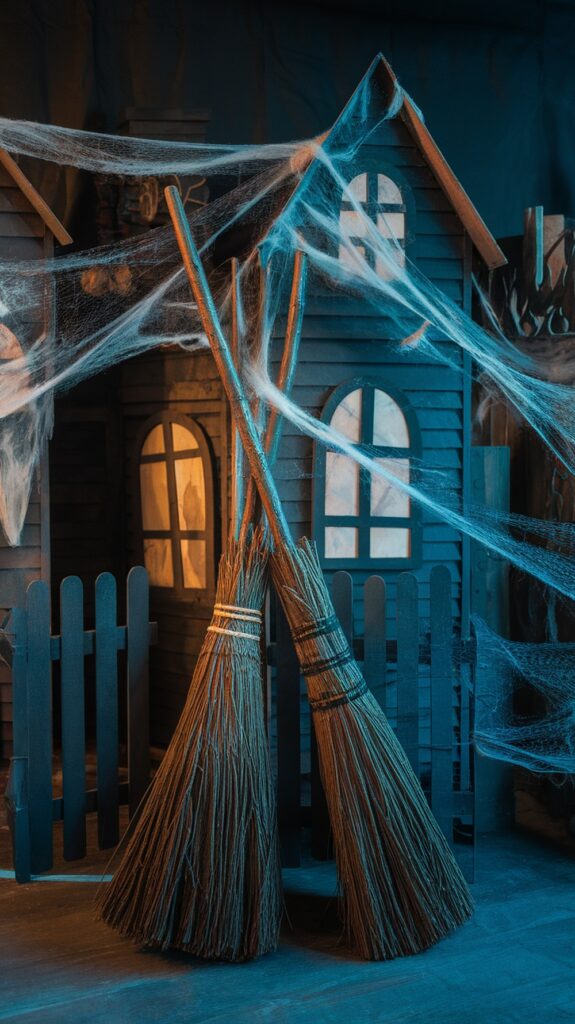
When I think about my favorite witch decorations for Halloween, broomsticks and flying witches always steal the show! These decorations are quick to make, easy for kids, and they never fail to add a playful touch to every room. My boys love giving each broom and witch silhouette its own twist, and I love how simple supplies can turn into decorations that feel magical and full of personality. There’s something so cheerful about seeing a handmade mini broomstick propped on the mantel or a spooky witch flying across the window at sunset. If you want your Halloween setup to get that classic witchy vibe, these two projects are a must for your list!
Kid-Friendly Mini Broomstick DIY
There’s nothing my boys love more than “sweeping” through the house pretending to take off on their own broomsticks. These mini versions are the perfect size for little witches and wizards, but they also look adorable as part of your witch decorations for Halloween. I keep the process simple and safe so even the tiniest hands can help.
Here’s what you’ll need for each mini broomstick:
- One popsicle stick (or a small wooden dowel)
- Yarn or raffia (brown, orange, or yellow works best)
- String or ribbon (for tying)
- School glue
Step-by-step:
- Make the bristles: Cut a bunch of yarn or raffia into 4- to 5-inch lengths. Gather them into a little bundle, about as thick as your pinky.
- Attach to the stick: Lay the popsicle stick or dowel on top of the bundle, letting the ends stick out. Grab your school glue and add a good squeeze where the stick meets the bristles.
- Tie it up: Wrap string or ribbon tightly around the end to hold the bristles in place, knot it, and trim any uneven pieces.
- Let it dry: That’s it—your broom is ready for display or hours of wild pretend play!
If you want extra flair, you can:
- Paint the sticks with sparkly paint or even stripes.
- Add a tiny bow with leftover ribbon.
- Write names on the handle so each kid has their own.
- Hot glue a mini witch hat or spider onto the handle for extra personality.
I love seeing these brooms pop up in unexpected places. They look so cute tucked into pumpkins, wedged in a candy bowl, or taped up beside a homemade witch hat on the wall. These mini broomsticks are budget-friendly, quick to make, and always a big hit with the kids!
Crafting Flying Witch Silhouettes for Spooky Windows
Flying witch silhouettes give you that iconic Halloween look and take very little time. Every year my boys and I fill our living room window with a whole “witch squad,” and every neighbor who visits comments on how fun they look. Plus, this project just feels classic—black witches zooming across the glass as the sun sets behind them. Talk about a mood!
Here’s how we make our flying witches—no fancy equipment needed:
- Black construction paper (or black cardstock for sturdier witches)
- Scissors
- White colored pencil or chalk (for tracing)
- Tape or removable adhesive (like sticky tack)
- Witch template (you can freehand, but I like to print one from the internet)
Instructions:
- Trace or draw your witch: If you’re using a template, lay it on top of the black paper and trace around the edges with a white pencil or chalk. My kids like to draw funny hats or wild hair for extra fun.
- Cut out the silhouette: This part is perfect for little hands—just supervise if your kids are using bigger scissors. We keep ours simple, but sometimes add a cat or a little flowing robe.
- Make it fly: Attach the silhouette to your window using small loops of tape on the back. If you’re planning to move them a lot, sticky tack works well and won’t leave marks.
- Mix it up: Create a whole flock by cutting witches in different flight poses. Add in a few paper bats or a sparkly moon for drama!
To add a finishing touch, I sometimes let the boys pick out window-safe paint markers and draw stars, clouds, or a crescent moon right onto the glass around our witches. It turns a simple silhouette into a whole spooky nighttime scene! When the sun goes down and your house is glowing from inside, those flying witches really come to life. Our neighbors always stop and stare—mission accomplished!
Pro mom tip: Save your witch templates to reuse year after year, or let your kids create new designs as their drawing skills grow. These silhouettes fold flat, so they’re easy to store with your other decorations.
There’s a special kind of magic in seeing decorations you make together each Halloween. Whether it’s a row of charming brooms or a parade of witches swooping across the window, these clever, hands-on projects deliver family fun and a playful pop of spooky spirit every time!
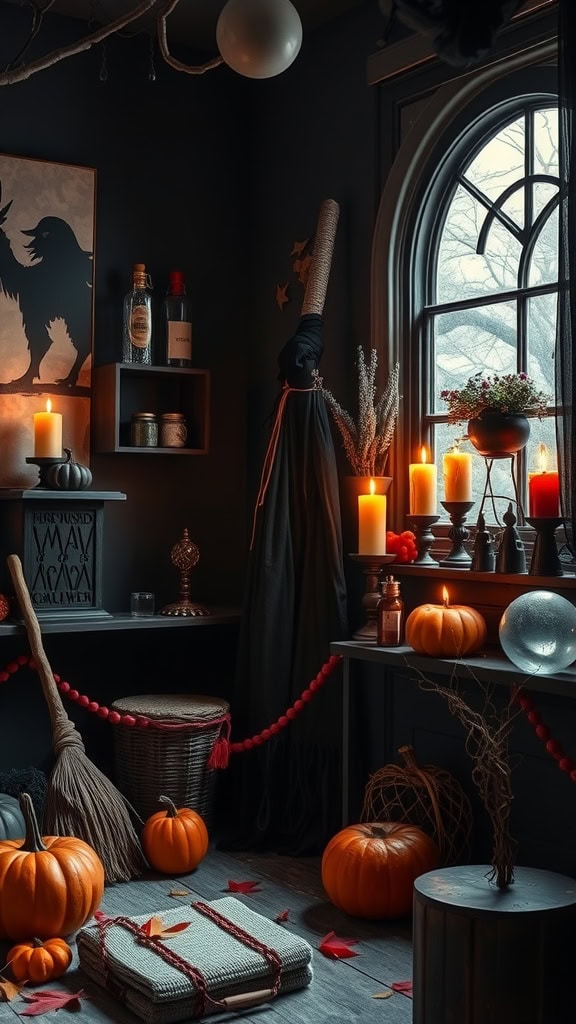
Witchy Mason Jar Lanterns and Glowing Decor

Adding light and a mysterious glow is my favorite way to finish off witch decorations for Halloween at home. Every year, as the sun goes down and our homemade lanterns flicker on, my boys scramble around the house and declare it the “spookiest night ever!” You don’t need any fancy skills—just a few ordinary jars, some paint, and fun ideas. If you love potion bottles, witchy lights, or want that perfect magical glow, these quick projects are perfect for your kitchen table.
Painted Witch Mason Jar Tutorial
Mason jars are always a highlight in our Halloween projects. They’re sturdy, easy for kids to handle, and you can reuse them every year. Our painted witch lanterns line the porch for trick-or-treaters, but I’ve even tucked them onto the mantle or used them as nightlights for a little extra magic at bedtime.
What you’ll need:
- Clean, empty mason jars (any size works)
- Acrylic paint (green, purple, black, orange)
- Paintbrushes or foam brushes
- Black and white paint pens (optional for faces)
- Sticky googly eyes or paper cutouts
- String or thick ribbon
- Battery-operated tea lights or fairy lights
- Glue or double-sided tape
How we make ours:
- Get those jars squeaky clean. My kids like scrubbing them at the sink—anything with water is a win in our house!
- Pick a base color. We paint some jars witchy green, some purple, and always a couple in classic black if someone feels extra spooky.
- Let the jars dry. (I put them upside down on an old towel. Sometimes, we have a snack while we wait—a must for little helpers.)
- Add a witch face! Big eyes, a lopsided smile, or a silly nose… let the kids decide. You can paint these on or glue on paper or felt cutouts.
- Wrap the rim with black ribbon or string, then tie on a little paper witch hat or dangle a paper spider from the lid.
- Pop in a battery tea light for an instant lantern!
A few more ideas if you want to switch it up:
- Paint stars or moons all over for a night-sky witch.
- Stick on glitter before the paint is dry for some shimmer.
- Add cut-out paper hats to the tops with glue.
Every lantern turns out different, and the mismatched look is what I love most. When those little jars glow after dark, their faces seem to come alive. The boys even give them names—last year we had Giggly Hazel and Mister Spook!
Glow-in-the-Dark Potion Bottles: Easy Nontoxic Recipes

Nothing says witchy like a glowing potion bottle on the windowsill! My boys go wild for these—sometimes they pretend they’re brewing potions to turn their brothers into frogs. Glowing decor feels like something straight out of a storybook, but you can make it in minutes with safe ingredients.
Here’s how we make our own glow-in-the-dark bottles, using things you probably have at home.
What you’ll need for each potion:
- Clear plastic or glass bottles (empty water bottles work!)
- Highlighter markers (the brighter, the better)
- Tonic water (for blue glow)
- Water
- Glow-in-the-dark paint (nontoxic kids’ craft paint)
- Corn syrup (optional for thicker, bubbly potions)
- Small glow sticks (for extra punch)
- Food coloring (for color variations)
- Funnel
Three super simple glowing potions:
1. Highlighter Glow Potion
- Carefully pry the end off a bright yellow highlighter, slide out the ink stick, and soak it in a little water in your bottle.
- Swish it around until the water turns bright neon yellow.
- Add a blacklight nearby and watch it glow like wild! (Perfect for parties.)
2. Tonic Water Twinkle
- Fill a bottle with tonic water (it has quinine, which glows blue under UV light).
- Drop in a few pieces of glow-in-the-dark paint for floating bits.
- Shake up the bottle and place a blacklight or small flashlight behind it after dark.
3. Classic Glow Stick Potion
- Carefully activate a small glow stick and pop it into the bottle (great for quick magic!).
- Add water, a squeeze of corn syrup, and a drop of food coloring.
- Seal the lid tight and shake. As the stick floats, it lights up the bottle from inside.
Tips for extra witchy magic:
- Mix food coloring for witchy green, blood red, or bubbling purple potions.
- Wrap bottles with black tape or twine, then add a handwritten label: “Eye of Newt,” “Witch’s Brew,” or “Dragon Snot”—the sillier the better.
- Add glitter for that “mystical” swirl.
These glowing potion bottles make awesome windowsill displays or table toppers. At bedtime, the soft light is so comforting my youngest always begs to keep one near his pillow. Safe, quick, and so much fun.
Pro mom tip: Always supervise with small parts or batteries, and seal bottles tight if you have curious kiddos like mine.
If you want Halloween decorations that really stand out at home, you can’t beat a batch of lit-up jars and magical potions. My boys will stare for ages, trading ghost stories by lantern light, and I always think—what could be more enchanting than that?
Finishing Touches: Spooky Witch Details for Every Room

When I’ve covered the basics with my witch decorations for Halloween, what makes our house come alive is all the little witchy extras. These are the projects that make every room feel magical, from the front door to the kitchen. I always say, it’s the finishing touches that make our home feel ready for a movie night or a surprise visit from my boys’ friends! Each idea adds a playful wink—so no room feels left out and everyone who visits spots something fun.
Let’s look at two simple ways I like to spread that spooky witch spirit all over the house. These are budget-friendly, can be made with the kids, and bring in those unique, handmade details that store-bought decorations just can’t match!
DIY Witch Shoe Door Hangers
After we put up our hats and broomsticks, I love greeting trick-or-treaters with something unexpected right at the door. Witch shoe door hangers are quick, cute, and bring so many smiles. My boys think it’s hilarious when guests “trip over a witch’s feet” walking in!
To make your own, you’ll need:
- Black and purple felt or stiff fabric
- Scissors
- Fabric glue or a hot glue gun (grown-ups handle this)
- Colorful ribbon scraps
- Large buttons or pom-poms
- String or yarn for hanging
Here’s how we make ours at home:
- Draw a witch shoe pattern on paper. I make mine pointy and curly at the toe (the sillier, the better). Trace two shoes per hanger—one for each side.
- Cut out the shapes from black or purple felt. My boys help pick colors and fabric textures.
- Decorate the shoes! Have fun with this. We glue on stripes for socks, add big green felt buckles, stick on buttons, and wrap ribbons around the ankles. Sometimes we even add a little ‘dirt’ using a brown marker!
- Glue the top edges together but keep the opening at the ankle. This way, you can tuck a piece of candy or a note inside for guests.
- Attach a loop of yarn or ribbon for hanging at the top. We add a big bow for extra flair.
- Hang on the door knob or hooks either as a single shoe or as a pair, upside-down like a witch “crashed” into the house!
Some fun ways to switch it up:
- Make mini versions for bedroom doors.
- Stuff the toes with a little tissue paper so they look “full.”
- Hide a glow stick inside the opening for nighttime visitors.
My boys always peek into the shoes to see if any treats magically appear. These witchy feet are a breeze to make and catch everyone’s eye right away, setting the mood before people even step inside!
Creating a Witch’s Potion Station

A witch’s house wouldn’t be complete without a potion station! This is my favorite little corner to set up—usually in the kitchen or on a hallway console table. It only takes a few items, and it makes every guest (especially the kids) want to peek and pretend-mix their own wild brew.
Here’s what I use to build our potion station:
- Clear glass jars or recycled bottles in different shapes and sizes
- Food coloring, water, and glitter
- Plastic spiders, gummy worms, or marbles for “eye of newt” and “warty toads”
- Small labels or chalkboard tags
- A silver tray or old wooden box
- A draped tea towel or spooky “web” cloth
My potion station routine:
- Fill bottles with colored water by mixing a drop or two of food coloring into water. Purple, green, and black look the witchiest!
- Add “ingredients.” I love slipping a plastic spider or some marbles into the jars. The boys toss in gummy worms or cotton balls (“ghost puffs”). If you want real fizz, sprinkle in a bit of baking soda and vinegar now and then.
- Label everything with spooky names. We use tape and write with a marker: “Swamp Slime,” “Bat Wings,” “Wicked Warts,” and “Truth Serum.” Sometimes my kids come up with the names!
- Arrange the bottles on a tray or box. The messier and more crowded, the better.
- Dress up the table with a webby cloth or some gauze fabric. I might tuck in a painted wand or a small broomstick too.
Extra ideas for fun:
- Add a small bowl with dry ice chips (supervised) for bubbling fog.
- Let the kids “brew” after school with safe add-ins like sprinkles or colored sugar.
- Change out the ingredients every week to keep it fresh and surprising.
Every time my boys’ friends visit, the first stop is always the potion station. It becomes the heart of our Halloween kitchen, and lets everyone’s imagination run wild. You don’t have to spend much or get fancy—just use the old jars and bottles you already have. This one simple setup can turn any regular space into a witch’s lair in minutes.
Adding these little witch details makes each room in the house part of the Halloween fun! Kids notice every new decoration, and it keeps the excitement going until Halloween night finally arrives.

Conclusion
Making witch decorations for Halloween at home with kids is pure magic! Every project brings out giggles, creativity, and a mess that is 100% worth it. When my boys and I scatter our homemade witch hats, glowing jars, and goofy broomsticks around the house, I know we’re building memories they’ll keep forever.
Let yourself get creative and don’t worry if things get a little wild or sticky. The most charming decorations are the ones made with little hands and lots of laughter. Grab your supplies, gather around the table, and enjoy every moment together as you make your own witch decorations for halloween.
Thank you for spending time with me—we moms make Halloween truly spellbinding. Wishing you and your family the happiest, craftiest, and most magical Halloween ever! If you try any of these ideas, I’d love to hear your stories or see your creations!