This post may contain affiliate links. Read the full disclosure here.
Planning a Halloween party can feel overwhelming when you’re juggling three energetic boys and trying to create something magical without breaking the bank! I’ve learned through trial and error that the best celebrations come from putting your own creative spin on things, and halloween party diy projects are honestly the way to go. Not only do they save money, but they also add that personal touch that makes your party truly memorable!
This year, I’m sharing my favorite DIY ideas that have been tested and approved by my little crew of candy-loving monsters! These projects are manageable even with kids running around, and many of them can actually become fun activities to do together before the big day. Get ready to transform your home into the spookiest, most creative party destination on the block!
Floating Ghost Luminaries
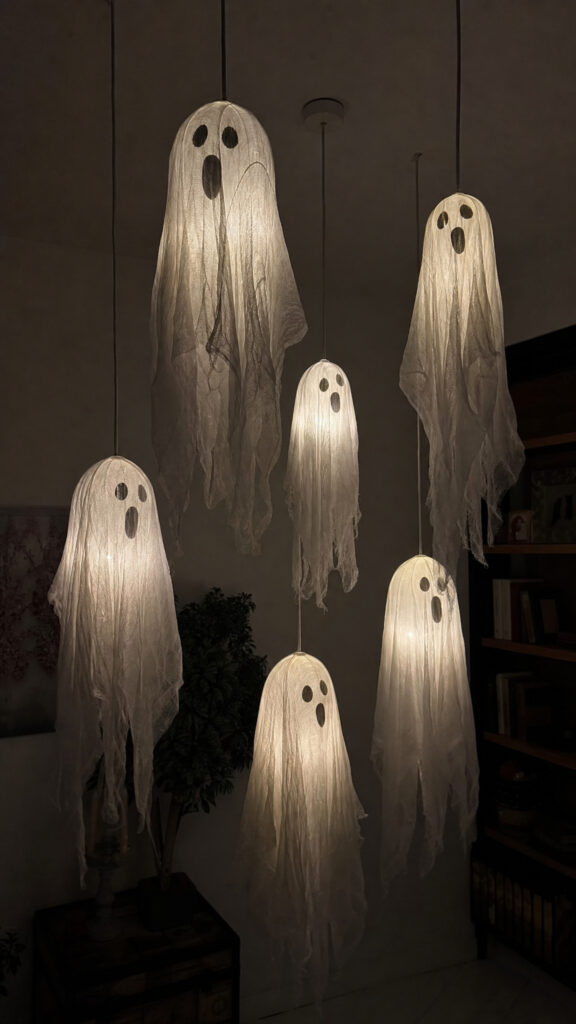

These adorable floating ghosts are literally the easiest halloween party diy project ever, and they create the most magical ambiance! All you need are white balloons, cheesecloth or white fabric, glow sticks, and a black marker. I made about fifteen of these last year and hung them from our porch ceiling, and every single trick-or-treater stopped to take photos!
Start by activating your glow sticks and dropping one inside each balloon before inflating it. Blow up the balloons to different sizes for a more interesting display. Then drape the cheesecloth over each balloon, securing it at the bottom with a string or rubber band. Use your black marker to draw spooky or silly faces on each ghost – I let my boys help with this part and we ended up with some hilariously goofy expressions!
Hang these ghosts at varying heights from your ceiling, trees, or porch overhang using clear fishing line. When the lights go down, they’ll glow eerily and appear to float in mid-air! The best part is they last all night long and create the perfect photo backdrop for your party guests. You can even attach small weights to the bottom and let them hover around the floor for an extra spooky effect!
Mummy Wrapped Beverage Station
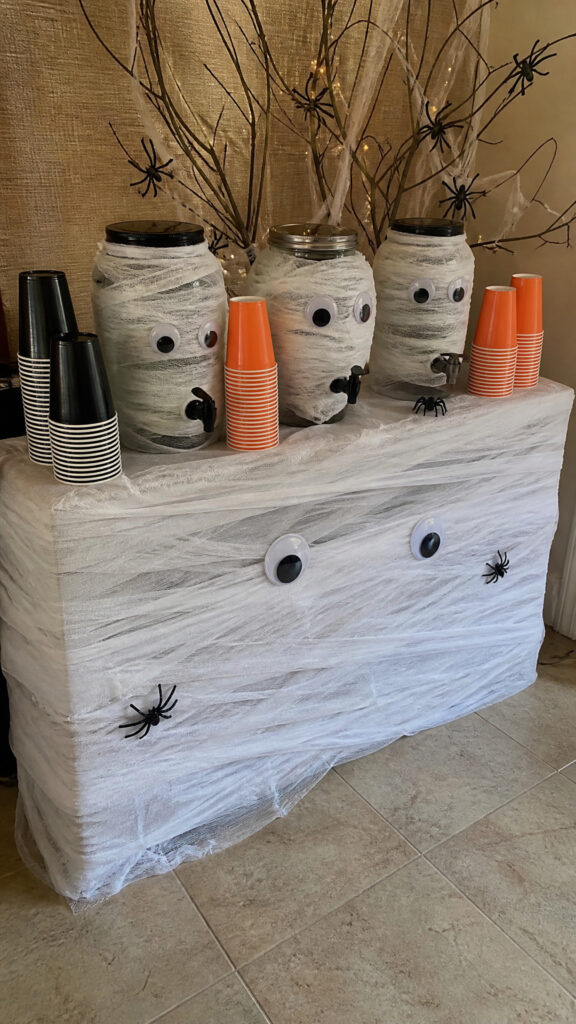
Transform your boring beverage table into a showstopping mummy with just white streamers and googly eyes! This halloween party diy takes maybe twenty minutes but looks like you spent hours on it. I covered our entire drink station last year and it became the focal point of our whole party setup!
Start with your table or beverage dispenser and begin wrapping it with white crepe paper streamers or gauze bandages in a crisscross pattern. Don’t worry about being too neat – mummies are supposed to look a little messy and wrapped haphazardly! Leave some gaps showing through for that authentic ancient mummy vibe. Secure the ends with clear tape as you go.
Once everything is wrapped, add giant googly eyes in strategic places. I used some massive 4-inch googly eyes from the craft store and they were absolutely perfect! You can also add eyes to individual drink dispensers, bottles, or even cups. For extra fun, attach plastic spiders crawling up the “bandages” or add some fake cobwebs. My middle son insisted we name our mummy “Steve” and now every year the kids ask if Steve is coming back to the party!
Spooky Silhouette Window Clings
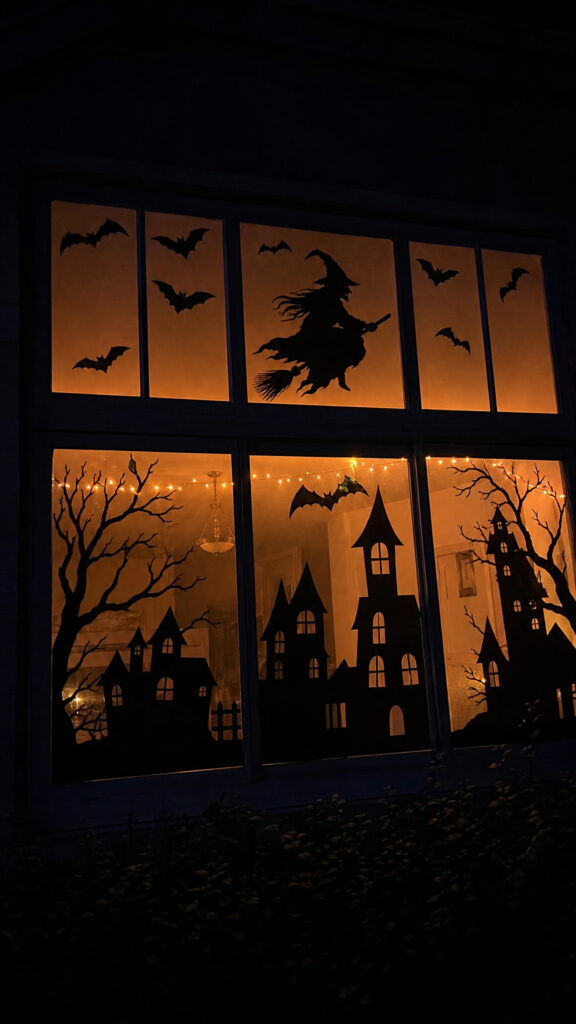
Window silhouettes are such a dramatic way to decorate for your Halloween party, and making them yourself is so much cheaper than buying pre-made ones! This halloween party diy project is perfect for getting the kids involved because they can help trace and cut out shapes. We covered every window in our house and the effect from outside was absolutely incredible!
Grab some black contact paper or construction paper and print out silhouette templates of witches, cats, bats, haunted houses, and creepy trees. You can find tons of free templates online! Trace these onto your black paper and carefully cut them out. If you’re using contact paper, you can stick them directly to your windows. If you’re using construction paper, use a tiny bit of tape or removable adhesive.
Arrange your silhouettes to tell a story across your windows – maybe a witch flying across the moon, bats swooping down, or a haunted house scene. I like to add a few layers with some shapes closer to the glass and others set back slightly for depth. At night when your interior lights are on, these create the most amazing spooky shadow effect that looks professionally done! Plus, they’re super easy to remove and reuse year after year!
Candy Corn Mason Jar Votives
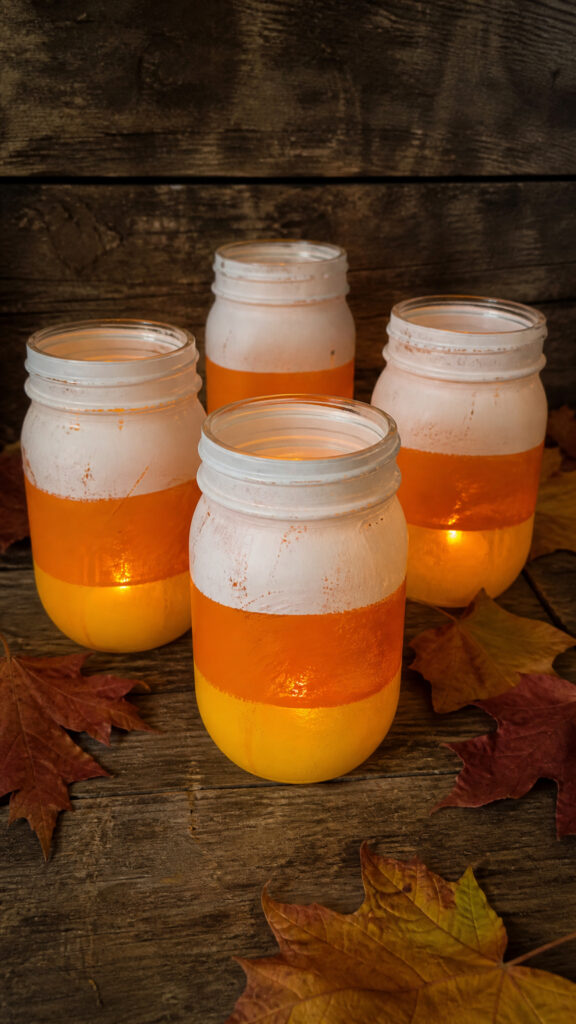
These candy corn votives are ridiculously cute and add such a festive touch to your party tables! This halloween party diy is one I return to every single year because they’re just so cheerful and perfectly Halloween-themed. My boys love helping paint these, and I love that they’re inexpensive to make in bulk!
Collect mason jars in various sizes – I hit up thrift stores and garage sales throughout the year to stock up! Clean them thoroughly and let them dry completely. Then tape off three horizontal sections on each jar. Paint the bottom section yellow, the middle section orange, and leave the top section clear or paint it white. Use acrylic craft paint for the best coverage and let each section dry before removing the tape.
Once your jars are completely dry, place battery-operated tea lights or small candles inside. The glow through the painted glass creates the most beautiful warm ambiance! You can also tie orange and black ribbons around the necks of the jars or attach small tags with guests’ names to use them as place settings. I made two dozen of these over the years and now I have enough to line our entire walkway, staircase, and all the party tables!
Creepy Crawly Ice Bucket
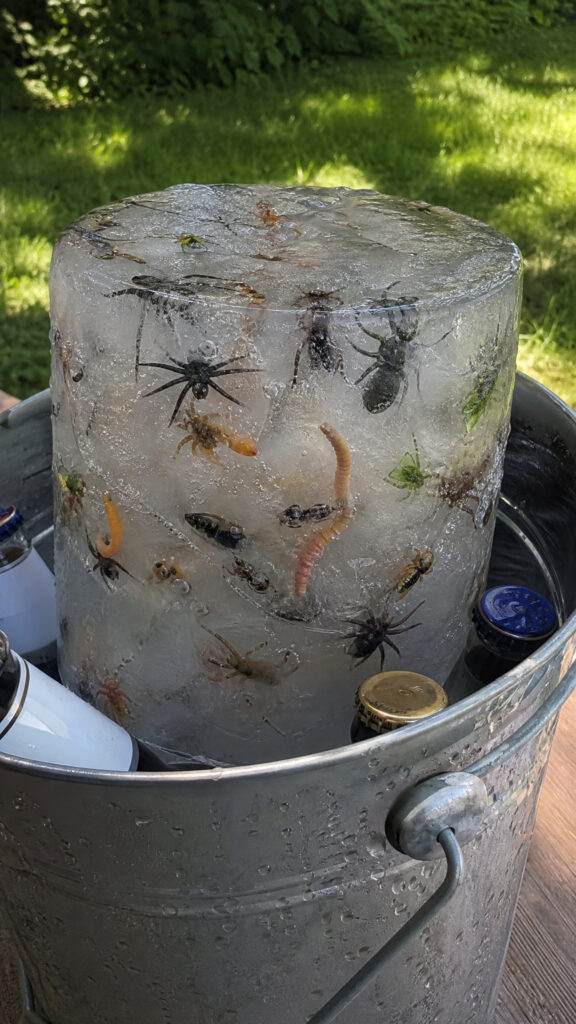
Want to hear your party guests squeal with delight and surprise? This creepy ice bucket is the perfect halloween party diy for adding an unexpected element to your celebration! I made this for the first time last year and the reactions were absolutely priceless. Even my brave oldest son jumped a little when he first saw it!
You’ll need a large plastic punch bowl or clear container, plastic bugs and creepy crawlies (spiders, worms, snakes), and water. Start by placing some of your plastic creatures in the bottom of your container and add a layer of water. Freeze this solid. Then add another layer of bugs, more water, and freeze again. Continue this process until your container is full of frozen layers with bugs suspended throughout!
On party day, pop the entire ice block out of the container and place it in a larger serving bowl or bucket. Nestle your drinks, juice boxes, or bottles around and into the ice. As the ice melts throughout the party, the bugs become more visible and appear to be crawling around! It’s functional, keeps drinks cold, and serves as a conversation starter. Just make sure to warn guests that the bugs aren’t real – I had one mom nearly drop her drink before she realized!
Pumpkin Patch Balloon Garland
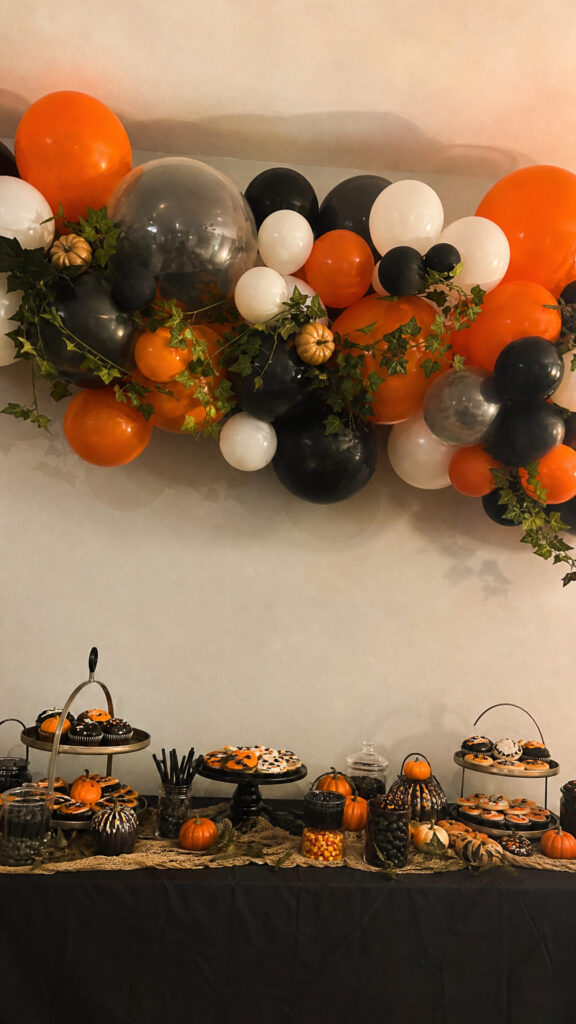
Balloon garlands are having such a moment right now, and creating a Halloween version is easier than you’d think! This halloween party diy makes a huge visual impact and serves as the perfect backdrop for party photos. I hung ours above our treat table and it seriously looked like something from a professional party planner!
Grab orange, black, white, and maybe some purple or green balloons in various sizes. You’ll also need balloon tape or fishing line, and some faux greenery or vine garland. Start inflating your balloons in different sizes – this variety is what makes the garland look professional! Thread them onto your balloon tape or tie them onto fishing line, alternating colors and sizes randomly.
Once your basic garland is assembled, attach it to your wall or hang it over your party table. Then go back and fill in any gaps with smaller balloons. Weave in some faux vine garland to give it that pumpkin patch feel! I also attached a few small artificial pumpkins using wire or hot glue. You can add coordinating streamers, paper bats, or even small witch hats to customize it further. The whole thing took me about an hour to make, but it looked like a million bucks!
Witch Hat Ring Toss Game
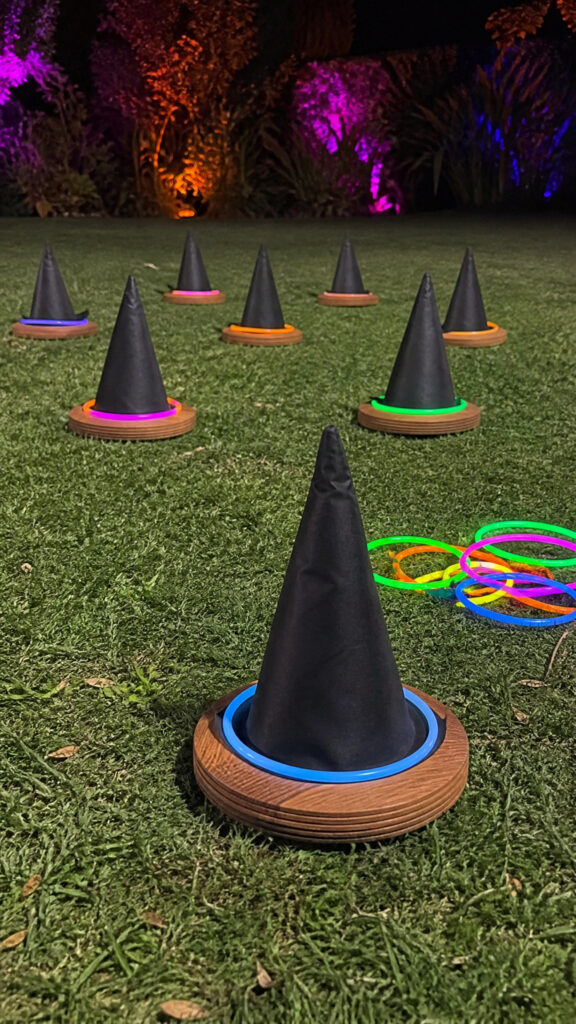
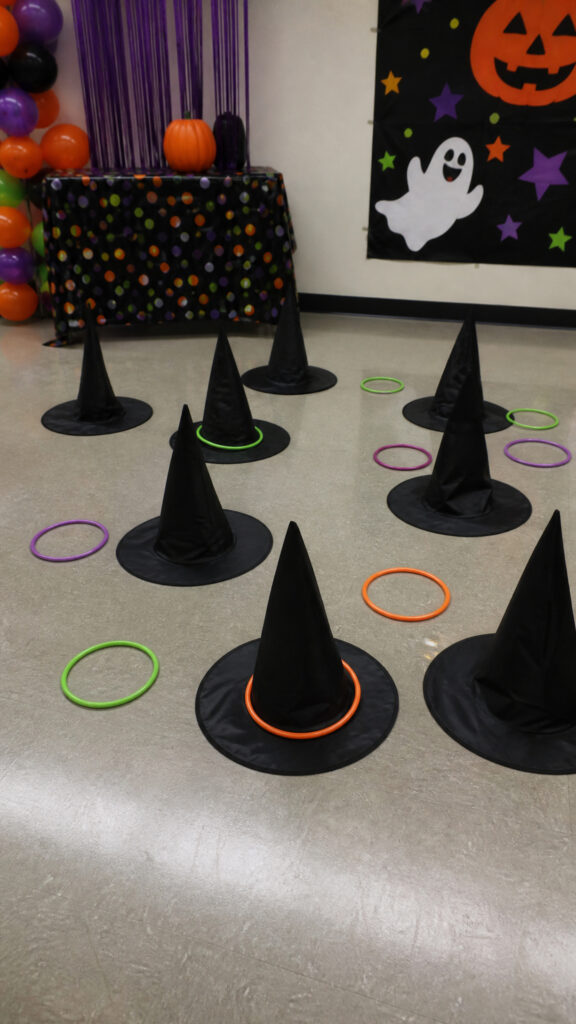
Every good Halloween party needs activities, especially when you have energetic kids running around! This witch hat ring toss is such a fun halloween party diy that doubles as both decoration and entertainment. My boys played this for literally an hour straight last year, and it kept them busy while I set up the rest of the party!
You’ll need several witch hats (the cheap costume ones work perfectly), glow stick necklaces or embroidery hoops for rings, and something to secure the hats. Hot glue the witch hats to small wooden boards or heavy cardboard bases so they stand upright. Arrange them at varying distances to create different difficulty levels. Paint numbers on each base to assign point values!
Set up your witch hats in your yard or party space and let guests take turns tossing the rings to see who can score the most points. You can use glow stick necklaces for nighttime play, which looks absolutely amazing! We kept a running scoreboard and gave out little prizes to winners throughout the night. This game works for all ages – even the adults got really competitive! You can also spray paint some hats in different colors to make certain ones worth bonus points.
Frankenstein Juice Box Monsters
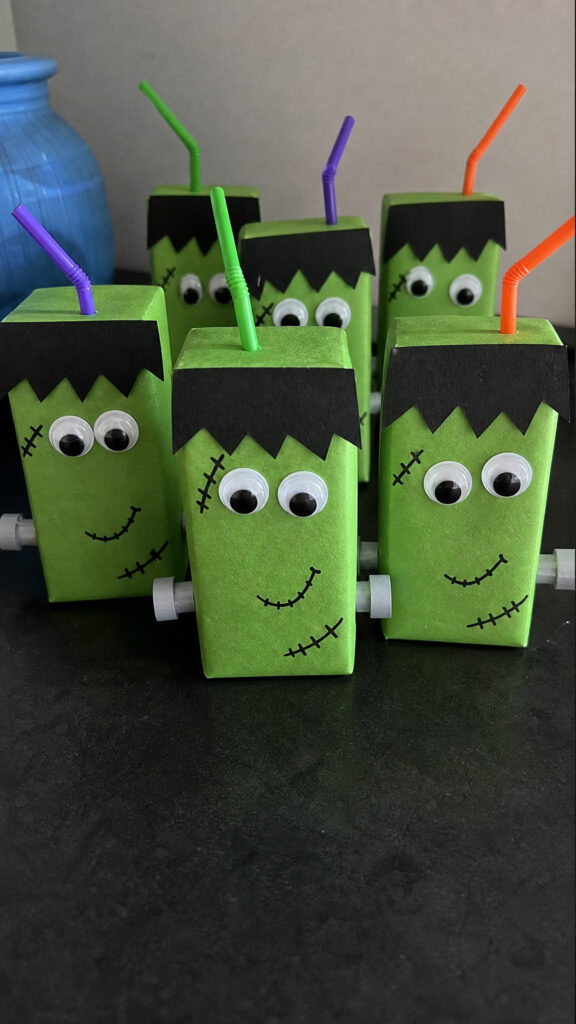
These adorable juice box covers are such a hit with kids and make serving drinks so much more festive! This halloween party diy is perfect for individual servings and the kids absolutely love having their own little monster. Plus, it helps everyone keep track of whose drink is whose – mom win!
Grab green cardstock or construction paper, black markers, googly eyes, and glue. Cut rectangles large enough to wrap around a standard juice box, leaving the straw hole accessible. Draw Frankenstein faces on each wrapper with black marker – the stitches, the hair, the bolts on the neck. Glue on googly eyes for extra personality!
You can also make other monsters using the same concept – orange for pumpkins, white for ghosts, purple for vampires! I made an entire monster family of juice boxes and the kids went crazy for them. Wrap each juice box in its costume and secure with tape or glue. Add black construction paper “hair” sticking up on top for Frankenstein, or cut bat wings to attach to the sides of vampire juice boxes. These are so simple but add such a special touch that makes kids feel like the party was made just for them!
Cauldron Treat Buckets
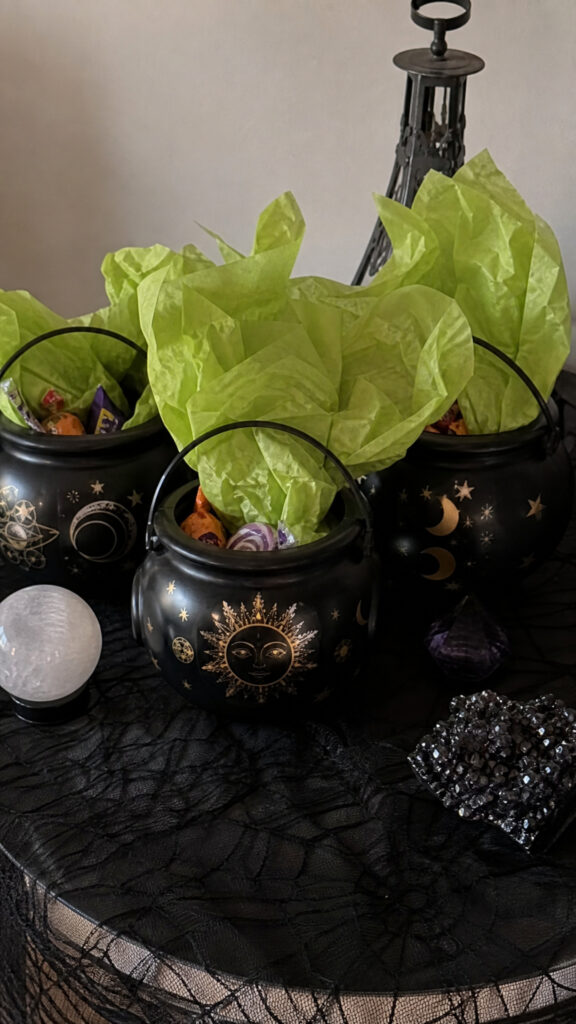
Individual treat buckets are perfect for party favors or for organizing your candy station! These mini cauldrons are an adorable halloween party diy that guests can take home filled with goodies. I love making these because they’re useful during the party and then become part of the party favor – two birds, one stone!
Pick up small black plastic buckets or pails from the dollar store – they usually have them in the Halloween section! Attach a green pipe cleaner or wire handle if they don’t already have one. Then get creative with decorating! I used metallic paint pens to write “witch’s brew” or draw potion symbols on the sides. You can also attach sticker labels or use vinyl lettering.
Fill each cauldron with Halloween treats, small toys, or party mix. I like to add some green tissue paper “smoke” spilling out the top for effect! You can personalize each bucket with guests’ names and use them as place settings at your party table. During the party, these can hold individual snack portions, and then at the end of the night, kids fill them with candy from your treat station to take home. My boys still use theirs for storing small toys even after Halloween is over!
Spider Web Doorway
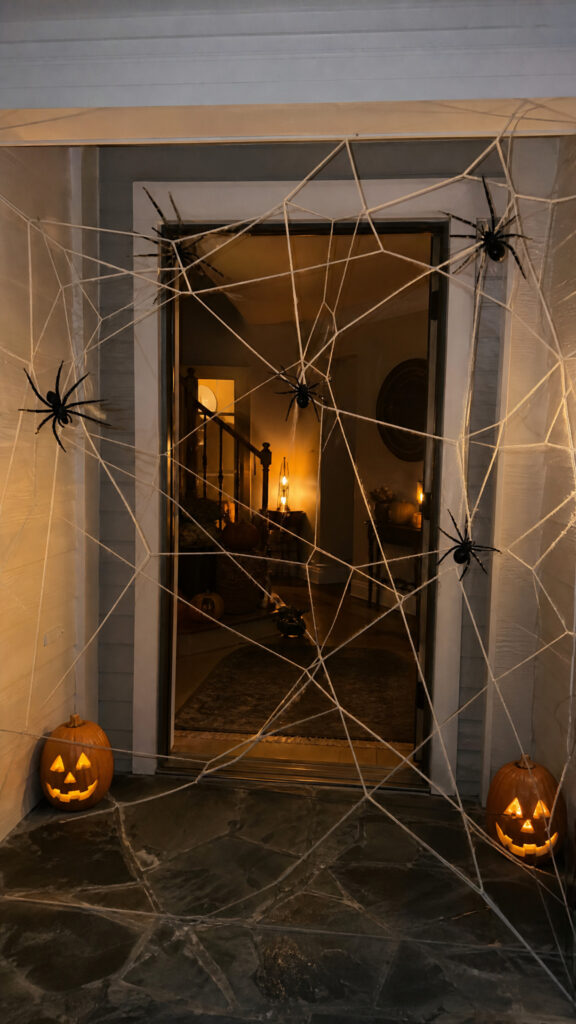
Create an entrance that guests won’t forget with this dramatic spider web doorway! This halloween party diy sets the tone for your entire celebration the moment people arrive. I made one for our front door and one for the entrance to our party room, and they were absolutely the most photographed decorations of the night!
You’ll need white yarn or string and a few large plastic spiders. Start by taping one end of your yarn to a corner of your doorway. Then stretch it across to another point on the doorframe and tape it down. Continue creating a web pattern by connecting different points around the frame, always working from the outside in. The pattern doesn’t have to be perfect – real spider webs are a bit irregular anyway!
Once you have your basic web structure, go back and add more connecting lines to fill it in and make it look more authentic. Place your plastic spiders at various points on the web – I used hot glue to secure them. For extra drama, hang a really large spider right in the center! You can also add some cotton batting pulled apart to look like old cobwebs. At night, shine a colored light on it for an extra eerie effect. Fair warning though – make sure guests know it’s there before they walk through, or you might recreate that classic “walking through a spider web” panic dance!
Googly Eye Pumpkin Patch
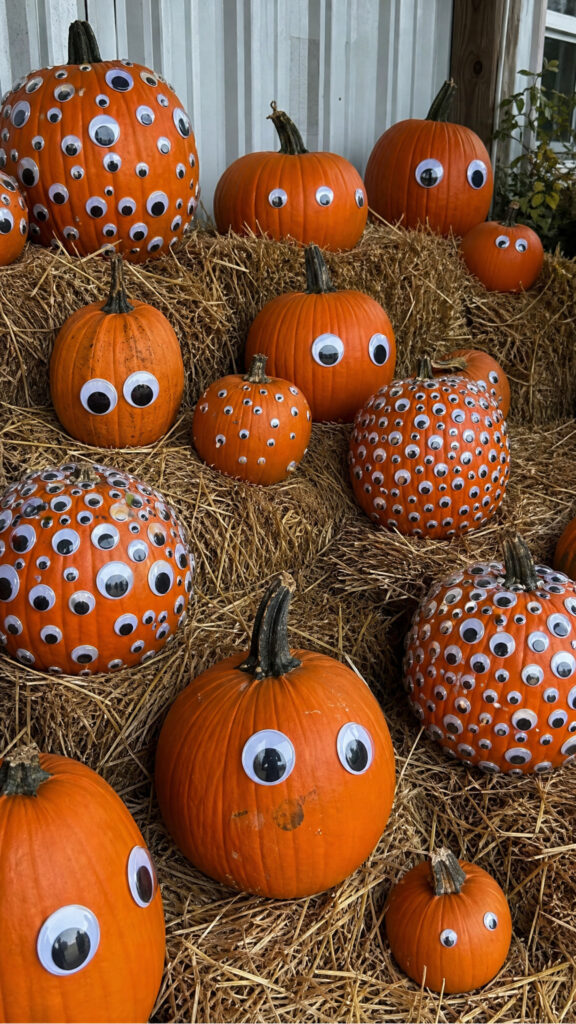
This might be the silliest and most fun halloween party diy on this list! Instead of carving pumpkins (which, let’s be honest, is messy and time-consuming when you have three boys to supervise), create a googly eye pumpkin display that’s hilarious and family-friendly. We did this last year and I’ve never heard so much laughter at a Halloween party!
Hit up the craft store and buy googly eyes in every size imaginable – the bigger and more varied, the better! Grab real pumpkins or foam craft pumpkins in different sizes. Then just start sticking eyes all over them! Some pumpkins can have two eyes like normal, others can have dozens of eyes covering the entire surface. Mix up the sizes and placements for maximum silliness!
You can use hot glue for a permanent hold or adhesive dots if you want to reposition them. Create pumpkin characters by adding other simple features – pipe cleaner arms, felt mouths, paper accessories. My favorite was the pumpkin we covered entirely in tiny eyes that looked absolutely ridiculous! Display your pumpkin patch on your porch, along your walkway, or as a centerpiece. The best part is that even my youngest could help with this project, and there’s no wrong way to do it. Every single guest commented on how creative and funny they were!
Floating Witch Hat Luminaries
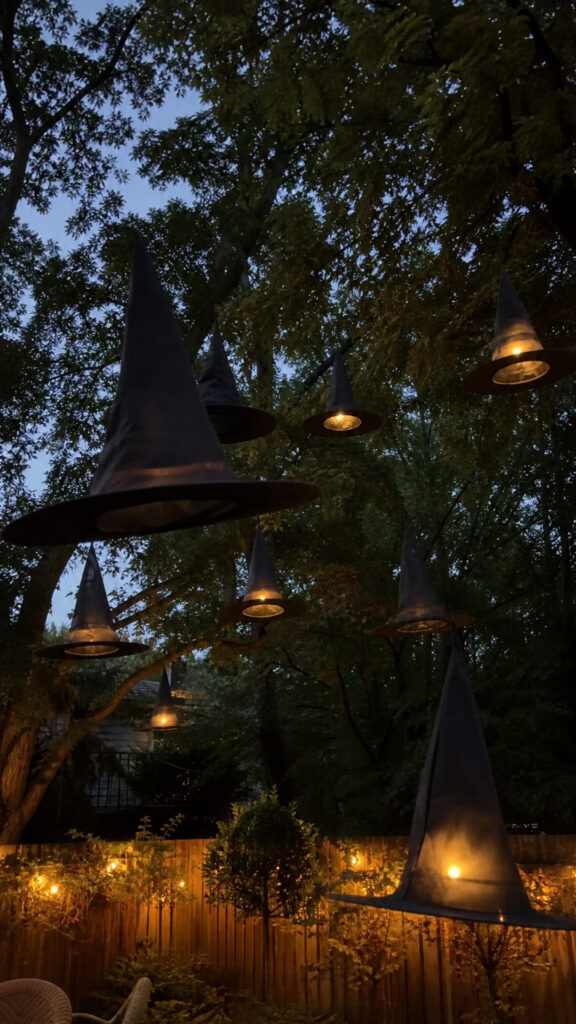
These floating witch hats create such a magical atmosphere and are surprisingly easy to make! This halloween party diy always gets the most compliments because people can’t figure out how the hats are floating. It’s actually super simple, and the effect is absolutely worth the minimal effort!
You’ll need witch hats (paper or lightweight foam ones work best), fishing line, LED string lights or glow sticks, and something to hang them from. Poke a small hole in the top of each witch hat and thread fishing line through it. If you want them to glow, place a glow stick or wrap LED lights inside each hat before hanging. Attach the fishing line to your ceiling, tree branches, or a porch overhang at varying heights!
The clear fishing line is nearly invisible, especially in dim lighting, so the hats appear to be floating in mid-air! I hung about a dozen of them at different heights above our party area and it looked like a witch convention was happening overhead. You can add some wispy black tulle or fabric strips hanging from the bottom of each hat to create the illusion of witch robes. When the wind catches them outside, they sway gently and look even more magical! This decoration works beautifully both indoors and outdoors, and you can reuse the hats year after year!
Time To Get Crafty!
There you have it – twelve amazing halloween party diy ideas that will transform your celebration into something truly special! The best part about these projects is that they’re all achievable even with kids underfoot, and many of them can become fun activities to do together as a family. I’ve learned that the memories made while creating decorations are just as valuable as the party itself!
Don’t feel like you need to tackle all twelve projects for one party – even choosing three or four of these ideas will make a huge impact! Mix and match based on your time, budget, and what excites you most. Remember, the goal is to have fun and create a celebration that feels personal and special. Now grab those craft supplies and get started – your best Halloween party ever is just a few DIY projects away!