This post may contain affiliate links. Read the full disclosure here.
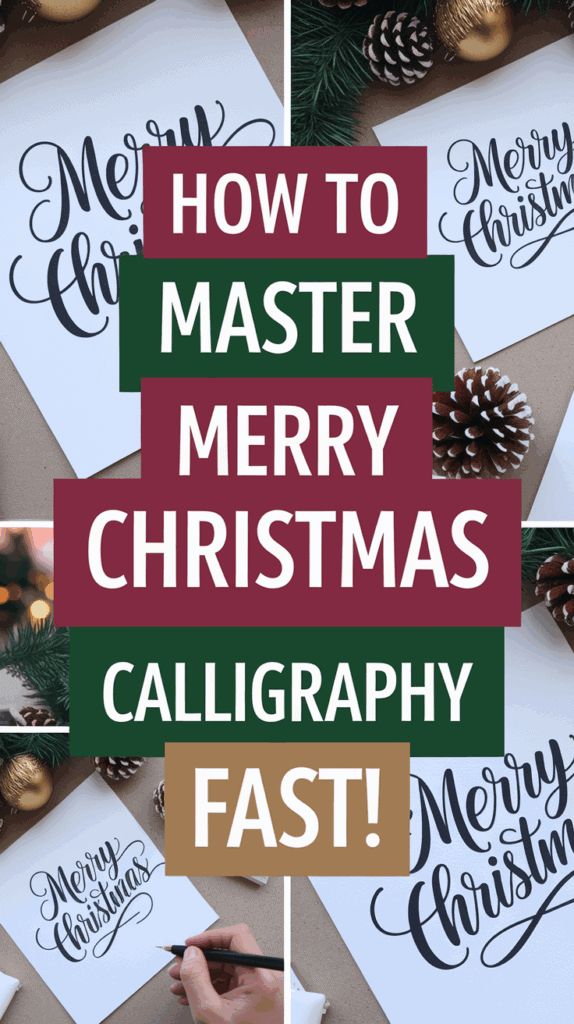
Welcome! If you’re a mom like me, juggling three lively boys and the holiday whirlwind, you know how special a simple touch can make Christmas feel extra magical. This year, I wanted our cards to stand out, so I searched for a way to write merry christmas in calligraphy that even a total beginner (with little helpers running around) could manage.
This modern calligraphy pen set made learning calligraphy so easy and relaxing.
If you’re hoping to add your own sweet, handmade twist to cards or gift tags, you’re in the right place! I’ll walk you through every easy, mom-friendly step, so even if you’ve never picked up a calligraphy pen, your Christmas wishes will shine in style.
Why Learn to Write Merry Christmas in Calligraphy?
Taking time to learn how to write merry christmas in calligraphy feels like giving your holiday moments an extra pinch of magic. I know life can get wild with kids (three busy boys here!), bubbling pots, and decorations up to your ears. But I promise, there’s something special about putting pen to paper and making those words dance. Even if you’re a rookie, it’s simple, and the charm is instant. Here’s why I think every mom should give it a shot—especially for the holidays!
Personal Touches Matter More Than Ever

When I write out “merry christmas” in a style that feels pretty and personal, I see smiles that light up the room! Kids notice, grandparents notice, and honestly, I feel good, too. It’s like baking cookies from scratch. Sure, you could just buy them, but homemade feels warmer and more meaningful.
- Friends and family treasure cards that look and feel special.
- Calligraphy adds a handmade touch to store-bought gifts and cards.
- Even my boys love watching the letters form—it’s like a cozy magic trick!
It’s a Fun (and Doable) Creative Break
Let’s face it—finding “me time” isn’t easy. But calligraphy is something you can start and stop as the kids play. Sometimes I squeeze in a few swirls between loads of laundry; it never has to be perfect!
- You don’t need fancy supplies to start; a simple felt-tip pen can work.
- Every attempt is a mini project you can finish in just a few minutes.
- The sense of accomplishment is real—trust me, I hang my practice sheets on the fridge!
Calligraphy Brings Family Together
Our kitchen table doubles as my art studio and my boys’ snack zone. When I’m writing “merry christmas in calligraphy,” my kids watch and even want to try. It sparks creativity, even in wiggly little hands. We laugh a lot and compare our “fancy” letters.
- Calligraphy makes for a cozy winter family activity.
- Kids love trying their own versions and feeling involved.
- Watching their confidence grow as they copy the swirls is just the best.
Lasting Keepsakes for Holidays to Come
Handwritten cards or tags in calligraphy don’t just get tossed out. I’ve tucked mine into keepsake boxes each year. When the boys pull them out next Christmas, we giggle at the memories. These small pieces of art become family treasures.
- Unique calligraphy cards and notes stand out in a sea of store-bought greetings.
- Little ones enjoy seeing how everyone’s writing changes each year.
- Years from now, your calligraphy will bring back sweet holiday memories.
Easy Way to Add Some Cheer
Calligraphy doesn’t need to be fancy or slow. Even simple letters look festive with a bold color or a few fun dots and curls. I love taping calligraphy wishes on the door or tucking them in lunchboxes for a quick holiday smile.
- Brightens up gift tags, stockings, and table settings.
- Adds homemade flair to holiday traditions.
- Turns any note, big or small, into a little work of art.
For moms wanting to leave their mark on the season, writing “merry christmas in calligraphy” is a small step that makes a big splash. I love how it brightens our family traditions, especially when life is extra busy. So go ahead and try it—you just might start a new favorite tradition!
Supplies You Need to Get Started (Even If You’re a Beginner)
Starting out with merry christmas in calligraphy can feel like shopping for a holiday you’ve never planned before. There are pens and papers everywhere, and a million options staring you down at the craft store. I remember standing in the middle of the aisle, three boys in tow, wishing I had a list that was simple, fuss-free, and budget-friendly. I learned that you don’t need expensive gear to get that classic, beautiful look. Here’s everything you need to grab before sitting down to write, whether this is your first time or your hundredth.
Paper: Your Calligraphy Canvas
Picking the right paper is like picking cookie dough for cutouts, some hold up better, and the end result just looks sweeter.
- Smooth printer paper: This is my favorite go-to for practice. It glides under your pen and won’t fuss with ink bleeding.
- Heavyweight cardstock: For final cards or tags, thick paper makes your calligraphy pop and gives it that keepsake feeling.
- Blank cards: If you want to keep things super simple, buy a pack of blank greeting cards. They’re ready to go and look neat.
Let your kids join in and choose different colors! Sometimes my boys pick the wildest shades, and those pieces always become the instant favorites.
Pens: Simple Tools, Big Results
I spent way too much time worrying about which pen to choose on my first go. The truth? Most of us have what we need right in our kitchen drawer or the kids’ pencil box. Here are the best and easiest pens to use:
- Felt-tip markers (like Crayola): They make broad and thin lines with a little pressure. Plus, they’re cheap and everywhere.
- Brush pens: Perfect for those bouncy, swirly strokes. You can find them in craft aisles or online, single or in packs with fun colors.
- Gel pens or fine liners: If you like a thin, precise look, grab one of these. Metallic colors add a nice holiday touch.
- Ballpoint pens: These aren’t just for writing grocery lists! With a slow, steady hand, even a ballpoint can look festive.
I often let my kids use washable markers for their own versions. That way, if there’s a mess, nothing gets stained.
Pencil and Eraser: Hidden Superheroes
You may think pencils are for kids’ homework, but for calligraphy, they’re magic. Sketch your words lightly first. If your lines wobble, no big deal! Just erase and go again.
- Sketch your merry christmas in calligraphy outline
- Make adjustments until you like the spacing and flow
- Go over with pen once you’re happy
A white or soft eraser is best, so your paper doesn’t tear. Keep it gentle, and your work stays neat and tidy.
Ruler: Keeping Things Straight
If you’re like me, your writing wants to dance across the page in every direction. A small ruler helps keep those holiday greetings on track.
- Lightly draw guide lines
- Space your words evenly
- Keep the baseline nice and straight
You’ll be amazed how much more professional your merry christmas in calligraphy looks with just a little planning.
Extras That Make Things Fun
These are totally optional, but I find they add a sprinkle of holiday magic and delight, especially when the kids jump in.
- Stickers and stamps: Fun for adding extra sparkle.
- Colored pencils: Shade in big letters or doodle holly leaves and berries.
- Glitter glue: Careful with little hands, but wow does it sparkle.
- Washi tape: Borders, backgrounds, and easy fixes for wonky edges.
- Tape and glue sticks: For adding your finished piece to gift bags, boxes or the mantle.
Let your kids reach for their favorite accents. It’s so fun to see what they come up with, and it makes the whole project feel a little extra merry.
The Must-Have Starter List
Here’s the short and sweet shopping list I wish I had from the start. Every item is beginner-approved, budget-friendly, and easy to find at the store or online.
- Smooth printer paper or blank greeting cards
- Felt-tip markers or brush pens (grab your kids’ washable markers, too)
- Pencils and a good eraser
- A small ruler
- Extras like stickers, colored pencils, or washi tape
Even with just the basics, you can create beautiful merry christmas in calligraphy pieces to share with everyone you love this season. Keeping it simple and fun is what matters most. If you have eager little hands joining in, even better—the memories are worth every marker smudge!
Simple Steps to Write Merry Christmas in Calligraphy

Before you grab your pen and go for it, take a deep breath and know this part is supposed to be fun! Writing merry christmas in calligraphy is a chance to slow down and enjoy the process right along with your kids. I get nervous about making mistakes too, but I’ve learned some simple steps that make things so much easier and help keep those nerves in check. You don’t need to be an artist. Just follow these steps with me and your calligraphy will have that homemade charm everyone loves.
How to Sketch Out Your Lettering First
I always begin by lightly sketching out “merry christmas” in pencil. It’s kind of like a safety net! Even if the baby is yanking on my sleeve or snacks are flying across the table, I don’t have to worry about making a mistake with ink right away.
Here’s my personal trick for getting started, even when you haven’t had coffee yet:
- Make sure your paper is smooth and clean. Grab your favorite pencil and lightly write “merry christmas” in your normal handwriting first.
- Space your words. I leave a little extra space between each letter for calligraphy, since some strokes will get thicker.
- Try simple cursive letters. If you can write your name in cursive, you can do this! If you’re not sure about cursive, write each letter separately and connect them later.
- Don’t press too hard. Keep your pencil marks light and easy to erase.
- Adjust as you go. If something looks off, use your eraser. Nudge a letter up or down, or make it a little curvier.
Sometimes my boys ask if they can try this part too! Let your kids sketch their words on extra paper. It keeps their little hands busy while you work.
Tip: Place your word right in the middle of your card or gift tag, then step back and look at it. Happy with the size and layout? It’s time for the best part — bringing it to life with ink!
Adding Ink and Creating Thick and Thin Strokes
Here’s where the magic really pops. Calligraphy is all about those beautiful thick and thin lines that dance across the page. If it feels tricky, don’t worry! With just a felt-tip pen or marker, you can get a stunning look in minutes.
Here’s how I show my kids and friends to do it:
- Downstrokes are the lines you draw moving your pen down. Press harder for these, and your line will get thicker.
- Upstrokes go up the page. Use just the tip of your pen and barely press, so the line stays thin.
- Move slowly. There’s no rush!
- Outline first if you want. Some moms (including me on busy days) draw the outline with pen, then fill in the thicker downstrokes afterward.
- If you’re using a regular marker (not a brush pen), fake it! Draw the letter, then add a second line on the downstrokes and color it in.
Here’s a quick cheat sheet for beginners:
- Start each letter by tracing over your pencil sketch.
- On every part of a letter that moves down toward you, make the line thicker.
- Every stroke moving up stays light and thin.
- Don’t be shy about pausing after each letter to check your work!
I tell my boys it’s like drawing race tracks. The cars (your pen) zoom down the hill fast and strong (thick line), but creep up the hill slow and careful (thin line).
Biggest tip: Even if your lines wobble, no one will notice once you finish. The varied strokes give that classic calligraphy look that always impresses.
Fixing Mistakes and Making Your Calligraphy Look Festive
Okay, let’s be honest — nobody’s first run is perfect! My kids and I end up with smudges, shaky lines, and sometimes a rogue dot or squiggle. If something goes off the rails, this is where the holiday spirit really comes in. Instead of tossing your hard work, grab your extras and turn a mistake into a festive flourish!
Here’s what I do every single time a letter goes wonky:
- Add doodles! Little snowflakes on top of skinny letters hide bumps and add sparkle.
- Draw tiny holly leaves or berries beside “merry” or “christmas.” These can cover smears or fill empty spaces.
- Place a mini Christmas hat on the letter “M” or “C.” Even the wobbliest line looks cute with a red hat and white trim.
- Cover bigger mistakes with stickers or washi tape. I keep a pack of gold stars handy for “oops” moments.
- Turn shaky lines into shadows. Just add a thin extra line with a lighter marker on one side. Suddenly, you have depth!
This is also a great way for the kids to join in. I ask them to draw doodles over my smudges, and we end up with a card that’s even more playful.
Final thought for this step: Calligraphy doesn’t need to look fancy or stiff. The quirks and doodles show you made it yourself, and that’s what friends and family remember. Every year, my boys vote for their favorite fix-ups, and those always make our treasured holiday box.
So don’t sweat mistakes. With a few cheerful touches, every merry christmas in calligraphy can become the perfect keepsake!
Creative Ways to Use Your Merry Christmas Calligraphy
Once you’ve figured out how to write merry christmas in calligraphy, the fun really begins! There are so many cheerful ways to share and display your handwritten words around your home. Whether you want to surprise your kids, spoil the grandparents, or just add a little sparkle to the season, your efforts can shine in lots of creative places. I love how these simple projects brighten up our whole house and make everyone feel a bit more merry. If you’re wondering what else to do once you’ve finished your calligraphy practice, here are my favorite ideas!
Handmade Christmas Cards That Stand Out
Handmade Christmas cards are always a winner in our family. My kids love slipping them into envelopes, and even the youngest can help with stickers and stamps.
- Write “merry christmas” in calligraphy on the front of blank cards.
- Add color with watercolor, glitter, or even crayon scribbles from the kids.
- Try layering your calligraphy on colored paper and taping it to your card for a fun, 3D look.
If you want the card to feel even more personal, have your kids add their own special drawings. Grandparents can’t get enough of anything touched by little hands!
Personalized Gift Tags and Labels
Forget store-bought tags. Homemade tags with calligraphy instantly make a gift feel more special.
- Cut cardstock into shapes (stars, trees, or traditional rectangles work well).
- Write “merry christmas” in the center, then punch a hole for ribbon or twine.
- Add playful doodles, or let the kids draw tiny trees or snowmen.
We love attaching these to every present under the tree. Even a simple bag of holiday cookies feels extra fancy this way!
Festive Wall Art or Banners
If you want a quick way to decorate and fill up empty wall space, banners or wall signs are a fantastic option.
- Create a big, bold version of your merry christmas in calligraphy on thick paper.
- Tape it up on the mantle or hang across the windows with mini clothespins and string.
- Make a banner by spacing out each letter or word on a triangle of paper, then stringing them together.
With bright markers or metallic pens, you can make any room feel instantly more cheerful and inviting.
DIY Ornaments for the Tree
Turn your calligraphy into a keepsake ornament. This is a big hit with my kids, and we look forward to making a new one every year!
- Cut circles or shapes from sturdy paper or leftover cardboard.
- Write “merry christmas” in calligraphy, then let your children add color, glitter, or stickers.
- Punch a hole and loop ribbon through to hang on the tree.
Watching the kids search for their handmade ornament every year is always a highlight for me.
Place Cards for Christmas Meals
If you’re hosting Christmas lunch or dinner, place cards in calligraphy add a sweet, classic touch.
- Fold pieces of cardstock and write your guests’ names below a festive “merry christmas” greeting.
- Tuck a small stem of pine or a cinnamon stick underneath for extra holiday charm.
Even the simplest meal feels more special when everyone sees their name beautifully written!
Special Lunch Notes and Surprises
During the school week, I love sticking a merry christmas in calligraphy note into my boys’ lunchboxes. It’s a tiny boost of holiday cheer in the middle of a busy day.
- Write a quick calligraphy message on a small note or napkin.
- Add a silly doodle or inside joke just for your child.
The smiles (and sometimes eye-rolls) I get are so worth the effort.
Framed Keepsakes and Memory Boxes
Turn your favorite piece of merry christmas in calligraphy into something you can treasure for years.
- Place your calligraphy behind glass in a holiday-themed frame.
- Add a date and your kids’ signatures on the back.
- Save each year’s version in a memory box—seeing their handwriting grow is so sweet.
This is perfect if you want to build a holiday tradition that lasts.
Holiday Table Decor

Add cheer to every meal with simple calligraphy decorations:
- Create mini signs for buffet dishes (“Peppermint Brownies” or “Santa’s Cocoa”) using your calligraphy.
- Place small handwritten “merry christmas” notes at each setting.
- Use folded calligraphy cards as little menu cards or blessings at the table.
It’s a quick way to turn an ordinary meal into a holiday moment.
Reusable Chalkboards and Signs
If you have a chalkboard or a small wooden sign, try writing merry christmas in calligraphy with chalk markers. You can change up the style each week, and kids love trying their own versions.
- Hang a chalkboard on the door with your new greeting.
- Write a countdown to Christmas right below your message.
It becomes a fun, creative spot the whole family looks forward to seeing every morning.
Digital Use: Scan and Print Your Work
Sometimes, once I finish a calligraphy piece, I like to scan or snap a clear photo of it. You can use that digital version for:
- Custom holiday email signatures.
- Printed stickers for wrapping paper or gifts.
- Creating matching sets of cards or invitations for a whole classroom or extended family.
This trick saves time and lets your hard work go even further!
All these ideas started with that first “merry christmas” written in calligraphy at my kitchen table. You don’t need fancy supplies or lots of time. Every bit of effort, no matter how small, adds magic to your season and memories the whole family will love.
Encouragement for Moms: Progress Over Perfection

Learning how to write merry christmas in calligraphy as a mom (especially with a full house and sticky fingers all around) means giving yourself a big scoop of encouragement. I know the pressure to make things look picture-perfect, but the truth is, every smudge or wobbly line tells a story. This isn’t about flawless art, it’s about creating something special with your own hands. Our kids see us showing up, trying something new, and having fun — and that sticks with them much longer than a perfect “M” or “C.”
Why Progress is More Meaningful Than Perfection
I used to get so hung up if my attempt didn’t look like what I’d seen online. Comparing my first tries to fancy Pinterest posts just zapped all my excitement. But here’s what I realized: the charm of merry christmas in calligraphy comes right from your messy, in-the-moment life.
Every time I pick up a pen when the kitchen is a mess or my boys are giggling in the background, I’m teaching them it’s okay to learn in the middle of chaos. We celebrate progress together, even if it means our “Merry Christmas” looks a little different each time.
- Kids don’t care if it’s perfect, they remember the fun of doing it together.
- Each card ends up with its own style.
- The process (and the laughter) is the most memorable thing.
Letting Go of Perfection and Loving the Process

Letting myself be okay with squiggly lines and bumpy letters changed everything. It let me enjoy the moment, and it made my kids less worried about making mistakes, too. We all get a little better every year, but honestly, the homemade charm never leaves.
If your calligraphy looks shaky or the colors end up all mixed, I can promise you: nobody else sees the “mistakes.” They just see the love and effort you put in.
- Have fun with the doodles and decorations, even if your pen slips.
- Don’t erase every flaw; let them become part of the story.
- Sometimes our little ones come up with silly new styles that I never would have tried.
Setting a Realistic Mindset for Busy Moms
I remind myself (a lot) that Pinterest-perfect isn’t our goal. For me, progress looks like sitting down at the table, even for five quiet minutes between laundry loads or snack breaks. It’s about finding a bit of calm and letting my boys see it’s okay not to have all the answers when trying something creative.
If I can finish a card or even a few letters, that’s a good day. Sometimes I tape a half-finished card on the fridge as a reminder that effort beats perfection every time.
Some quick wins for busy moms:
- Celebrate each small step: Maybe you trace a single word or just sketch a draft.
- Save every version, even if it’s not your favorite.
- Let your kids see you learning. It boosts their confidence to try new things, too!
The Joy of Making Memories Together
Honestly, the best part of merry christmas in calligraphy isn’t the end product. It’s the giggles over crooked letters, the markers swapped back and forth, and the kitchen table a happy, creative mess. My boys love seeing their progress, and so do I.
Years from now, we’ll pull out these cards and remember the mini disasters as well as the moments that went just right. When perfection isn’t possible (or even practical), memories are what we’re really making together.
So if you’re worried your calligraphy isn’t “good enough,” breathe easy, mama! Your genuine effort, and the messy, colorful memories, are what really matter. Every card, every attempt, is a step further along this fun holiday tradition. Progress over perfection, always!

Conclusion
Writing merry christmas in calligraphy as a busy mom isn’t just about creating something pretty. It’s about making space for small, joyful moments and showing our kids that handmade touches matter. Every smudge and giggle adds heart to your holiday traditions. These simple projects can turn into keepsakes that bring everyone together, year after year.
If you’re holding back because you want every letter to look perfect, let that go! What counts are the memories made at the kitchen table or on the living room floor surrounded by paper and markers. Keep experimenting, keep laughing, and don’t be afraid to make your own style. The best holiday magic comes from trying new things, even during the chaos.
Thank you for spending some time reading with me! Wishing you and your family a holiday season filled with creativity, warmth, and beautiful messes. Share your calligraphy tries with the people you love and watch new traditions take root. You’ve got this, mama!